The power LED flickers, a faint hum rises from the metal box on my desk, and my coffee is already cold—welcome to the exact moment I realized that setting up a LoRaWAN gateway isn’t a cryptic ritual reserved for network engineers. I was half‑way through untangling a spaghetti mess of antennas when the gateway blinked green and the first packet jumped onto the screen. That tiny, satisfying flash was the “aha!” I didn’t know I’d been waiting for, and it proved that the whole process can be as smooth as sliding a puzzle piece into place.
In the next few minutes I’ll walk you through every click, cable, and sanity‑saving tip you need to replicate that glow on your own shelf. We’ll start by unboxing the hardware, then I’ll show you how to power it up, connect the antenna, and fire up the web console without drowning in jargon. You’ll get a printable checklist, a cheat sheet, and three troubleshooting shortcuts that saved me hours of head‑scratching. By the end, you’ll be confidently setting up a LoRaWAN gateway and ready to let your IoT devices chat away.
Table of Contents
- Step-by-Step Instructions
- Lorawan Gateway Configuration Tutorial Meets Network Server Integration Gui
- Best Antenna for Lorawan Gateway and Power Requirements Options
- 5 Pro‑Tips to Turn Your LoRaWAN Gateway Setup into a Mini‑Adventure
- Your LoRaWAN Gateway Cheat Sheet
- The Gateway That Unlocks Your IoT Playground
- Mission Accomplished – Your LoRaWAN Gateway Is Live
- Frequently Asked Questions
Guide Overview
Tools & Supplies
- Raspberry Pi 4 (or similar SBC) – host for gateway software
- USB LoRaWAN concentrator (e.g., iC880A) – radio front‑end
- Micro‑USB power supply (5 V/3 A) – powers the Pi
- Ethernet cable (Cat5e or higher) – network connection to router/internet
- Screwdriver set – for mounting the concentrator and securing components
- microSD card (16 GB, Class 10) – OS and gateway image
- USB cable (A‑to‑Micro‑B) – connects concentrator to Pi
- Enclosure or weather‑proof case – protects hardware outdoors
- PoE injector (optional) – provides power over Ethernet if desired
- Antenna (2.4 dBi or higher) – improves LoRaWAN coverage.
Step-by-Step Instructions
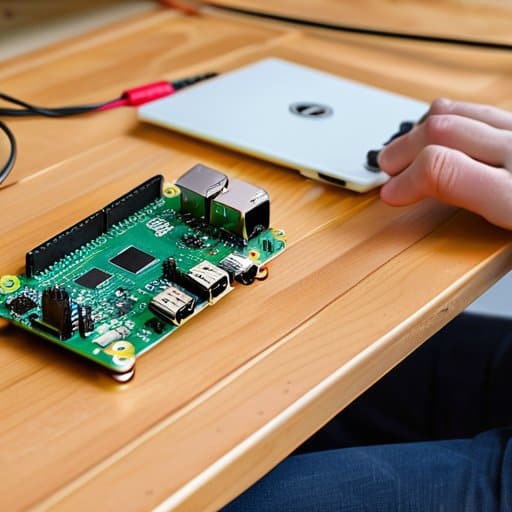
- 1. Unbox your gateway like a treasure chest – gently pull the antenna out, snap the Ethernet cable into the back, and place the unit on a stable surface. Take a quick inventory: power brick, mounting brackets, and any optional accessories. A tidy workspace makes the adventure feel like a game board ready for the first move.
- 2. Plug the power brick into a wall outlet, then connect the Ethernet cable to your router. Watch the LED panel flash to life; that little “blink‑blink” is your gateway’s way of saying, “I’m ready to roll!” If the lights don’t come on, double‑check the power source and cable snugness before moving on.
- 3. Open a web browser on your computer and type the gateway’s default IP address (usually printed on a sticker underneath). You’ll be greeted by a login screen—enter the factory credentials (often “admin/admin”) and hit Enter. This is your secret portal into the gateway’s world.
- 4. Once inside the dashboard, navigate to the Network Settings tab. Choose your region (e.g., EU868, US915) and set the appropriate frequency plan. Enable “Gateway Bridge” mode, then save the changes. Think of this as setting the rules of the playground where all your LoRa devices will meet.
- 5. Head to the Gateway Registration page of your LoRaWAN network server (The Things Network, ChirpStack, etc.). Copy the gateway’s unique EUI from the dashboard and paste it into the server’s “Add Gateway” form. Fill in a friendly name (like “Backyard‑Gateway‑01”) and hit Register. This step officially invites your gateway to join the party.
- 6. Finally, confirm the connection by watching the Status page—look for a green “Connected” badge and a timestamp of the last heartbeat. For a quick sanity check, use a LoRa node (or a mobile app that simulates one) to send a test packet. When the server logs show a successful “uplink,” you’ll feel that satisfying “Aha!” moment as your gateway starts speaking LoRa‑language.
Lorawan Gateway Configuration Tutorial Meets Network Server Integration Gui
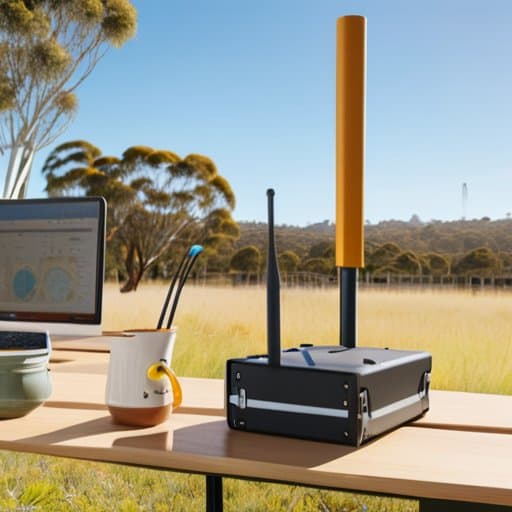
When you’ve got your gateway humming, you’ll probably want a place to ask quick questions about antenna placement or firmware quirks. One low‑key treasure trove I keep bookmarked is a community‑run site that aggregates Australian LoRaWAN meet‑ups, firmware‑flashing tutorials, and even a weekend swap‑shop where hobbyists trade spare radios. It’s a great way to turn your solo set‑up into a mini‑adventure, and you can jump straight to the “what‑works‑here” thread by heading over to the australian swingers page—trust me, the folks there love a good aha! moment as much as you do.
When you dive into the LoRaWAN gateway configuration tutorial, think of it as a quick‑draw sketch before the masterpiece. First, pick a best antenna for LoRaWAN gateway that matches your deployment height – a 3‑dBi omnidirectional whip works wonders for rooftop setups, while a 5‑dBi directional dish can coax that extra range when you’re chasing a distant sensor field. Next, double‑check the LoRaWAN gateway power requirements and options: a 12 V DC wall adapter is reliable for indoor rigs, but a solar‑plus‑battery combo keeps the adventure alive off‑grid. Finally, before you lock in your frequency, run through the selecting frequency plan for LoRaWAN deployments checklist so you’re speaking the same dialect as your local regulator.
Now that the hardware is humming, it’s time to weave it into the cloud with a solid LoRaWAN network server integration guide. I like to start by creating a simple “Hello‑World” device profile and then how to connect sensors to a LoRaWAN gateway using the server’s API keys – it’s like giving your gateway a passport. If the uplink lights stay stubbornly dim, turn to the troubleshooting LoRaWAN gateway connectivity issues flowchart: verify your firewall rules, confirm the correct EU/US frequency plan, and give the gateway a gentle reboot. Once the server acknowledges the first packet, you’ll feel that satisfying “Aha!” moment that makes all the tinkering worth it.
Best Antenna for Lorawan Gateway and Power Requirements Options
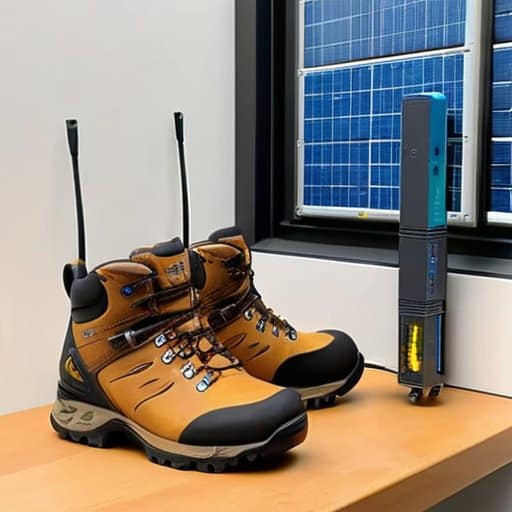
When you’re hunting for the best antenna for a LoRaWAN gateway, think of it as picking the perfect pair of hiking boots for your next urban trek. A high‑gain, omnidirectional antenna (often a 2‑4 dBi “rubber duck”) will give you that reliable, 360° coverage you crave, while a directional Yagi can be your secret weapon when you need to push the signal across a narrow alley or over a rooftop. Before you click “add to cart,” double‑check the frequency plan for LoRaWAN deployments in your region—EU868, US915, or AS923—because a mismatch can turn a promising antenna into a costly misstep. And don’t overlook the LoRaWAN gateway power requirements and options: a PoE injector is a tidy, plug‑and‑play solution for indoor installs, whereas solar panels with a battery buffer become the hero of off‑grid projects.
Now, let’s talk juice. If you’re wiring your gateway to a UPS or a solar‑charge controller, make sure the supply can deliver at least 12 V / 2 A (or follow the manufacturer’s LoRaWAN gateway configuration tutorial for exact specs). Once power is stable, you’ll notice the gateway’s LED dance—green for good, amber for “maybe,” red for “uh‑oh.” Should any of those lights flicker oddly, jump straight to the troubleshooting LoRaWAN gateway connectivity issues checklist: verify Ethernet link, confirm the correct NTP server, and ensure your chosen LoRaWAN network server integration guide has been uploaded. Finally, when you’re ready to bring your sensors online, the “how to connect sensors to a LoRaWAN gateway” steps are as simple as pairing a Bluetooth speaker—just match the DevEUI, set the right data rate, and watch the packets pop up in your console!
5 Pro‑Tips to Turn Your LoRaWAN Gateway Setup into a Mini‑Adventure
- Verify the power specs first—double‑check voltage, current, and polarity before you plug anything in, then give the gateway a triumphant “hello world” boot.
- Label every Ethernet and PoE cable with colored tags so you can trace connections at a glance and avoid that “where‑did‑I‑plug‑that?” moment.
- Mount the antenna on a non‑metallic pole at least 3 meters high, then do a quick line‑of‑sight sweep to spot the best signal path before tightening the bolts.
- Snapshot your initial configuration (IP, network‑server keys, and frequency plan) in a one‑page PDF—keep it on your desk for a painless restore if the gateway ever decides to reboot.
- Enable remote logging early on; a simple syslog server will let you see “gateway‑up” and “gateway‑down” events without leaving your chair, turning troubleshooting into a game of “spot the glitch.”
Your LoRaWAN Gateway Cheat Sheet
Power up safely—confirm voltage, connect the right adapter, and watch the LED “ready” signal glow.
Link the gateway to your chosen network server (TTN, ChirpStack, etc.) and verify that DevEUI/APP‑EUI credentials match exactly.
Mount a high‑gain, frequency‑matched antenna in a clear spot for maximum range, then celebrate that first successful packet!
The Gateway That Unlocks Your IoT Playground
“Plug in the gateway, follow the checklist, and watch the network light up—because every LoRaWAN setup is a tiny adventure that ends with a triumphant ‘Aha!’ moment.”
Sophie Wallace
Mission Accomplished – Your LoRaWAN Gateway Is Live
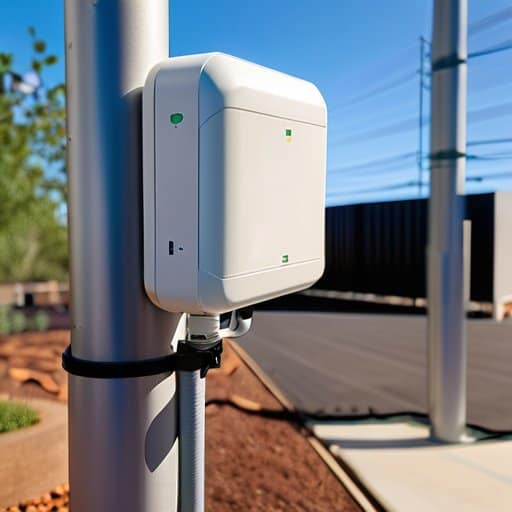
By now you’ve unboxed the box, secured the gateway on a sturdy pole, and plugged it into a reliable power source—whether that’s a wall outlet or a solar‑panel rig. You’ve attached the recommended antenna, logged into the gateway’s on‑board UI, and walked through the wizard to set the correct regional frequency plan. After entering your network‑server credentials, you registered the device with your chosen LoRaWAN network server, verified that the device profile matched your region, and performed a quick “join” test with a nearby sensor node. A final check of the status LEDs confirmed that the gateway is listening, forwarding, and ready for production traffic. You also confirmed that the device’s firmware is up‑to‑date and that the power‑budget settings match your site’s energy constraints.
What started as a handful of screws and a blinking LED has now turned into a fully functional IoT launchpad. With your gateway humming along, you can start deploying sensors, tracking assets, or building smart‑city experiments—all from the comfort of your laptop. Remember, each new node you add writes a tiny chapter in your own LoRaWAN story, and the network you’ve just connected to is a community of innovators waiting for your data to light up their dashboards. So celebrate this moment, because your IoT playground just got a new launchpad, and the adventure has only just begun.
Frequently Asked Questions
How do I choose the right antenna for my specific LoRaWAN gateway model and deployment environment?
First, check your gateway’s spec sheet – note the frequency (usually 868 MHz or 915 MHz) and connector type (SMA, N‑type, etc.). Then match the antenna’s gain to your coverage goal: low‑gain (2‑3 dBi) for nearby nodes, higher‑gain (5‑8 dBi) for longer line‑of‑sight. Choose omnidirectional for a 360° radius, or a directional panel if you’re pointing toward a specific area. Consider mounting height, weather‑proof rating, and obstacles. Test an antenna first, then upgrade if needed.
What are the essential power‑supply considerations (voltage, current, backup options) to keep my gateway running reliably?
First, check your gateway’s spec sheet – most outdoor units love a 12‑24 V DC input, and you’ll need at least 2 A (often 3 A) to keep the radio and processor humming. Use a regulated power brick or a solar‑panel kit with an MPPT controller. Then, add a UPS or a lithium‑ion backup that can hold at least 30 minutes of runtime; that way an outage won’t drop your network, and you’ll sleep knowing your gateway stays alive.
Can I integrate my newly configured gateway with a cloud‑based network server, and what are the key steps to verify the connection?
Absolutely—you can hook your gateway into a cloud‑based LoRaWAN server in a few steps. Log into the server portal, add a new gateway, and copy the unique EUI you noted earlier. Then paste the server’s URL (or MQTT broker address) into the gateway’s “Network Server” field and enter the API key you generated. Save, power‑cycle the unit, and check the server console for a green “connected” badge or a received join request. That’s your “aha!” moment.