I still remember the first time I attempted to make a lattice pie top – it was a disaster. I had envisioned a beautifully woven crust, but what I got was a messy, uneven disaster. The problem was, I had fallen victim to the common myth that making a lattice pie top is incredibly difficult and requires a lot of experience. But, as I learned through trial and error, the truth is that with the right guidance and a bit of patience, anyone can master a guide to making a lattice pie top. It’s all about understanding the simple techniques and tips that make all the difference.
In this article, I’ll share my honest, no-hype advice on how to create a stunning lattice pie top. You’ll learn the essential steps to prepare your dough, the best way to weave your lattice, and the secrets to achieving a perfectly golden crust. My goal is to empower you with the knowledge and confidence to take your pie-making skills to the next level, and to make the process enjoyable and stress-free. By the end of this guide, you’ll be equipped with the skills to create a beautiful lattice pie top that’s sure to impress your friends and family.
Table of Contents
- Guide Overview: What You'll Need
- Step-by-Step Instructions
- A Guide to Making a Lattice Pie Top
- Weaving Wisdom: 5 Essential Tips for a Stunning Lattice Pie Top
- Lattice Pie Top Essentials to Remember
- The Art of Lattice Pie Making
- The Perfect Lattice: A Journey to Flaky, Buttery Bliss
- Frequently Asked Questions
Guide Overview: What You'll Need
Total Time: 1 hour 15 minutes
Estimated Cost: $10 – $20
Difficulty Level: Intermediate
Tools Required
- Pastry Brush (for egg wash)
- Rolling Pin (for rolling out dough)
- Pizza Cutter or Sharp Knife (for cutting lattice strips)
- Ruler or Straight Edge (for measuring and cutting strips)
- Parchment Paper (for rolling out dough)
Supplies & Materials
- Pie Dough (homemade or store-bought)
- Filling of Choice (e.g., fruit, pudding, or cream)
- Egg (for egg wash)
- Water (for egg wash)
- Confectioners Sugar (optional for dusting)
Step-by-Step Instructions
- 1. First, let’s start by preparing our pie dough. I like to think of this step as the foundation of our lattice pie top, where precision is key. Take your chilled pie dough and divide it into two equal parts. Roll out each part into a thin sheet, about 1/8 inch thick, and use a pastry cutter or a knife to create long, thin strips for your lattice top.
- 2. Now it’s time to prepare our filling. While this might seem like a detour from our lattice top journey, trust me, it’s essential to have your filling ready before you start weaving. I find that a well-made filling can make all the difference in the overall flavor and texture of our pie. So, go ahead and prepare your favorite filling, whether it’s a classic apple or a more adventurous combination, and set it aside in the refrigerator to chill.
- 3. With our dough strips and filling at the ready, it’s time to start building our lattice top. Begin by placing one of the rolled-out pie dough sheets into a 9-inch pie dish, trimming any excess dough from the edges. Fill the pie crust with your prepared filling, leaving about an inch of space around the edges. This is where the magic happens, as we start to see our pie take shape.
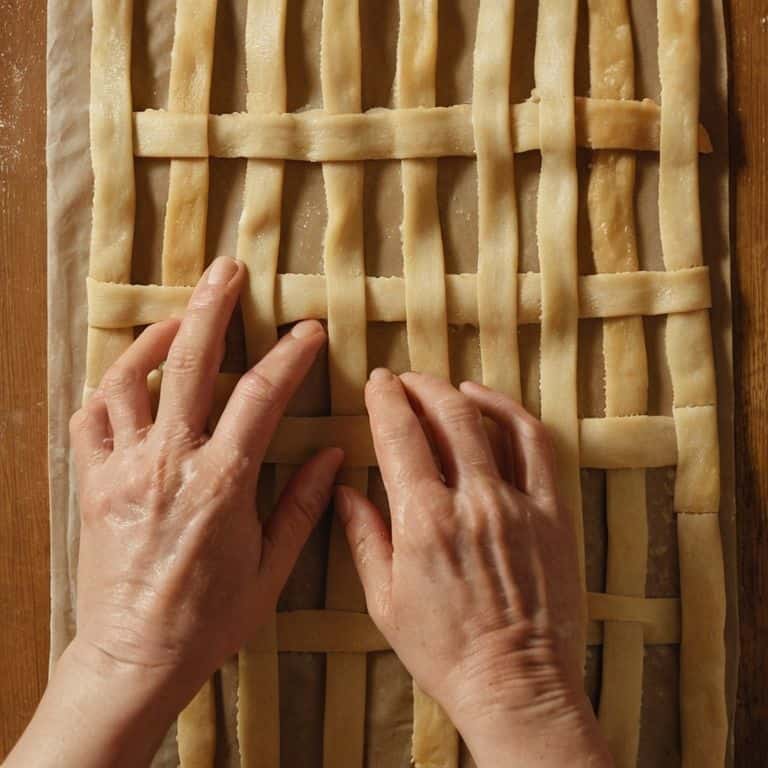
- 4. To start weaving our lattice top, place 5-6 of the dough strips on top of the filling, leaving about 1 inch of space between each strip. You can use a little bit of water to help the strips stick together if needed. Now, take another strip and weave it over and under the strips you’ve already placed, creating a crisscross pattern. Continue this process, alternating the over and under pattern, until your lattice top is complete.
- 5. As you weave, make sure to gently press the edges of the strips to seal them, using a little bit of water if necessary. This will help prevent the filling from escaping during baking. Don’t worry if your lattice top isn’t perfect – the imperfections are what make it charming. Once you’ve completed the lattice top, use a knife or kitchen shears to trim any excess dough from the edges.
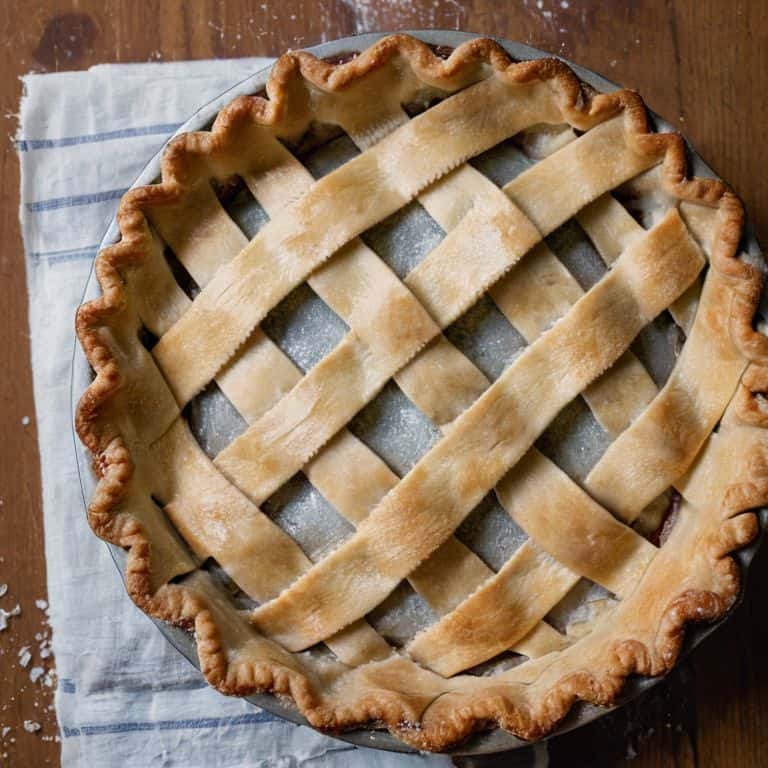
- 6. To add an extra touch of elegance to our lattice pie, let’s create a decorative border. Use any remaining dough strips to create a braid or a simple border around the edges of the pie. You can also use a fork to create a decorative edge, pressing the tines gently into the dough to create a pattern. This is where you can let your creativity shine, so don’t be afraid to experiment.
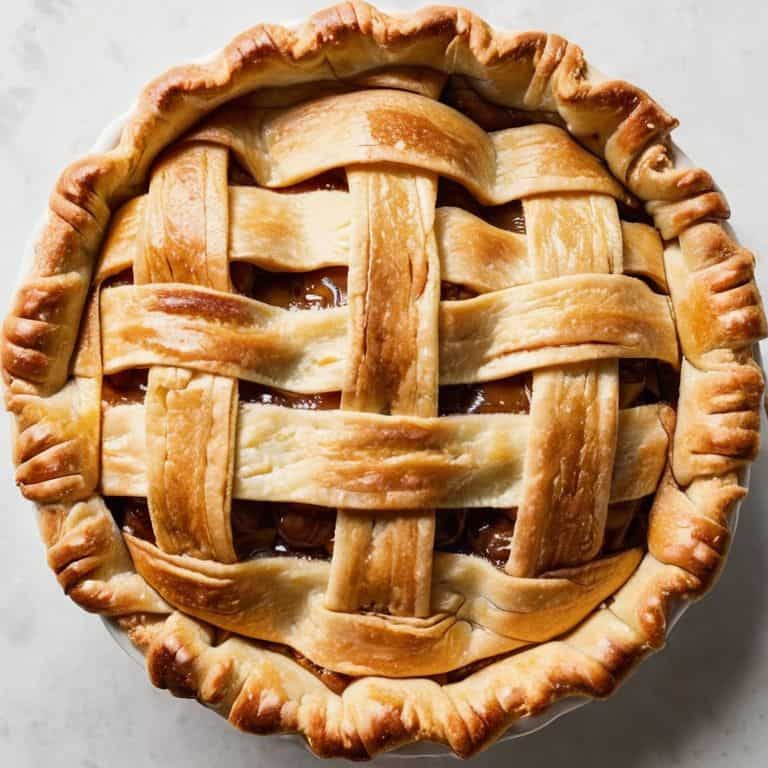
- 7. Finally, it’s time to bake our beautiful lattice pie. Preheat your oven to 375°F (190°C), and place the pie on a baking sheet lined with parchment paper. Brush the lattice top with a little bit of egg wash or milk to give it a golden brown finish. Bake the pie for 40-50 minutes, or until the crust is golden brown and the filling is bubbly. Remove the pie from the oven and let it cool on a wire rack for at least 30 minutes before serving. And that’s it – your lattice pie top is now complete, and it’s sure to be the star of the show at any gathering.
A Guide to Making a Lattice Pie Top
As you master the art of creating a lattice pie top, remember that flaky pastry techniques are key to achieving a beautiful, tender crust. To ensure your pastry is flaky, keep your butter and water cold, and handle the dough gently to avoid developing the gluten. This will result in a crust that is not only delicious but also visually appealing, with a delicate layered texture that adds to the overall aesthetic of your pie.
When it comes to pie crust design ideas, the lattice top is a classic choice that never goes out of style. Not only is it visually stunning, but it also allows for a beautiful balance of crust and filling in each bite. To take your lattice top to the next level, try experimenting with different baking lattice top pies techniques, such as brushing the crust with a little extra butter or egg wash to give it a golden glow.
By following these tips and practicing your easy pie weaving methods, you’ll be well on your way to creating stunning lattice-topped pies that are sure to impress. Remember to have fun and be patient with yourself as you develop your skills – with a little practice, you’ll be a pro at creating beautiful, homemade pie crust recipes in no time.
Easy Pie Weaving With Homemade Crust
Now that we’ve covered the fundamentals of creating a lattice pie top, let’s dive into the fun part – weaving it together with a homemade crust. I just love how a lattice top adds a touch of elegance to any pie, and with a little practice, you’ll be a pro in no time. To start, roll out your chilled dough to a thickness of about 1/8 inch, then use a pastry cutter or a knife to cut strips for your lattice.
As you begin to weave your lattice, remember to keep your strips evenly spaced and gently press them onto the filling to secure. Don’t worry if it gets a bit messy – that’s all part of the charm. With each strip, you’ll see your lattice come to life, and before you know it, you’ll have a beautifully woven top that’s sure to impress.
Unlocking Flaky Pastry Techniques
To achieve that perfect, flaky lattice top, it’s essential to master the art of handling pastry dough. I’ve found that keeping my ingredients cold, especially the butter, makes all the difference. When mixing, I aim for a coarse, pea-like texture – this ensures the dough doesn’t become too uniform, allowing for a beautiful, layered effect during baking.
By maintaining a gentle touch and avoiding overworking the dough, you’ll be rewarded with a lattice top that’s both delicate and robust. Remember, the key to flaky pastry lies in preserving those delicate layers of butter and dough, so be patient and take your time – it’s worth the extra effort!
Weaving Wisdom: 5 Essential Tips for a Stunning Lattice Pie Top
- Begin with a gentle touch: Handle your pie dough with care to prevent over-working, which can lead to a tough, dense crust that’s hard to weave
- Keep it cool: Chill your dough in the refrigerator for at least 30 minutes before rolling it out, as this will help the gluten relax and make the dough more pliable
- Measure up: Use a ruler or measuring tape to ensure your lattice strips are evenly sized, which will result in a beautifully uniform pattern on top of your pie
- Don’t over-twist: Gently twist your lattice strips to create a delicate, layered effect – over-twisting can cause the dough to tear or become misshapen
- Brush with love: Use a little bit of egg wash or melted butter to brush your lattice top, adding a golden glaze and helping the pastry to brown beautifully in the oven
Lattice Pie Top Essentials to Remember
Mastering the art of lattice pie tops begins with a well-made homemade crust, where the key to flaky layers lies in keeping your ingredients cold and handling the dough gently
A successful lattice pattern is not just about aesthetics; it’s also about ensuring even baking, which can be achieved by maintaining a consistent weave and not overlapping the strips too much
With practice, patience, and the right techniques, such as using the right amount of filling and not overworking the dough, you’ll be able to create a stunning lattice pie top that’s both visually appealing and deliciously flaky
The Art of Lattice Pie Making
Weaving a lattice pie top is not just about creating a beautiful crust, it’s about telling a story of love, patience, and the joy of baking – with every twist and turn, you’re crafting a culinary masterpiece that will be remembered long after the last slice is savored.
Julia Ashwood
The Perfect Lattice: A Journey to Flaky, Buttery Bliss
As we conclude our journey to creating the perfect lattice pie top, let’s recap the essential steps that have brought us to this point. We’ve covered the fundamentals of mise en place, ensuring that our ingredients are prepped and ready to go. We’ve also delved into the art of flaky pastry techniques, which are crucial for achieving that perfect, layered crust. By mastering these skills and combining them with our easy pie weaving method using homemade crust, you’ll be well on your way to creating stunning lattice tops that will elevate your baked goods to the next level.
Now, as you embark on your own lattice pie top adventures, remember that practice makes perfect, and it’s okay to make mistakes along the way. The true magic happens when you combine patience, persistence, and a willingness to learn, allowing you to unlock the secrets of lattice pie perfection. So, don’t be afraid to experiment, try new things, and most importantly, have fun with the process – and before you know it, you’ll be weaving like a pro and creating delicious, show-stopping desserts that will impress friends and family alike.
Frequently Asked Questions
How do I prevent my lattice strips from shrinking or becoming misshapen during the baking process?
To prevent lattice strips from shrinking or becoming misshapen, make sure to chill them thoroughly before baking, and use a light touch when placing them on the pie. Also, brush with a little egg wash to help them hold their shape – it’s a simple trick that makes all the difference in achieving a beautiful, even lattice top.
What's the best way to achieve a golden brown color on my lattice top without overcooking the filling?
To achieve that perfect golden brown on your lattice top, try brushing it with an egg wash before baking, and then bake the pie at 375°F for 25-30 minutes, or until the crust is golden. You can also use a pie shield to prevent overbrowning, and check on it every 10 minutes to ensure the filling isn’t overcooking.
Can I use a store-bought crust to make a lattice pie top, or is it better to make my own homemade crust?
While store-bought crusts can work, I highly recommend making your own for a lattice pie top – the extra flaky layers and tender texture are worth the effort, and it’s actually easier than you think to achieve that perfect weave.