I still remember the first time I tried to blind bake a pie crust – it was a disaster. The crust shrunk, it was soggy, and it looked nothing like the beautiful, flaky masterpiece I had envisioned. I soon discovered that I wasn’t alone in my struggles, and that many home bakers shared my frustration with this seemingly simple yet deceptively tricky technique. The truth is, how to blind bake a pie crust is often shrouded in mystery, with many recipes providing vague instructions that leave you wondering where you went wrong.
In this article, I’ll share my foolproof method for blind baking a pie crust, one that I’ve perfected over years of testing and experimentation. You’ll learn the science behind this essential baking technique, and I’ll walk you through each step of the process with clarity and precision. By the end of this guide, you’ll be equipped with the knowledge and confidence to produce a beautifully baked, flaky crust every time. Whether you’re a beginner or an experienced baker, my goal is to make the process of how to blind bake a pie crust accessible, enjoyable, and rewarding, so you can focus on creating delicious pies that impress and delight.
Table of Contents
Guide Overview: What You'll Need
Total Time: 45 minutes to 1 hour
Estimated Cost: $5 – $15
Difficulty Level: Easy
Tools Required
- Pastry Brush (for egg wash)
- Pie Dish (9 inches in diameter)
- Parchment Paper (large sheet)
- Oven (preheated to 375 degrees Fahrenheit)
Supplies & Materials
- Pie Crust Dough (homemade or store-bought)
- Egg (for egg wash)
- Water (for egg wash)
- Pie Weights or Dried Beans (for weighting the crust)
- Butter or Cooking Spray (for greasing the parchment paper)
Step-by-Step Instructions
- 1. First, let’s start with preparing the pie crust. To do this, you’ll want to roll out your chilled pie dough to a thickness of about 1/8 inch, making sure to keep it as evenly sized as possible to prevent any weak spots. I like to use a light dusting of flour on my countertop to prevent the dough from sticking.
- 2. Next, carefully transfer the rolled-out pie dough into your pie dish, gently pressing it into the corners and up the sides of the dish. Make sure to trim any excess dough from the edges, leaving about 1/2 inch of overhang to prevent the crust from shrinking too much during baking.
- 3. Now it’s time to chill the pie crust in the refrigerator for at least 30 minutes to allow the dough to firm up. This step is crucial in preventing the crust from becoming misshapen during the baking process.
- 4. While the pie crust is chilling, preheat your oven to 375°F (190°C). It’s essential to use parchment paper to line the pie crust, which will help prevent the filling (if using) from sticking to the crust. Cut a piece of parchment paper to fit the pie dish, leaving some overhang for easy removal.
- 5. Fill the pie crust with pie weights or dried beans, making sure to cover the entire surface. This will help the crust hold its shape while baking. If you don’t have pie weights, you can use dried beans or even rice as a substitute.
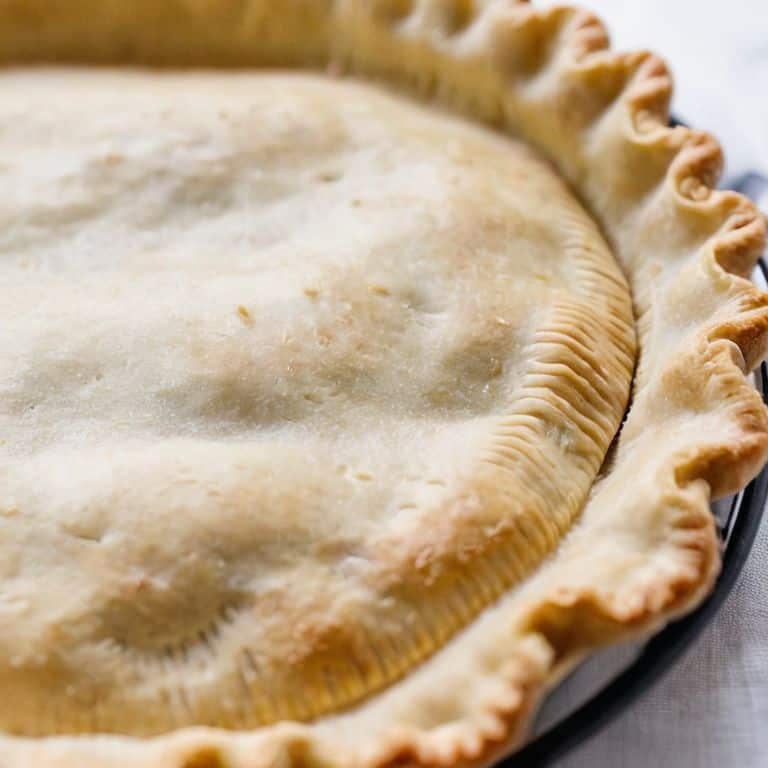
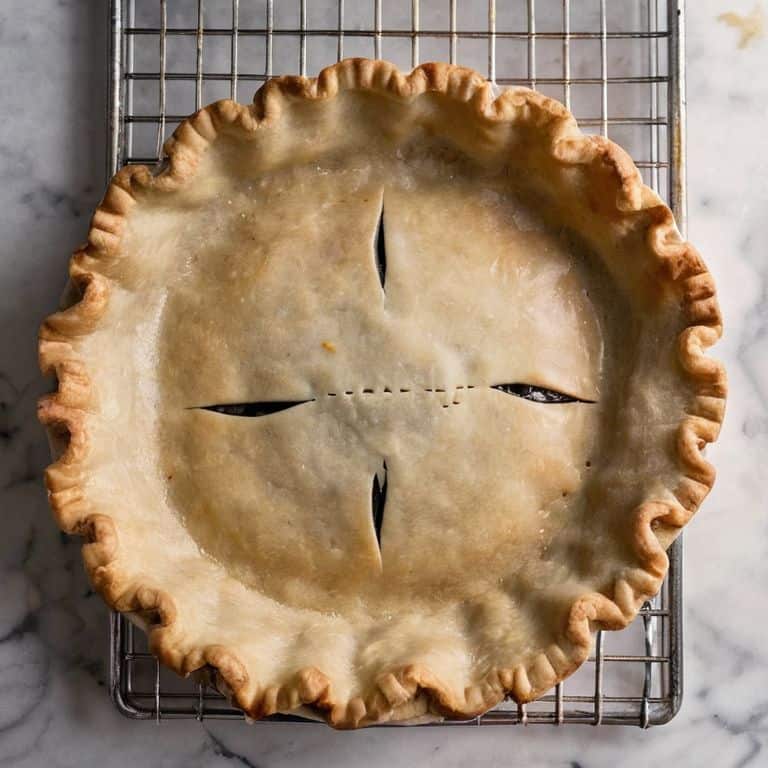
- 6. Place the pie crust in the preheated oven and bake for 15 minutes. After the initial 15 minutes, remove the parchment paper and pie weights or beans, and continue baking the crust for an additional 5-10 minutes, or until it’s lightly golden brown. Keep an eye on the crust to prevent overbrowning.
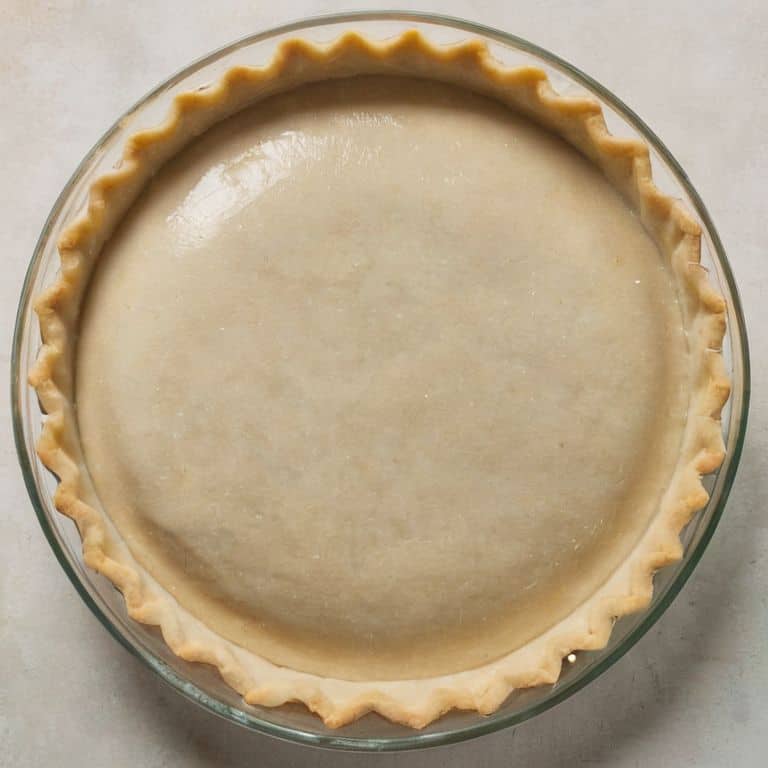
- 7. Once the pie crust is golden brown, remove it from the oven and let it cool completely on a wire rack. This is an important step, as you want the crust to be completely cooled before filling and serving. I like to let mine cool for at least 30 minutes to an hour before filling.
- 8. Finally, your blind-baked pie crust is now ready to be filled with your favorite filling. Whether you’re making a classic apple pie or a decadent chocolate cream pie, the key to a perfect pie is a well-baked crust. Take your time, and don’t be afraid to experiment with different fillings and toppings to create your signature pie.
Blind Baking Pie Crust
As we dive into the world of blind baking, it’s essential to understand the importance of preventing pie crust shrinkage. This can be achieved by ensuring your crust is chilled and firm before baking, and by using the right amount of pie weights or beans. I like to use ceramic pie weights, but dried beans work just as well. The key is to distribute the weight evenly, allowing the crust to hold its shape while it bakes.
When it comes to temperature, it’s crucial to follow a blind baking temperature guide to get the best results. I recommend baking your crust at 375°F (190°C) for a flaky and tender texture. It’s also important to keep an eye on your crust’s baking time, as overbaking can lead to a dry and crumbly texture. For pie crust recipes for beginners, I suggest starting with a simple recipe and gradually experimenting with different ingredients and flavors.
To achieve a flaky pie crust, it’s all about the layers. By using a combination of cold ingredients and gentle mixing, you can create a crust that’s both tender and flaky. Don’t be discouraged if it takes a few attempts to get it just right – with practice, you’ll be a pro at blind baking in no time. Refer to a pie crust baking time chart to ensure you’re baking your crust for the right amount of time, and don’t hesitate to experiment with different tips for flaky pie crust to find what works best for you.
Flaky Crust Temperature Guide
To achieve that perfect, flaky crust, temperature plays a crucial role. I’ve found that blind baking at 375°F (190°C) yields the best results. This temperature allows the crust to cook slowly and evenly, preventing it from shrinking or becoming too brown. It’s also important to note that you should preheat your oven for at least 15 minutes before baking to ensure it reaches a consistent temperature.
By maintaining this optimal temperature, you’ll be rewarded with a crust that’s both tender and crispy. I’ve tested various temperatures, and 375°F (190°C) is my tried-and-true favorite. Trust me, the extra attention to temperature will pay off in the end, giving you a beautifully baked pie crust that’s sure to impress.
Preventing Shrinkage Secrets
To prevent your beautifully crafted pie crust from shrinking during the blind baking process, it’s essential to understand the role of temperature and baking time. I’ve found that a consistent oven temperature is key, so make sure to invest in an oven thermometer to ensure accuracy. Additionally, keeping an eye on the baking time is crucial – I recommend checking on your crust at 15-minute intervals to prevent overcooking.
By following these simple tips, you’ll be able to achieve a perfectly baked crust that retains its shape and size. I also swear by the “dock and chill” method, where you gently dock the crust with a fork and chill it in the freezer for 10 minutes before baking. This helps to relax the dough, reducing the likelihood of shrinkage and resulting in a flawless, flaky crust.
My Top 5 Secrets to Blind Baking Perfection
- Choose the right pie crust: I only use homemade or high-quality store-bought crusts made with cold, European-style butter for the flakiest results
- Keep it cold: Make sure your crust is chilled before baking, and keep your filling ingredients refrigerated until the last minute to prevent butter from softening
- Don’t overwork the dough: Mix your crust ingredients just until they come together in a shaggy mass, then let the dough rest – this will help you avoid a tough, dense crust
- Use the right weights: I swear by ceramic pie weights or dried beans to prevent the crust from bubbling up during baking – they distribute heat evenly and won’t scratch your crust
- Bake low and slow: A lower oven temperature and longer baking time will help you achieve a beautifully golden, evenly cooked crust – trust me, it’s worth the extra 10 minutes!
Key Takeaways for Blind Baking Perfection
Always use a combination of parchment paper and pie weights or dry beans to prevent the crust from bubbling up and to ensure even cooking
Maintain a consistent oven temperature, and consider investing in an oven thermometer to guarantee accuracy, as fluctuating heat can lead to a less-than-flaky crust
Chill your pie crust for at least 30 minutes before blind baking to allow the gluten to relax, which will help prevent shrinkage and promote a beautiful, flaky texture
The Heart of Blind Baking
Blind baking is not just about preventing a crust from becoming soggy, it’s an art that requires patience, precision, and a deep understanding of how pastry responds to heat – with the right technique, you can unlock a world of flaky, golden perfection.
Julia Ashwood
Mastering the Art of Blind Baking
As we conclude our journey to the perfect blind baked pie crust, let’s recap the essential steps: preparing your crust with a flaky texture in mind, using the right temperature, and employing the secret to preventing shrinkage. By following these guidelines and understanding the science behind each step, you’ll be well on your way to creating pies that are not only delicious but also visually stunning. Remember, practice makes perfect, so don’t be discouraged if your first few attempts don’t yield the desired results. With time and patience, you’ll develop the skills needed to craft a flaky, fabulous crust that will impress even the most discerning palates.
Now that you’ve learned the art of blind baking, it’s time to unleash your creativity and experiment with different fillings and crust designs. Whether you’re a seasoned baker or a novice in the kitchen, the sense of accomplishment that comes from creating a beautiful, delicious pie is unparalleled. So, go ahead and get baking – with these skills, you’ll be elevating your baking game in no time, and the joy of sharing your creations with loved ones will be the greatest reward of all. Happy baking, and I look forward to seeing the masterpieces you create!
Frequently Asked Questions
What happens if I don't use pie weights or beans to hold down the crust during blind baking?
Without pie weights or beans, the crust can bubble up and become misshapen. To avoid this, you can try docking the crust with a fork or using a specialized pie crust shield. However, I swear by traditional pie weights or beans – they’re a foolproof way to keep your crust flat and even, ensuring a beautiful, professional-looking result.
Can I blind bake a pie crust ahead of time and store it for later use?
Absolutely, you can blind bake a pie crust ahead of time. I recommend baking and cooling it completely, then storing it in an airtight container at room temperature for up to 24 hours or freezing for up to 2 months. When you’re ready, simply thaw and fill – it’s a great time-saver for busy bakers like us!
How do I know if my pie crust is fully blind baked and ready for filling?
To determine if your pie crust is fully blind baked, check for a lightly golden color and a firm, set texture. Gently press on the crust – it should feel sturdy, not soft or squishy. If you’re unsure, bake for an additional 2-3 minutes and check again, remembering that overbaking can lead to a tough crust.