I still remember the first time I attempted to bake a homemade loaf – the excitement was palpable, but the result was a dense, soggy disaster. The quest for a perfect crust had begun, and I soon discovered that how to get a good crust on homemade bread wasn’t just about following a recipe, but understanding the science behind it. As I delved deeper, I found that many of us have been misled by the notion that a good crust requires a professional oven or a secret ingredient. The truth is, achieving that golden, crunchy crown is within reach, and it starts with a few simple, yet crucial steps.
In this article, I’ll share my hard-earned knowledge on how to get a good crust on homemade bread, gained from years of experimentation and testing. You’ll learn the importance of mise en place, the role of steam in creating a crispy crust, and the precise techniques to ensure your loaf turns out perfectly every time. My goal is to empower you with practical, no-nonsense advice, so you can confidently bake delicious homemade bread with a crust that’s nothing short of exceptional. By the end of this guide, you’ll be equipped with the skills to create a truly mouthwatering loaf, and the satisfaction of knowing you’ve mastered the art of bread baking.
Table of Contents
Guide Overview: What You'll Need

Total Time: 2 hours 30 minutes
Estimated Cost: $10 – $20
Difficulty Level: Intermediate
Tools Required
- Mixing Bowl (stainless steel or glass)
- Measuring Cups
- Dutch Oven (or a stone oven)
- Oven Thermometer
Supplies & Materials
- Bread Flour (high-protein flour recommended)
- Salt
- Sugar
- Active Dry Yeast
- Water
Step-by-Step Instructions
- 1. First, let’s start with the foundation of a great crust: creating the right environment. To achieve this, you’ll want to ensure your oven is preheated to the correct temperature, usually around 425°F (220°C) for a classic bread crust. I also recommend using a Dutch oven or a stone in your oven to enhance the crust’s development.
- 2. Next, we need to focus on the dough preparation. It’s essential to have a well-developed gluten structure for the dough to hold its shape and create a beautiful crust. To achieve this, make sure you’re mixing your dough ingredients thoroughly and allowing the dough enough time to rest and rise. A good rule of thumb is to let it rise for at least an hour, or until it has doubled in size.
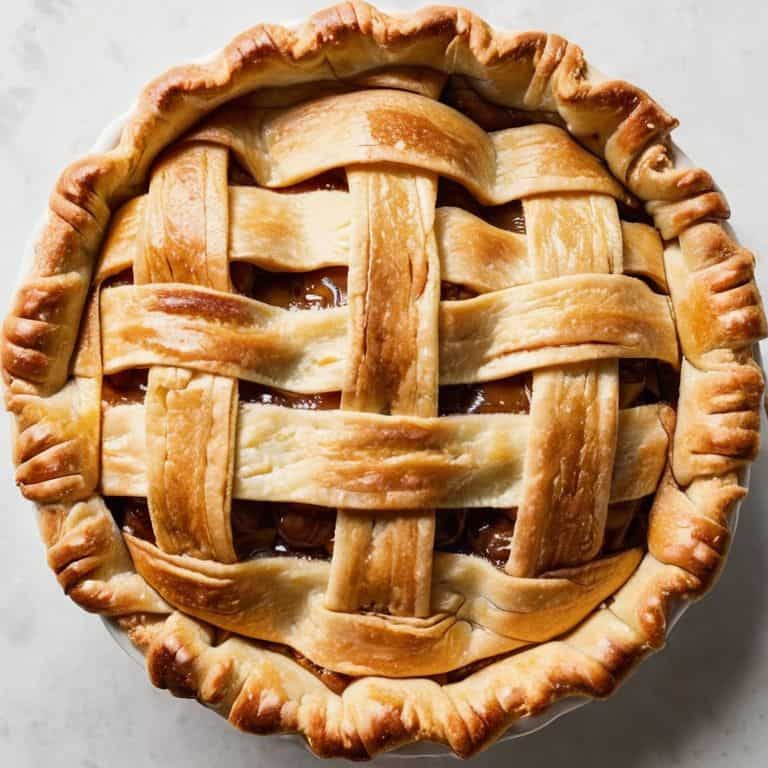
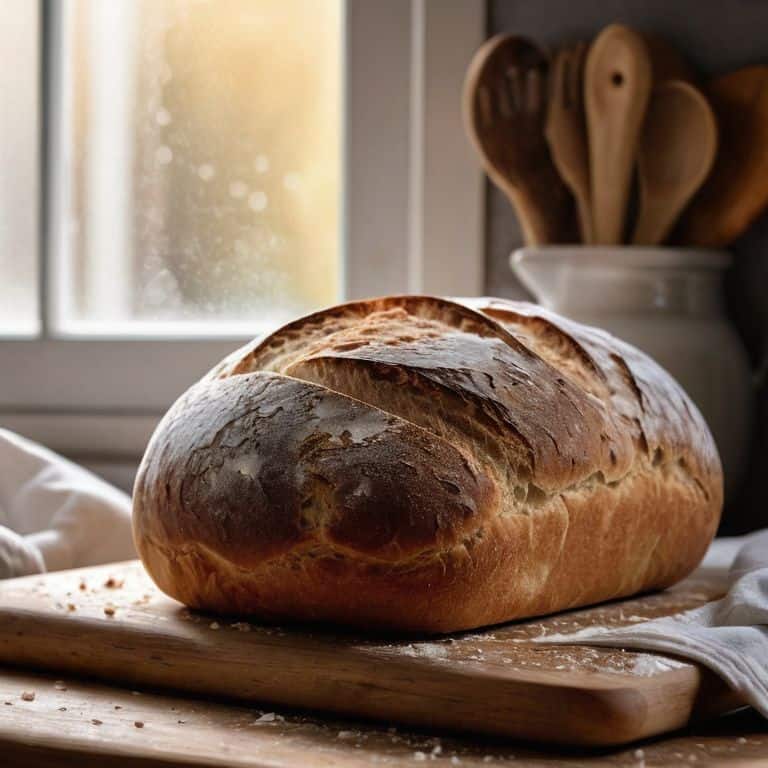
- 3. Now, let’s talk about scoring the bread. Scoring is the process of making shallow cuts on the surface of the bread before baking, which helps control the way the bread expands during baking and creates a more even crust. To score your bread, use a sharp razor or knife and make 2-3 diagonal cuts on the surface, about 1/4 inch deep.
- 4. After scoring, it’s time to prepare the oven for steam. Steam is crucial for creating a crispy crust, as it helps to cook the bread evenly and prevents it from drying out. To create steam, you can place a pan of water in the oven while it’s preheating, or use a steam injector if you have one. This step is often overlooked, but trust me, it makes a huge difference in the final result.
- 5. With your oven and dough ready, it’s time to load the bread. Gently place your scored bread into the preheated oven, either directly on the stone or in the Dutch oven. If using a Dutch oven, make sure to cover it with a lid to trap the steam and heat.
- 6. Now, we wait. Baking time will vary depending on the size and type of bread you’re making, but as a general rule, you can expect to bake your bread for 25-40 minutes, or until it’s golden brown and sounds hollow when tapped on the bottom. Keep an eye on it, as the crust can go from perfectly golden to burnt quickly.
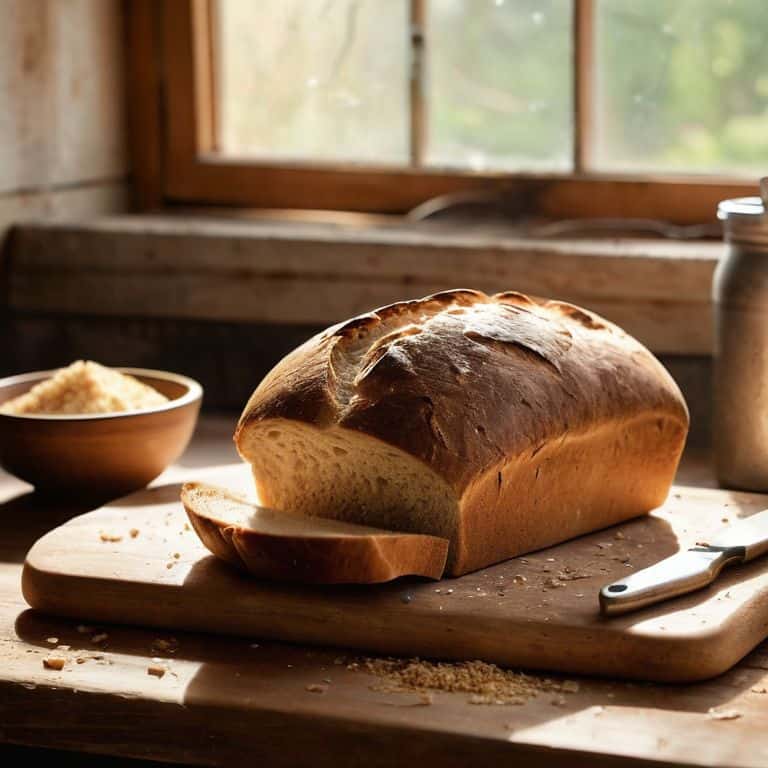
- 7. Once your bread is done, it’s essential to cool it properly. Resist the temptation to slice into your warm bread, as this can cause the crust to become soft and soggy. Instead, let it cool on a wire rack for at least 30 minutes before slicing. This will help the crust to set and retain its crunchiness.
- 8. Finally, let’s talk about storing your bread to maintain that perfect crust. If you don’t plan on consuming your bread within a day or two, it’s best to freeze it. Freezing will help preserve the crust’s texture, and when you’re ready to eat it, simply thaw it at room temperature or reheat it in the oven. For shorter storage, keep your bread in a cool, dry place, away from direct sunlight.
Crust Mastery Unlocked
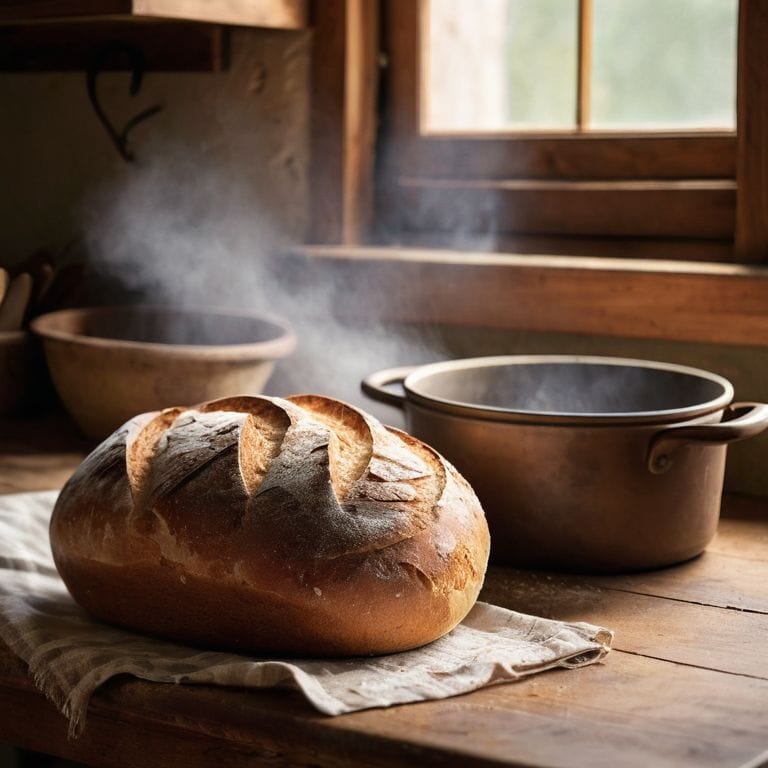
As I delve deeper into the world of bread making, I’ve come to realize that mastering the art of crust formation is a journey, not a destination. One of the most crucial elements in achieving a perfect crust is the importance of steam in bread baking. Steam helps to create a crispy, golden-brown crust, while also promoting even cooking. To harness the power of steam, I recommend using a Dutch oven or covering your bread with a cloche during the baking process.
Scoring the bread is another technique that can make a significant difference in the quality of the crust. By making a few strategic cuts on the surface of the bread, you can control the way the bread expands during baking, resulting in a more evenly cooked crust. It’s also essential to use a baking stone to absorb excess moisture and distribute heat evenly, leading to a crispy crust.
To take your crust game to the next level, it’s vital to understand the role of yeast in crust development. Yeast fermentation produces carbon dioxide, which gets trapped in the dough, creating a lighter, airier texture. By controlling the yeast’s activity, you can influence the crust’s texture and flavor. Remember, controlling oven temperature is also crucial, as it affects the yeast’s activity and the crust’s formation.
Steam Secrets for Crunchy Crust
To achieve a truly crunchy crust, it’s essential to understand the role of steam in the baking process. When you create a steamy environment, it helps to gelatinize the starches on the surface of the bread, resulting in a crisper crust. I like to think of it as a little trick that helps the crust “set” in all the right ways. By using a Dutch oven or covering your bread with a cloche, you can trap the steam and create a mini-oven that promotes even cooking and, of course, that perfect crunch.
I’ve found that a simple water spray or a handful of ice cubes on the oven floor can also do the trick, releasing a burst of steam as the bread bakes. It’s all about finding the right balance, and with a little practice, you’ll be a pro at harnessing the power of steam to create a crust that’s nothing short of sublime.
Yeasts Role in Golden Browning
Yeast plays a vital role in achieving that perfect golden brown crust. As it ferments, yeast produces carbon dioxide, which gets trapped in the dough, creating a delicate balance of air pockets and crust formation. This process, known as oven spring, is crucial for a well-browned crust. I’ve found that using high-quality, active dry yeast and allowing the dough to rise at room temperature can make all the difference in promoting even browning.
By understanding yeast’s function, you’ll be better equipped to coax out that beautiful golden color. Remember, it’s all about creating an environment where yeast can thrive, and in turn, produce a crust that’s both crispy and beautifully browned. With a little practice and patience, you’ll be baking loaves with a stunning, golden crust that’s sure to impress.
Crust Crusader's Top 5 Tips
- Preheat your oven to the right temperature, and ensure you have a steamy environment to mimic a professional bakery’s conditions
- Choose the right type of flour, as protein content affects gluten development and crust texture – I swear by bread flour for a chewier crust
- Don’t overmix your dough, as this leads to a dense, tough crust – mix wet and dry ingredients separately and gently fold them together
- Score your bread before baking to control the way it expands and to create a beautiful, artistic crust – it’s all about the aesthetics, too
- Resist the urge to slice your bread as soon as it’s out of the oven – letting it cool completely allows the crust to set and the interior to stabilize, resulting in a more satisfying crumb and crunch
Crust Perfection in a Nutshell
Mastering the art of homemade bread crust is all about understanding the interplay between steam, yeast, and temperature to achieve that perfect golden brown
By preheating your oven to the right temperature and using steam to your advantage, you can create a crunchy, caramelized crust that elevates your bread to the next level
Remember, patience and practice are key – don’t be discouraged if it takes a few tries to get your crust just right, as the journey to crust mastery is just as important as the destination
The Crust Connoisseur's Mantra
A good crust is not just about the recipe, it’s about understanding the harmony between flour, water, yeast, and heat – it’s a symphony of textures and flavors that unfolds with every perfectly baked loaf.
Julia Ashwood
The Crust Conquest: A Journey to Perfection
As we conclude our journey to achieving the perfect crust on homemade bread, let’s recap the key elements that make all the difference. From the initial step-by-step instructions to the nuances of steam secrets and yeast’s role in golden browning, each component plays a vital role in crafting a crust that’s not only delicious but also visually appealing. By mastering the art of mise en place, understanding the science behind the steps, and being meticulous in our approach, we’ve set ourselves up for success. Whether you’re a seasoned baker or just starting out, remember that practice makes perfect, and it’s okay to experiment and try new things – it’s all part of the learning process.
Now, as you embark on your own crust conquest, remember that the true magic happens in the details. Don’t be afraid to get creative and try new recipes, and always keep in mind that a great crust is not just about the end result, but about the journey itself. So, go ahead, get your hands flour-covered, and watch your homemade bread rise to new heights – with a crust that’s nothing short of perfection. Happy baking, and I look forward to seeing the amazing creations you’ll come up with!
Frequently Asked Questions
What's the ideal temperature and humidity for baking bread to achieve a perfect crust?
For a perfect crust, I swear by a hot oven – we’re talking 425°F to 450°F. As for humidity, a steamy environment is key, so I recommend using a Dutch oven or a steam injector to maintain a humid microclimate. This combo will give you that golden, crunchy crown you’ve been dreaming of!
Can I use a Dutch oven or a ceramic pot with a lid to create steam for a crunchy crust?
Absolutely, you can use a Dutch oven or a ceramic pot with a lid to create steam for a crunchy crust. This method is perfect for achieving that golden brown crunch, as it traps the steam and allows it to cook the bread evenly. Simply preheat the pot, add your dough, cover it with the lid, and bake – the results will be stunning!
How does the type of flour used affect the crust's texture and color, and are there any specific flours recommended for a golden, crunchy crust?
The type of flour used is a game-changer for crust texture and color. I swear by bread flour or all-purpose flour with a high protein content for a golden, crunchy crust. The higher protein level helps create a stronger gluten network, resulting in a more robust crust. Give it a try and see the difference for yourself!