I still remember the first time I attempted to how to bake a cake – it was a disaster! The recipe I followed seemed straightforward, but the end result was a dense, dry disaster. It wasn’t until I understood the importance of mise en place and the science behind each step that my cakes started to turn out perfectly. There’s a common myth that baking a cake is a complicated, frustrating process, but I’m here to tell you that it doesn’t have to be. With the right guidance, you can create a moist, delicious cake that will impress anyone.
In this article, I’ll share my foolproof tips for baking a cake, including the essential steps to take before you even start mixing. You’ll learn how to prepare your ingredients, mix your batter to perfection, and avoid common mistakes that can ruin your cake. My goal is to make the process of how to bake a cake so enjoyable and stress-free that you’ll be eager to get back into the kitchen and try new recipes. By the end of this guide, you’ll have the confidence to bake a cake that’s not only delicious but also visually stunning, with a tender crumb and a beautiful texture.
Table of Contents
Guide Overview: What You'll Need
Total Time: 2 hours 30 minutes
Estimated Cost: $20 – $40
Difficulty Level: Intermediate
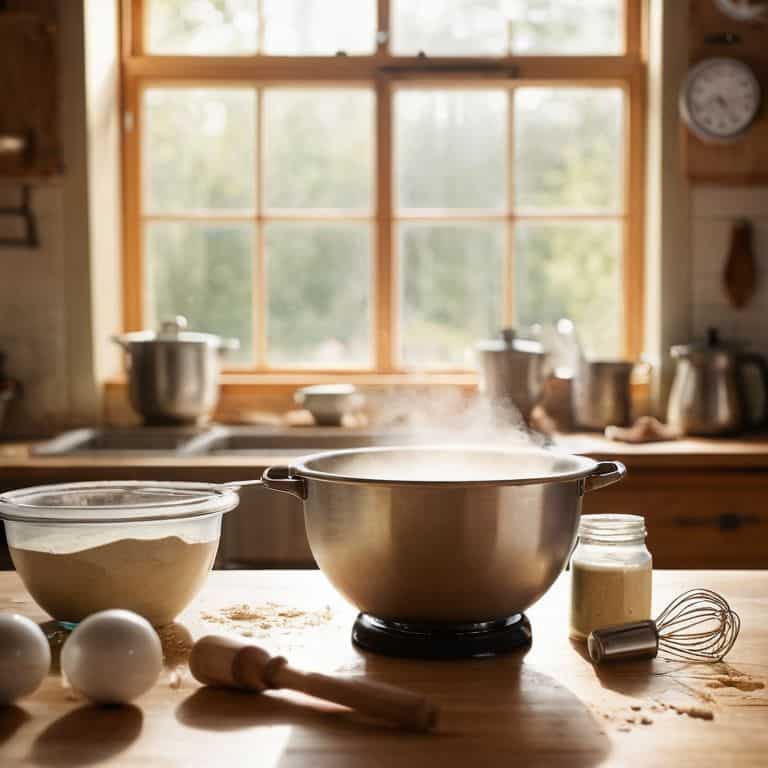
Tools Required
- Mixing Bowls Stainless steel or glass
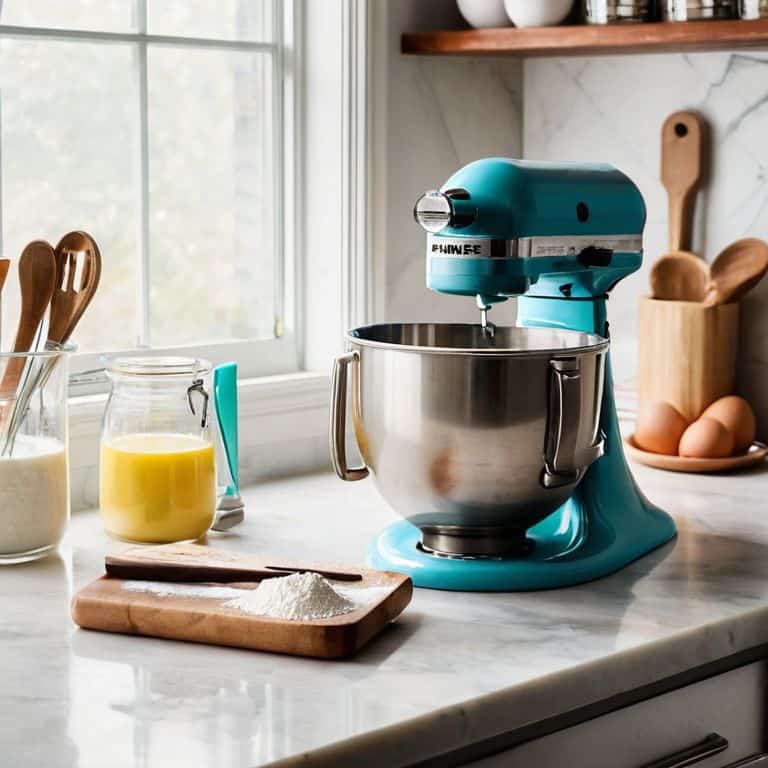
- Electric Mixer Stand or handheld
- Measuring Cups Dry and liquid
- Measuring Spoons
- Whisk
- Rubber Spatula
- Cake Pans 9 inches round
- Oven Preheated to 350 degrees Fahrenheit
Supplies & Materials
- All-purpose Flour 2 cups
- Granulated Sugar 1 cup
- Unsalted Butter 1 cup, softened
- Large Eggs 3
- Milk 1 cup
- Vanilla Extract 1 teaspoon
- Baking Powder 1 teaspoon
- Salt 1/2 teaspoon
Step-by-Step Instructions
- 1. First, let’s start with the foundation of our cake: preheating the oven to 350°F (175°C). This is a crucial step, as it ensures that our cake bakes evenly and at the right temperature. While the oven is preheating, take a moment to prepare your baking space, making sure all the necessary ingredients and tools are within reach.
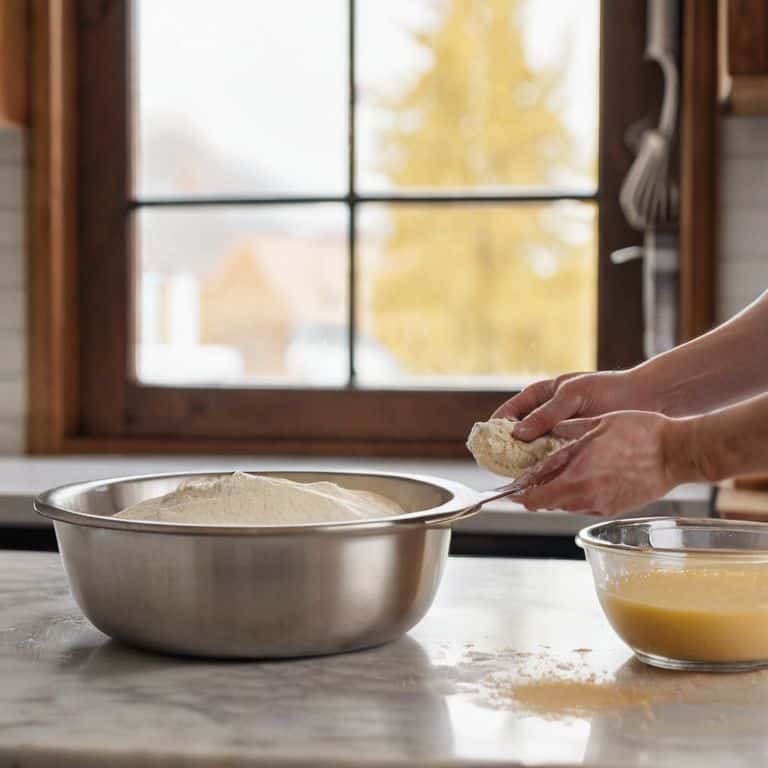
- 2. Next, we’ll be focusing on mise en place, which is a French term that means “everything in its place.” This step is all about preparing and measuring out our ingredients, including flour, sugar, eggs, and butter. Take your time to carefully measure each ingredient, as this will directly impact the final result of our cake. I like to use a digital scale for accuracy, but if you don’t have one, don’t worry – measuring cups will do the trick.
- 3. Now, let’s move on to creamming the butter and sugar together. This is where the magic begins, and our cake starts to take shape. In a large mixing bowl, use an electric mixer to cream the butter and sugar until it’s light, fluffy, and almost white in color. This process should take about 3-4 minutes, depending on the speed of your mixer. Be sure to stop and scrape down the sides of the bowl a few times to ensure everything gets well incorporated.
- 4. With our butter and sugar mixture ready, it’s time to add the eggs one at a time, making sure each egg is fully incorporated before adding the next. This is a critical step, as we want to avoid ending up with a cake that’s too dense or soggy. Take your time, and don’t rush this process – it’s all about creating a smooth, even batter.
- 5. Next, we’ll be adding the dry ingredients, including flour, baking powder, and a pinch of salt. I like to sift these ingredients together before adding them to the batter, as this helps to remove any lumps and ensures they’re evenly distributed. Add the dry ingredients to the batter in three parts, alternating with a liquid ingredient, such as milk or buttermilk, beginning and ending with the dry ingredients.
- 6. Now that our batter is ready, it’s time to pour it into a prepared pan. I like to use a 9-inch round cake pan, greased and floured to prevent the cake from sticking. Smooth the top of the batter, making sure it’s even and level, before placing the pan in the oven. This is an exciting moment – our cake is finally going into the oven, and we get to see it transform into a beautiful, golden-brown masterpiece.
- 7. After 25-30 minutes, or when a toothpick inserted into the center of the cake comes out clean, it’s time to remove the cake from the oven. Let it cool in the pan for 5-10 minutes before transferring it to a wire rack to cool completely. This is the hardest part – waiting for the cake to cool before we can frost and decorate it! But trust me, the wait will be worth it – our cake is going to be absolutely delicious, and we’ll get to enjoy the fruits of our labor soon.
Baking Cake Magic
As we dive into the world of cake baking, it’s essential to understand the importance of precise temperature control. This is where the magic happens, and your cake transforms from a mixture of ingredients to a moist and fluffy delight. I always recommend investing in a reliable oven thermometer to ensure your oven is at the correct temperature. When it comes to choosing the best flour for your cake recipes, I swear by using high-quality, unbleached all-purpose flour. It makes all the difference in the texture and flavor of your final product.
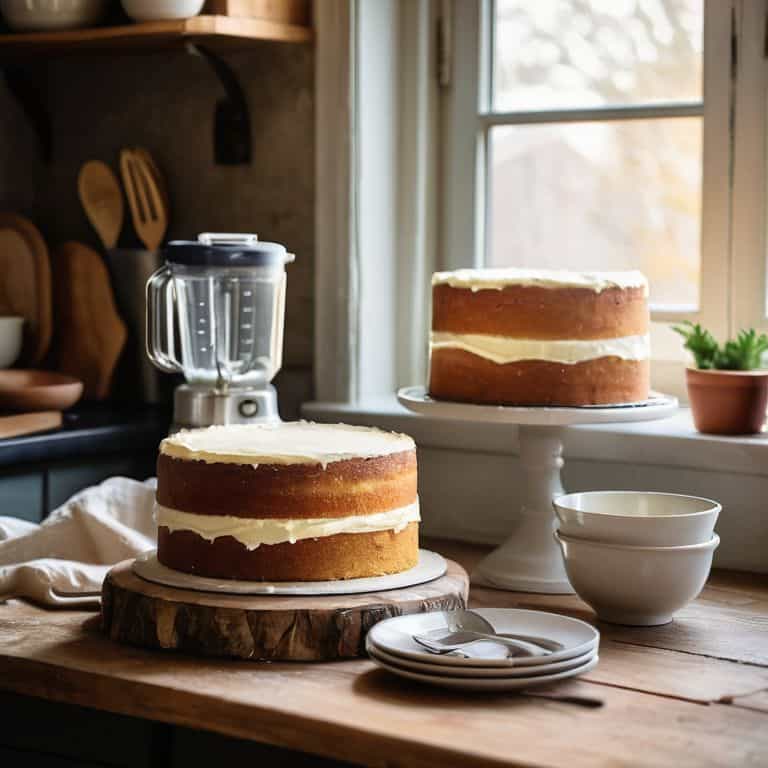
When it comes to adding an extra layer of elegance to your cake, cake decorating techniques for beginners can seem daunting, but trust me, it’s easier than you think. With a little practice, you can create beautiful designs that will impress your friends and family. For a classic look, try using a simple vanilla cake mix from scratch and pairing it with a rich chocolate ganache filling recipe. The combination is absolutely divine, and the best part is that it’s relatively easy to make.
To take your cake baking to the next level, don’t be afraid to experiment with different flavors and ingredients. For example, try adding a hint of vanilla or almond extract to your batter for a unique twist. Remember, the key to perfecting your craft is to have fun and not be too hard on yourself if things don’t turn out as planned. With time and practice, you’ll be a pro at creating stunning cakes with easy cake frosting designs that will make everyone’s jaw drop.
Best Flour for Perfect Recipes
When it comes to baking a cake, the type of flour used can make all the difference. I always swear by using high-quality, all-purpose flour for my recipes. This type of flour has a perfect balance of protein and starch, which helps to create a tender crumb and a delicate texture. I’ve experimented with different types of flour, including cake flour and bread flour, but I find that all-purpose flour gives me the most consistent results.
For my favorite recipes, I recommend using a premium all-purpose flour that is unbleached and unbromated. This will ensure that your cake turns out light, fluffy, and full of flavor. Trust me, the extra cost is worth it – your taste buds will thank you! With the right flour, you’ll be well on your way to creating a truly magical cake.
Vanilla Mix From Scratch Secrets
To unlock the true essence of a homemade cake, making your vanilla mix from scratch is a game-changer. I adore the process of combining simple ingredients like granulated sugar, pure vanilla extract, and high-quality flour to create a bespoke blend. It’s all about understanding how these elements interact to produce a unique flavor profile. By doing it yourself, you can adjust the proportions to suit your taste preferences, ensuring your cake is truly one-of-a-kind.
The key to a successful from-scratch vanilla mix lies in the quality of your ingredients and attention to detail during the mixing process. I always emphasize the importance of ‘mise en place’ here, as having all your ingredients measured and ready to go makes all the difference in achieving a smooth, even blend. With a little practice, you’ll be creating your own signature vanilla mixes that elevate your baked goods to the next level.
My Top 5 Secrets to Baking the Perfect Cake
- Ensure your ingredients are at room temperature, especially eggs and butter, for a smooth and even mix
- Measure your ingredients with precision, as this will significantly affect the final texture and flavor of your cake
- Don’t overmix your batter, as this can lead to a dense and tough cake – stop mixing as soon as the ingredients come together
- Use the right type of flour for your recipe, whether it’s all-purpose, cake flour, or bread flour, as each has a unique protein content that affects the final product
- Resist the temptation to open the oven door during the baking time, as this can cause your cake to sink or not bake evenly – patience is key to a perfectly baked cake
Three Essential Takeaways for the Perfect Cake
Always remember, the quality of your ingredients matters: choosing the right flour and using a homemade vanilla mix can elevate your cake from good to extraordinary
Preparation is key: mastering the art of ‘mise en place’ will not only save you time but also ensure that each component of your cake is perfectly prepared, leading to a flawless final product
Practice patience and don’t be afraid to experiment: whether it’s testing a recipe multiple times or trying out new flavors, the journey to creating the perfect cake is just as important as the end result, so enjoy the process and learn from your mistakes
The Heart of Cake Baking
Baking a cake is not just about following a recipe, it’s about crafting a moment, a memory, and a taste that will linger long after the last crumb is gone.
Julia Ashwood
The Sweetest Conclusion
As we wrap up our journey on how to bake a cake, let’s recap the essential elements that make a truly exceptional dessert. From selecting the best flour for our recipe to crafting a vanilla mix from scratch, every step has been a deliberate choice to elevate our baking experience. We’ve delved into the world of mise en place, ensuring that our ingredients are prepped to perfection, and explored the science behind the steps, understanding how each component interacts to create a masterpiece. By following these meticulous steps and embracing the joy of the process, you’re not just baking a cake – you’re creating a culinary story.
As you take your first bite of that perfectly baked cake, remember that the true magic lies not just in the taste, but in the journey itself. The process of baking is a metaphor for life’s adventures – full of trials, errors, and moments of pure joy. So, don’t be afraid to experiment, to try new recipes, and to make mistakes. For in the end, it’s the love, the care, and the attention to detail that you put into your baking that will make every cake a masterpiece, and every bite a testament to the beauty of culinary art.
Frequently Asked Questions
What is the ideal temperature and baking time for a moist and fluffy cake?
For a moist and fluffy cake, I swear by a temperature of 350°F (175°C) and a baking time of 25-30 minutes. However, this can vary depending on your oven and cake size, so keep an eye on it and adjust as needed – you want it to be golden brown and a toothpick to come out clean!
How do I ensure that my cake is evenly layered and stacked without collapsing?
To ensure evenly layered and stacked cakes, I swear by the ‘dowel method’ – inserting thin dowels or cake pillars between layers for support. It’s a game-changer! I also make sure to chill each layer before stacking, and use a turntable to evenly distribute the frosting and decorations, resulting in a stunning, collapse-free masterpiece.
Can I substitute or combine different types of sugar in a cake recipe for a unique flavor profile?
Absolutely, you can experiment with different sugars for a unique flavor. I love combining granulated sugar with brown sugar for a deeper taste or using turbinado sugar for a hint of caramel. Just remember, substituting sugars can affect texture and moisture, so start with small changes and adjust to taste.