I still remember the day I decided to ditch the nails and get creative with hanging pictures in my quirky little house. I was determined to find a way to hang pictures without nails that would make my walls truly tell my story. As I embarked on this DIY adventure, I realized that it’s not just about displaying framed artwork, but about creating a space that reflects my personality and style. I’ve tried various methods, from using adhesive strips to leaning frames against the wall, and I’m excited to share my favorite techniques with you in this guide on how to hang pictures without nails.
In this article, I’ll take you through my personal journey of discovering the best ways to hang pictures without nails, and I’ll share my honest, no-hype advice on how to achieve a beautifully curated wall that tells your story. You’ll learn how to choose the right frames, select the perfect spot for your artwork, and hang your pictures with ease, all without damaging your walls. I’ll show you that with a little creativity and patience, you can create a stunning gallery wall that reflects your unique style and personality, and I’ll guide you through the process with before-and-after photos and practical tips that will make you feel like you’re right there with me, hanging pictures and making memories.
Table of Contents
Guide Overview: What You'll Need
Total Time: 1 hour 15 minutes
Estimated Cost: $10 – $30
Difficulty Level: Easy
Tools Required
- Level (for ensuring straight hanging)
- Pencil (for marking wall)
- Ruler (for measuring 6 inches between hooks)
- Adhesive Strip Remover (for removing strips without damaging paint)
Supplies & Materials
- Adhesive Strips specifically designed for hanging pictures, with a weight limit of 5 pounds or more
- Paintable Wall Putty for filling any minor holes, if needed
Step-by-Step Instructions
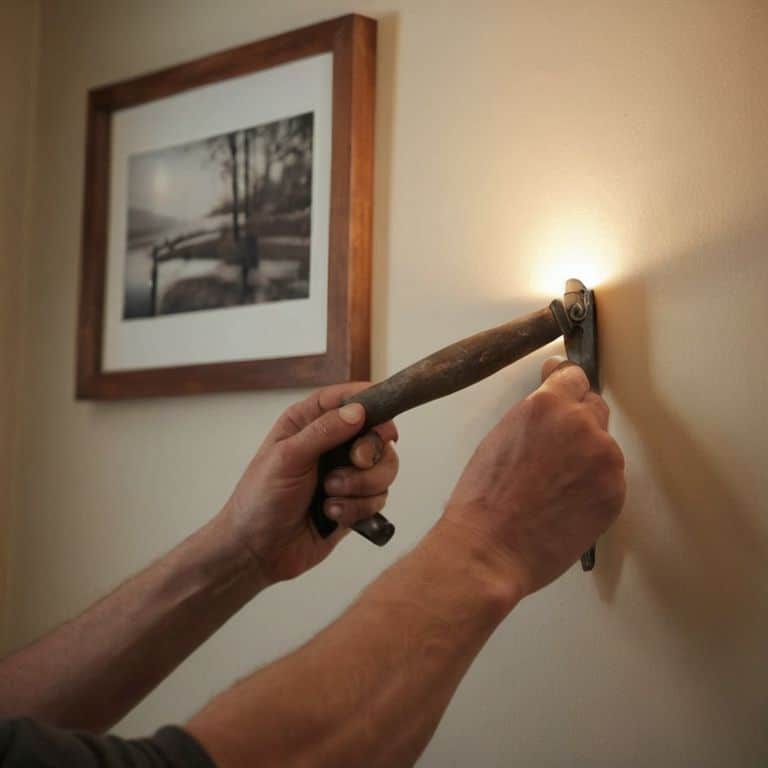
- 1. First, let’s get creative with our hanging methods – we’re ditching the nails and exploring alternative ways to display our favorite pictures. Start by gathering your materials: a drill (yes, you read that right – a drill, but not for nails!), a level, a pencil, and your chosen hanging method, such as adhesive strips or 3M picture hanging strips.
- 2. Next, measure twice, to ensure you’re placing your picture in the perfect spot. Consider the height, the distance from surrounding furniture, and the overall aesthetic you want to achieve. Take a step back and visualize how your picture will look on the wall – this is where the storytelling begins.
- 3. Now, it’s time to choose your hanging method. If you’re using adhesive strips, follow the manufacturer’s instructions for weight limits and preparation. For 3M picture hanging strips, make sure you have the right size for your frame. I like to use a variety of methods, depending on the weight and size of the picture, to keep things interesting and unpredictable.
- 4. With your materials and method ready, it’s time to mark the wall. Use your pencil to lightly mark the spot where you want to place your picture. Double-check that it’s level, and take a moment to appreciate the blank canvas that is your wall – soon it will be a beautiful reflection of your personal style.
- 5. Apply your chosen hanging method to the back of the picture frame, following the manufacturer’s instructions. This is where the magic happens, and your picture starts to take shape on the wall. Make sure it’s securely attached, and you’re ready for the final step.
- 6. Hang your picture, and step back to admire your handiwork. Take a moment to appreciate the story that’s unfolding on your walls – each picture, a chapter in the narrative of your life. If needed, make adjustments to the placement, and don’t be afraid to experiment and try new things.
- 7. Finally, add any finishing touches, such as adjusting the frame or adding surrounding decorations. This is where you can really let your personal style shine, and make your picture a true reflection of your unique story. Take a deep breath, and enjoy the sense of accomplishment that comes with creating a beautiful, nail-free display of your favorite memories.
How to Hang Pictures Without Nails
As I delve into the world of damage free hanging solutions, I’ve discovered a few tricks that make the process even more enjoyable. When it comes to hanging heavy frames, it’s essential to choose the right tools for the job. I swear by removable wall hooks that can bear the weight of my prized possessions without leaving a mark on the wall. This is especially important when decorating with command strips, as they can be easily removed and repositioned to achieve the perfect layout.
One of the most significant challenges I faced was finding the best adhesive for wallpaper that wouldn’t damage the delicate patterns. After some trial and error, I found a solution that worked beautifully, allowing me to hang my favorite pieces without worrying about ruining the wallpaper. This experience taught me the importance of decorating with command strips in a way that respects the unique characteristics of each room.
When working with plaster walls, it’s crucial to be gentle and precise to avoid causing any damage. I’ve learned to approach hanging pictures on plaster walls as a fun puzzle, where every piece fits together to tell a story. By using the right techniques and tools, you can create a beautiful and unique space that reflects your personality, and that’s what it’s all about – creating a damage free hanging solution that brings your story to life.
Damage Free Hanging With Best Adhesives
Now that we’ve explored the world of removable wall hooks, let’s dive into another nail-free favorite of mine: adhesives! I’ve had my fair share of trial and error with different types, but I’ve landed on a few that I just can’t get enough of. For lighter frames, I swear by those nifty little adhesive strips – you know, the ones that come with a promise to hold a surprising amount of weight without leaving any residue behind.
I’ve used them to hang everything from vintage prints to handmade artwork, and they’ve never let me down. For heavier pieces, I turn to a reliable adhesive putty that distributes the weight beautifully and can be easily removed when it’s time for a decor refresh. It’s amazing how a little creativity and the right tools can turn any wall into a canvas for your favorite stories – and the best part? No nails required!
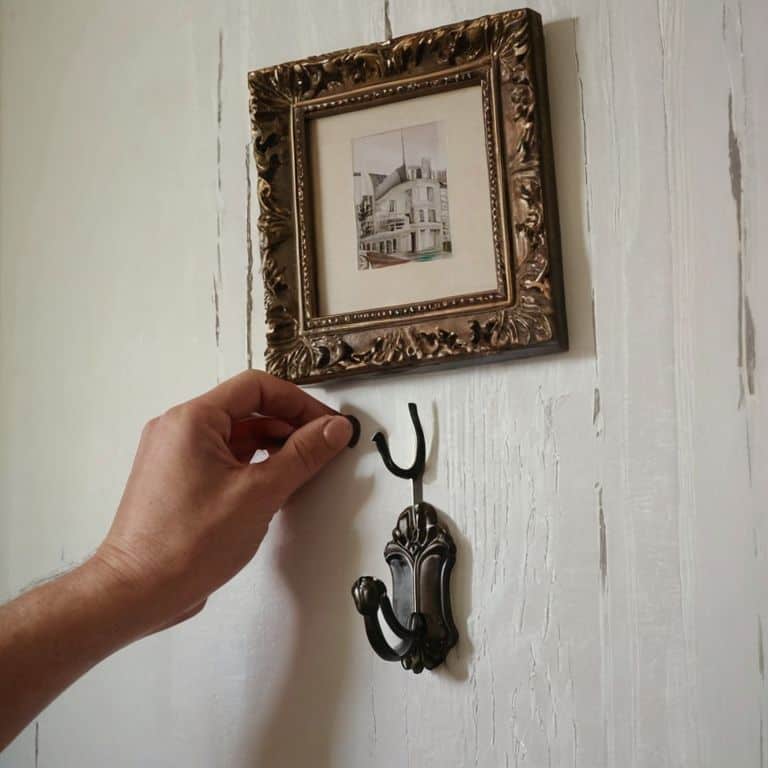
Telling Stories With Removable Wall Hooks
Now that we’ve covered the basics of nail-free hanging, let’s dive into one of my favorite tools: removable wall hooks. I like to think of them as the secret ingredient in my decorating recipes. They come in all shapes and sizes, and can be used to hang everything from framed photos to mirrors and even plants. I’ve named my trusty hook “Hugo” – he’s been with me through countless decorating adventures.
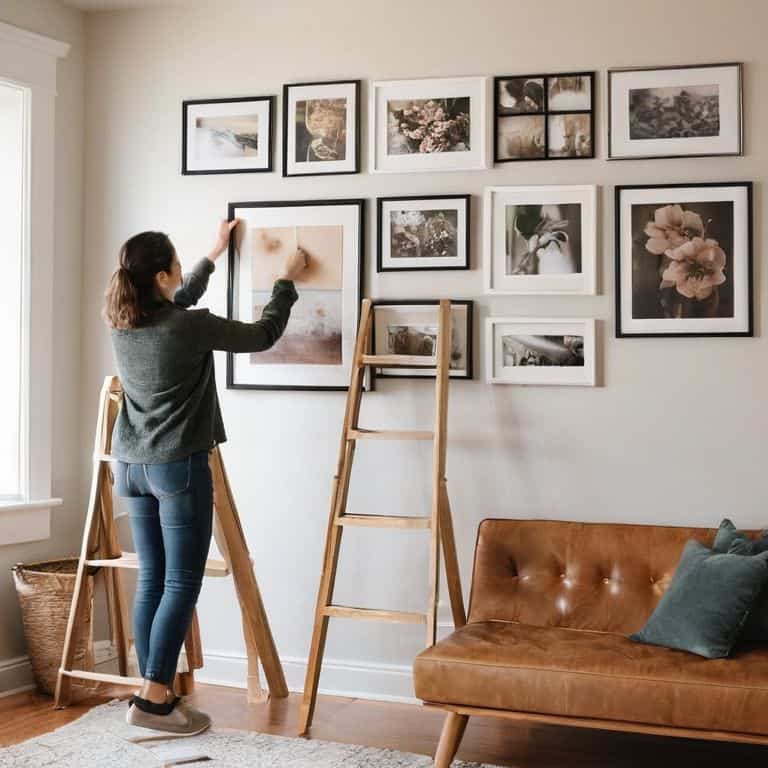
I love how removable wall hooks can add a touch of personality to a room without making a permanent commitment. They’re perfect for renters or for those of us who like to switch up our decor seasonally. Plus, they’re incredibly easy to use – just peel, stick, and hang! I’ve used Hugo to hang a gallery wall in our living room, and it’s become a beautiful way to tell the story of our travels and special moments.
Nailing It Without Nails: 5 Tips to Hang Your Memories
- Choose the Right Hook for the Job: Select removable wall hooks that fit your frame’s weight and style to ensure a sturdy, damage-free hold
- Measure Twice, Hang Once: Double-check your wall space and frame dimensions to find the perfect spot for your art, and use a level to ensure it’s straight
- Get Sticky with It: Explore different damage-free adhesives like command strips or 3M picture hanging strips to find the one that works best for your walls and frames
- Frame It Like a Pro: Consider the frame’s material, color, and style when choosing how to hang it, and don’t be afraid to mix and match for a unique look
- Tell Your Story: Don’t just hang pictures – create a narrative with your wall decor by grouping frames that tell a story, evoke a memory, or showcase your personality
Nailing the Story: 3 Key Takeaways
Hang with intention: every frame tells a story, so choose hanging methods that let your memories shine without damaging your walls
Get hooked on versatility: removable wall hooks are your best friend for a gallery wall that’s as easy to update as your favorite story
Stick to the plan: with the right adhesives, you can hang your treasures without a single nail, keeping your walls safe and your style on point
Hanging with Heart
The way we hang our pictures says a lot about the stories we want to tell – ditching the nails doesn’t just save the walls, it saves the story from being ordinary.
Maya Rivera
Bringing Your Story to Life
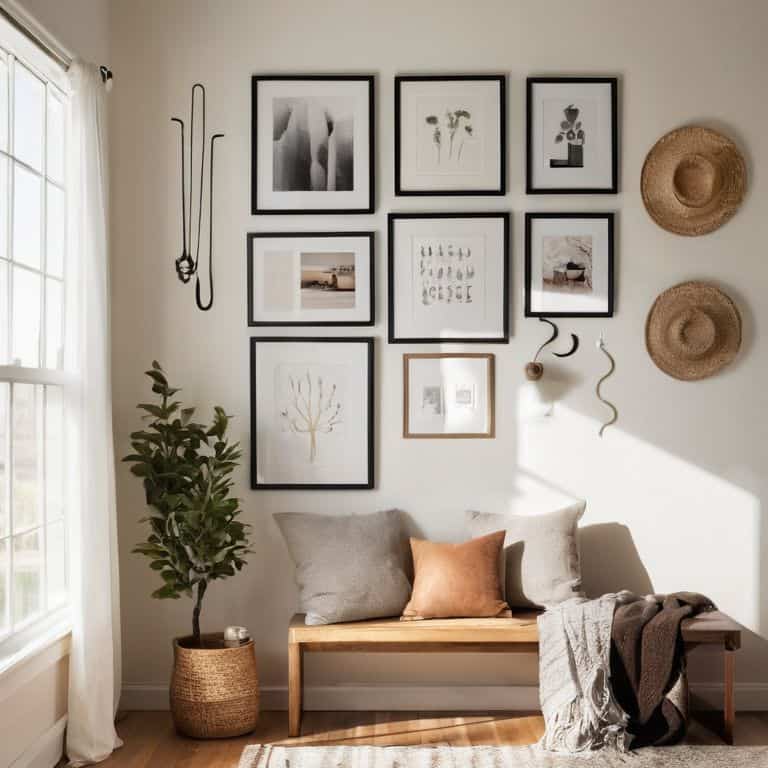
As we’ve explored the world of nail-free picture hanging, I hope you’ve discovered that it’s all about embracing creativity and finding the right tools for your unique space. From removable wall hooks to the best adhesives, we’ve covered the essentials to get you started on your decorating journey. Whether you’re a renter or a homeowner, these tips will help you create a beautiful, personalized gallery that tells your story without damaging your walls. Remember, it’s not just about hanging pictures – it’s about creating a narrative that reflects your personality and style.
So, go ahead and unleash your inner artist! Don’t be afraid to experiment and try new things. With a little patience and imagination, you can turn your walls into a stunning canvas that showcases your favorite memories and inspirations. As you finish reading this guide, I hope you feel empowered to start your own DIY adventure and make your space a true reflection of your unique spirit. Happy decorating, and don’t forget to have fun along the way!
Frequently Asked Questions
What are some creative ways to hang pictures without nails in a rental property?
I’m all about renting with style. For nail-free hanging, I swear by removable wall hooks and damage-free adhesives like command strips or 3M picture hanging strips. They’re easy to use and won’t leave a mark when you move out. Plus, they come in all sorts of fun designs to match your unique vibe!
How do I choose the right type of adhesive or removable wall hook for my specific wall type?
For my quirky old house, I’ve learned to match the adhesive or hook to the wall type. For plaster or drywall, I love 3M Command Strips. For brick or concrete, I opt for sturdy adhesive hooks like those from Monkey Hooks. And for my favorite vintage finds, I choose removable adhesive putty to avoid any damage.
Can I hang heavy or large pictures without nails, and if so, what are the best methods for doing so?
Absolutely, you can hang heavy or large pictures without nails. I swear by 3M Command Strips or heavy-duty adhesive hooks for a damage-free hang. For extra large pieces, consider a French cleat system – it’s a game-changer for supporting heavy frames without putting a single nail in the wall!