I still remember the first time I stumbled upon a guide to ikea hacks online – it was like uncovering a treasure trove of creative possibilities. The idea that I could take a generic, mass-produced piece of furniture and turn it into a one-of-a-kind masterpiece was exhilarating. But as I delved deeper into the world of IKEA hacking, I realized that there were a lot of misconceptions and overly complicated tutorials out there. It seemed like everyone was trying to make it more complicated than it needed to be.
In this article, I’ll share my own experiences and practical tips for turning IKEA pieces into unique works of art. I’ll walk you through my favorite IKEA hacks, from simple modifications to more complex transformations. My goal is to empower you with the confidence to take on your own DIY projects and make your home truly reflect your personality. Whether you’re a seasoned DIY enthusiast or just starting out, I promise that you’ll find something inspiring and useful in this guide to ikea hacks. So, let’s get started on this creative adventure together and make our homes a reflection of our imagination and style!
Table of Contents
Guide Overview: What You'll Need
Total Time: 1 hour 45 minutes
Estimated Cost: $20 – $100
Difficulty Level: Intermediate
Tools Required
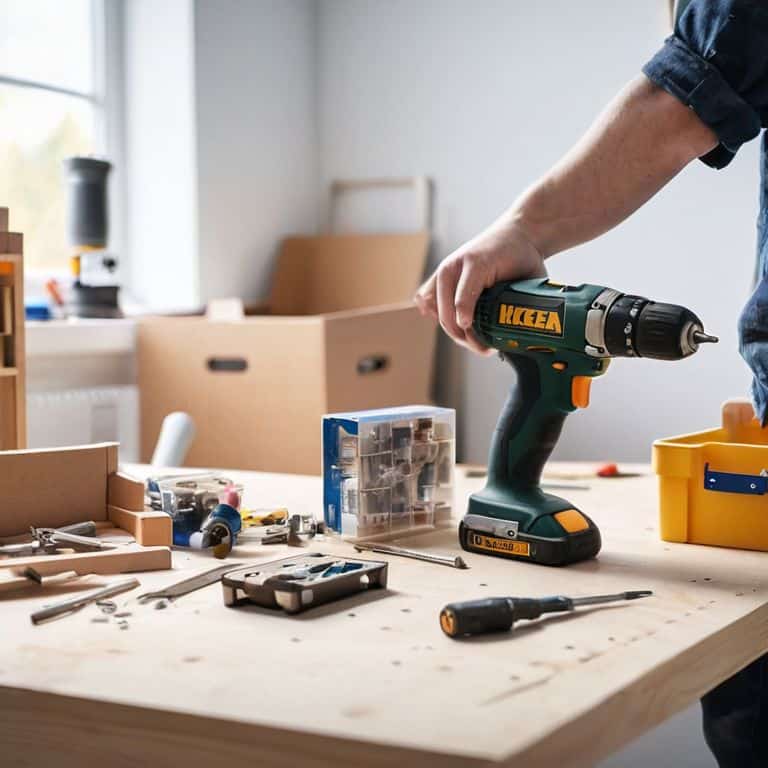
- Drill (with screwdriver and drill bits)
- Saw (circular or handheld)
- Sandpaper (various grits)
- Measuring Tape (for accurate measurements)
- Level (to ensure straight installations)
- Pencil and Marker (for marking cuts and positions)
Supplies & Materials
- Ikea Furniture Pieces (specific to the hack)
- 2-in x 4-in lumber (for support or additional structure)
- Wood Glue (for bonding wood pieces)
- Screws (of appropriate length and type)
- Decorative Items (e.g., paint, stickers, or hardware)
Step-by-Step Instructions
- 1. First, let’s start with the basics: gathering inspiration. I like to browse through home decor blogs, Pinterest, and even flea markets to get an idea of what I want to create. For my latest IKEA hack, I found this amazing vintage side table that I wanted to replicate using an IKEA Lack coffee table. I took note of the materials, colors, and overall aesthetic I wanted to achieve, and then I headed to IKEA to pick up the necessary pieces.
- 2. Next, I prep my workspace. This is probably the most important step, as it sets the tone for the entire project. I clear out a large area in my garage or patio, cover the floor with a drop cloth, and gather all my power tools, including my trusty drill, Bertha. I also make sure to have all the necessary materials within arm’s reach, so I can focus on the fun part – creating.
- 3. Now it’s time to disassemble the IKEA piece. In this case, I removed the legs and shelves from the Lack coffee table to give it a more vintage look. I used a screwdriver to take out the screws and set the hardware aside for later use. This step can be a bit tedious, but it’s essential to get to the core of the piece and start building from scratch.
- 4. With the piece disassembled, I can start adding my own touch. For this project, I decided to add a beautiful wooden trim to the edges of the table top. I measured and cut the trim to size, applied a layer of wood glue, and then nailed it into place using my nail gun, Nina. I love this part of the process, as it’s where the piece starts to take on its own unique character.
- 5. Once the trim is in place, it’s time to add some color and texture. I chose a gorgeous shade of turquoise paint and applied two coats to the entire piece, allowing it to dry completely between coats. I also added a clear coat of varnish to protect the paint and give it a nice sheen. This is where the magic happens, and the piece starts to come alive.
- 6. Now it’s time to reassemble the piece. I attached the legs and shelves back to the table top, making sure everything was level and secure. I also added some decorative hardware to give it a more polished look. This step requires a bit of patience, but it’s worth it to see the final result.
- 7. The final step is to add the finishing touches. I added a beautiful glass vase and some greenery to the table to give it a pop of color and life. I also took a step back to admire my handiwork and make any necessary adjustments. This is the best part of the process – seeing my vision come to life and knowing that I created something truly unique and special.
A Guide to Ikea Hacks
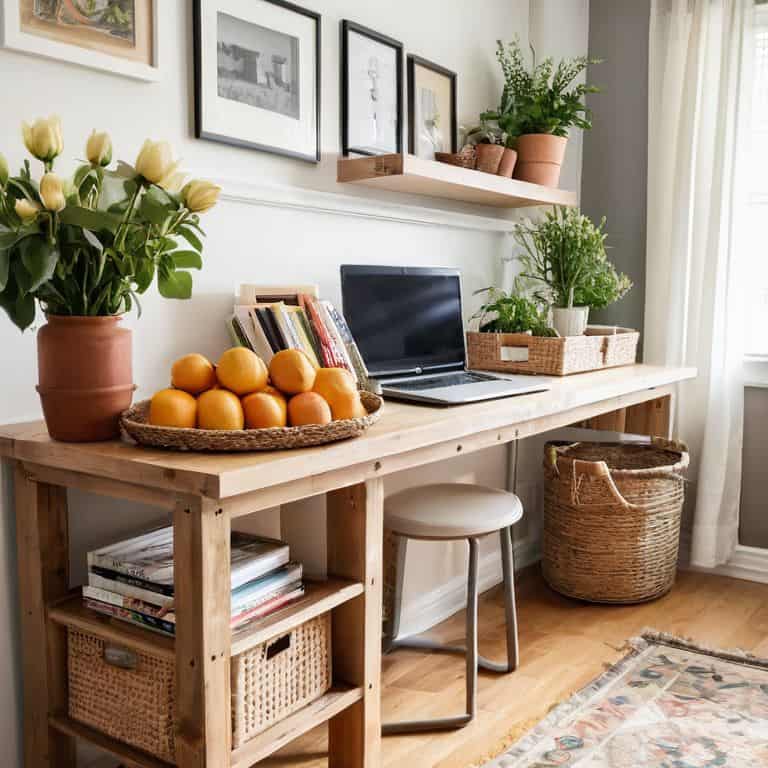
As I dove deeper into the world of IKEA hacking, I discovered the thrill of ikea furniture repurposing. It’s amazing how a simple shelf can be transformed into a unique storage unit or a desk can be turned into a one-of-a-kind kitchen island. The key is to think outside the box and imagine the potential in each piece of furniture. I’ve found that budget friendly home decor doesn’t have to mean sacrificing style or functionality.
One of my favorite IKEA hacks is giving new life to old shelves. With a little creativity, you can turn a basic shelf into a creative ways to use ikea shelves masterpiece. For example, you can add decorative trim, paint, or even attach baskets to create a one-of-a-kind storage solution. This is especially useful for small spaces where diy ikea storage solutions are essential. By thinking creatively, you can create a functional and beautiful space that reflects your personal style.
When it comes to customizing your IKEA furniture, the possibilities are endless. From ikea desk makeover ideas to ikea furniture customization tips, the internet is filled with inspiration and guidance. My advice is to start small and have fun with the process. Don’t be afraid to experiment and try new things – it’s all part of the DIY adventure. With a little patience and imagination, you can create a space that’s truly unique and reflective of your personality.
Budget Friendly Home Decor Secrets
One of my favorite secrets to sharing is how to give your space a high-end look without the hefty price tag. I’ve found that thrift stores, garage sales, and yes, even IKEA, can be treasure troves for unique pieces just waiting for a little TLC. By repurposing or upcycling these hidden gems, you can create one-of-a-kind decor that reflects your personal style. Plus, it’s a great way to reduce waste and get creative with your decor.
I love scouring flea markets for vintage items to restore, and my small patio is always filled with urban gardening projects. These hobbies not only bring me joy but also inspire my DIY home decor ideas. With a little imagination, you can turn a thrift store find into a stunning centerpiece or a repurposed IKEA piece into a show-stopping statement. Remember, it’s all about telling your story through your living space, and with these budget-friendly secrets, you can do just that.
Ikea Furniture Repurposing Magic
Ikea Furniture Repurposing Magic
One of my favorite things to do is breathe new life into old Ikea pieces. I’ve turned a worn-out Malm dresser into a unique kitchen island, and even repurposed a Lack coffee table into a one-of-a-kind potting bench for my patio. The key is to see beyond the original purpose and imagine the possibilities. With a little creativity and some power tools (I’ve named mine Bertha and Boris, by the way!), you can transform any Ikea piece into a stunning, one-of-a-kind masterpiece that reflects your personal style.
By repurposing Ikea furniture, you’re not only reducing waste but also adding a touch of personality to your space. I love sharing my own before-and-after stories, and I’d love to hear yours too! What Ikea hack will you try first, and how will you make it your own?
Unleashing the DIY Magic: 5 Essential Tips for IKEA Hacks
- Let the treasure hunt begin: Always keep an eye out for second-hand or discounted IKEA items that can be transformed into unique pieces
- Measure, measure, measure: Before you start hacking, make sure you have a clear plan and the right measurements to avoid any DIY disasters
- Get creative with textures and colors: Don’t be afraid to mix and match different materials and hues to give your IKEA hack a truly one-of-a-kind look
- Think outside the box (or instruction manual): Consider unconventional uses for IKEA pieces, like turning a bookshelf into a room divider or a headboard
- Add a personal touch: Incorporate meaningful items or mementos into your IKEA hack to make it a reflection of your personality and style
My Top 3 IKEA Hack Takeaways
I’ve learned that with a little creativity, even the most basic IKEA pieces can be transformed into unique, one-of-a-kind masterpieces that reflect your personal style
Repurposing and upcycling IKEA furniture is not only budget-friendly, but it’s also an amazing way to reduce waste and give new life to old or discarded items
By embracing the world of IKEA hacks, you’ll not only save money and get creative, but you’ll also end up with a home that tells your story and feels truly, authentically yours
Unlocking the True Potential
The beauty of IKEA hacks lies not in the furniture itself, but in the story it tells when it’s transformed into a one-of-a-kind reflection of you – a reminder that home decor is not just about filling a space, but about filling it with pieces of your soul.
Maya Rivera
Unlocking the Full Potential of IKEA Hacks

As we’ve explored the world of IKEA hacks together, I hope you’ve discovered that transforming your space doesn’t have to break the bank or require a team of professionals. From repurposing furniture to uncovering budget-friendly home decor secrets, we’ve delved into the creative possibilities that IKEA pieces offer. Whether you’re a seasoned DIY enthusiast or just starting to dip your toes into the world of home renovation, the key takeaway is that your home should tell your story, reflecting your unique style and personality.
So, as you embark on your own IKEA hacking journey, remember that it’s all about embracing your creativity and having fun along the way. Don’t be afraid to think outside the box, experiment with new ideas, and turn those affordable IKEA pieces into one-of-a-kind masterpieces. With a little imagination and some elbow grease, you can create a space that’s not only beautiful but also truly, uniquely yours.
Frequently Asked Questions
What are some common IKEA pieces that can be easily hacked or repurposed for a unique look?
I’m obsessed with hacking the MALM dresser, Billy bookcase, and POANG chair – they’re like blank canvases waiting for your personal touch! With a little creativity, you can turn them into one-of-a-kind pieces that reflect your style.
How can I ensure that my IKEA hacks are sturdy and long-lasting, rather than just temporary fixes?
To make sure your IKEA hacks stand the test of time, I always say: it’s all about the prep work, my friends! Take the time to properly disassemble, clean, and reinforce those pieces before adding your personal touches. And don’t be afraid to get creative with sturdy materials like wood or metal to give your hacks a solid foundation.
Are there any specific tools or materials that I'll need to get started with IKEA hacking, or can I use items I already have at home?
Oh, I’m so glad you asked! To get started with IKEA hacking, you’ll need some basic tools like a drill, screwdriver, and sandpaper. Don’t worry if you don’t have them all – I’ve made do with what I had on hand, too! You can also repurpose items like old jars, fabric, or paint to give your IKEA pieces a personal touch. My trusty sidekick, a power drill I’ve named ‘Bertha,’ has been with me through many a hack!