I still remember the day I opened the kitchen pantry in my new home and was hit with a wave of chaos. The shelves were cluttered, the air was stale, and I had no idea where to start. I had always been fascinated by the idea of how to organize your kitchen pantry, but now it seemed like a daunting task. As I stood there, staring at the mess, I realized that organizing a kitchen pantry isn’t just about tidying up – it’s about creating a space that tells a story of who you are and how you cook. It’s about turning a functional area into a beautiful reflection of your personality.
As we embark on this journey to transform your kitchen pantry, I want to assure you that it’s not about following a set of rigid rules or adhering to the latest trends. It’s about finding a system that works for you and your unique cooking style. In this article, I’ll share my personal experience and practical tips on how to organize your kitchen pantry, from purging unwanted items to creating a functional storage system. I’ll show you how to turn your pantry into a delicious reflection of you, where every jar, spice, and ingredient has its own special place. So, let’s get started on this creative adventure and make your kitchen pantry a space that inspires you to cook, create, and tell your own story.
Table of Contents
- Guide Overview: What You'll Need
- Step-by-Step Instructions
- How to Organize Your Kitchen Pantry
- Designing a Kitchen Storage Solution That Tells Your Story
- Maximizing Pantry Space With Custom Shelving
- Unpacking the Secrets: 5 Key Tips to a Kitchen Pantry that Tells Your Story
- Bringing Your Pantry to Life: 3 Key Takeaways
- Pantry Wisdom
- Bringing Your Pantry Story to Life
- Frequently Asked Questions
Guide Overview: What You'll Need
Total Time: 2 hours 30 minutes
Estimated Cost: $50 – $100
Difficulty Level: Intermediate
Tools Required
- Measuring Tape for measuring shelves and spaces
- Level to ensure shelves are straight
- Drill with screwdriver and drill bits
- Utility Knife (with extra blades)
- Pencil and Paper for planning and notes
Supplies & Materials
- Shelves adjustable, 6 inches deep
- Storage Bins various sizes, for dry goods
- Basket Containers for snacks and small items
- Adhesive Hooks for hanging items like baskets or bags
- Label Maker with extra labels, for organizing
Step-by-Step Instructions
- 1. First, let’s clear the clutter and take everything out of your pantry. Yes, you read that right – everything! This is the fun part where you get to see what you’re working with, and it’s also a great opportunity to _sort items into categories_, like baking supplies, snacks, and cooking essentials. Don’t worry too much about the mess at this stage; we’ll get to organizing in a bit.
- 2. Next, give your pantry a good _deep clean_. This means wiping down the shelves, sweeping and mopping the floor, and getting rid of any _dust bunnies_ that might have accumulated. Trust me, a clean slate makes all the difference when you’re trying to create a functional and beautiful space. My power tool, “Sawyer,” isn’t much help here, but a vacuum and some soap will be your best friends.
- 3. Now, it’s time to categorize and purge. Go through each category of items you removed from your pantry and get rid of anything that’s expired, broken, or just plain unnecessary. Be ruthless – if you haven’t used it in the past year, it’s probably safe to say you won’t miss it. This is also a great opportunity to _check expiration dates_ and make sure you’re not holding onto anything that’s past its prime.
- 4. With your pantry cleaned and your items sorted, it’s time to think about _storage solutions_. Consider what types of containers you’ll need to keep your items organized and easy to access. I’m a big fan of using _mason jars_ for dry goods like flour, sugar, and pasta, and _basketweave baskets_ for snacks and other small items. Don’t forget to measure your shelves before you buy anything, so you can ensure a snug fit.
- 5. Once you have your storage solutions in place, it’s time to _assign a home_ for each item. This means designating a specific shelf or container for each category of items, and making sure everything has its own place. I like to think of this step as creating a treasure map for my pantry – it helps me find what I need quickly and makes the space feel more _intentional_.
- 6. Now that everything has a home, let’s talk about _labels and signage_. I love using a label maker to add a personal touch to my storage containers, and you can also use chalkboard labels or even just a piece of chalk to add a _whimsical touch_ to your pantry. This step might seem small, but it makes a big difference in terms of making your pantry feel _polished and complete_.
- 7. Finally, take a step back and _admire your handiwork_! You’ve worked hard to create a beautiful and functional pantry, and it’s time to enjoy the fruits of your labor. Remember, the key to maintaining your newly organized pantry is to make it a habit to put things back in their assigned home after you’re done using them. Happy cooking, and don’t forget to share your before-and-after photos with me!
How to Organize Your Kitchen Pantry
As I delved into my own kitchen pantry organization journey, I realized that maximizing pantry space is all about creativity and resourcefulness. I started by taking everything out and sorting items into categories – it was amazing to see how much more manageable the task became. My partner and I then began to brainstorm kitchen storage solutions that would fit our unique needs and style. We decided on a combination of baskets, bins, and custom shelving to create a system that was both functional and visually appealing.
One of the most significant challenges we faced was food expiration date management. To tackle this, we implemented a “first in, first out” policy, where we placed newer items at the back and older ones at the front. This simple trick has helped us reduce food waste and keep our pantry fresh. We also made sure to label each shelf and bin, making it easy to find what we need when we need it. This attention to detail has been a game-changer in maintaining our pantry organization systems.
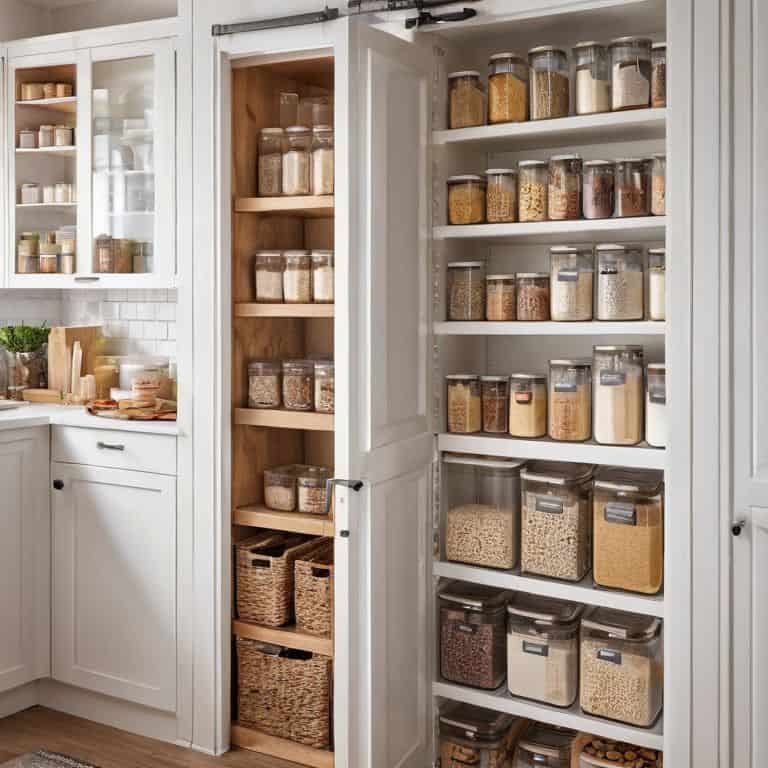
As we continue to refine our kitchen pantry layout, we’re always on the lookout for new custom pantry shelving ideas to incorporate. From adjustable shelves to sliding drawers, there are countless ways to optimize your pantry’s layout. By experimenting with different designs and solutions, you can create a space that not only reflects your personal style but also meets your unique needs and preferences.
Designing a Kitchen Storage Solution That Tells Your Story
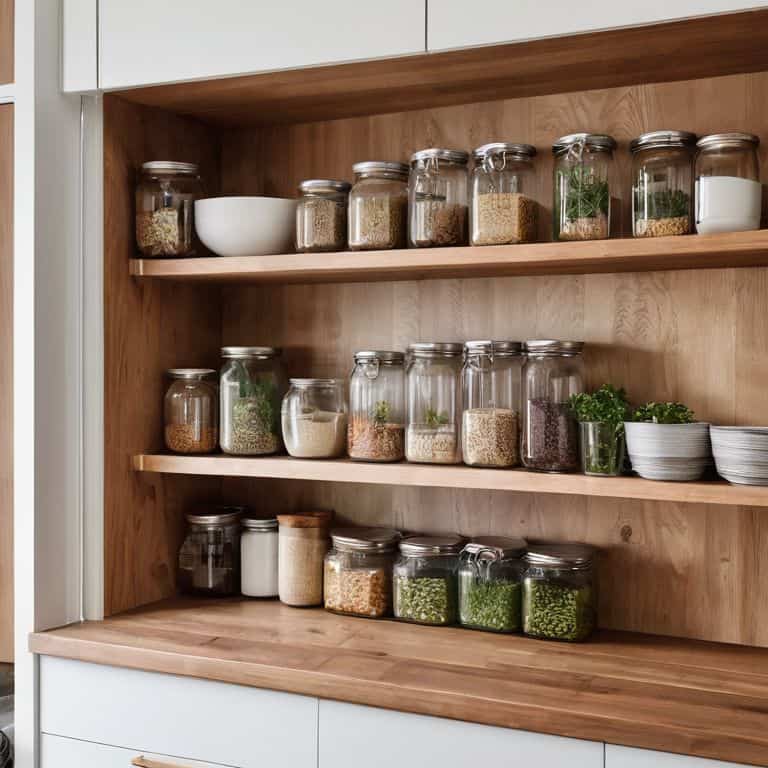
As I pondered my own kitchen pantry, I realized that storage isn’t just about function – it’s about reflecting our personalities. I wanted my pantry to tell the story of my love for baking and cooking with fresh, seasonal ingredients. So, I incorporated vintage baking tins, wooden crates, and a few favorite cookbooks into my shelving design. It’s amazing how these personal touches can make a space feel truly yours.
By adding elements that speak to your culinary passions, you can transform your pantry into a charming reflection of your story. Perhaps you’ll display a collection of artisanal spices, hang a framed recipe from your grandmother, or use colorful baskets to store your favorite snacks. Whatever your style, remember that your kitchen storage solution should be a celebration of you and your love for food.
Maximizing Pantry Space With Custom Shelving
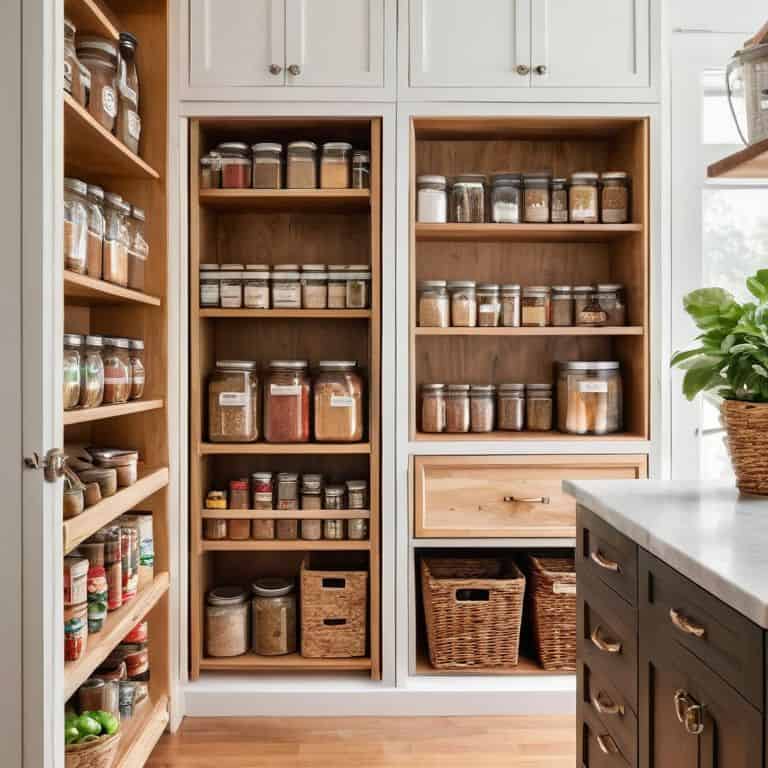
Now that we’ve tackled the basics of pantry organization, let’s talk about one of my favorite ways to maximize space: custom shelving. I like to think of it as giving my pantry a personalized makeover. By installing shelves that fit your specific needs, you can make the most of every nook and cranny. For me, it was about creating a home for my vintage cookbooks and frequently used spices. I opted for a mix of open shelving and closed cabinets to keep things visually interesting and functional.
My trusty power tool, “Bertha,” and I got to work, measuring and building custom shelves that would fit our pantry’s quirky dimensions. The result? A beautiful, one-of-a-kind space that tells the story of our culinary adventures. With custom shelving, you can turn your pantry into a reflection of your personal style and cooking habits. Whether you’re a baker, a foodie, or a busy parent, your pantry should be a space that inspires and delights you.
Unpacking the Secrets: 5 Key Tips to a Kitchen Pantry that Tells Your Story
- Start with a blank slate: Clear everything out of your pantry to get a sense of the space and what you’re working with – it’s like beginning a new chapter in your kitchen’s story
- Group similar items together: Think of your pantry as a library, where all the cooking books (or in this case, food items) are categorized and easy to find, making meal prep a breeze
- Assign a home for each item: Just like how a character in your favorite novel has a special place, each of your kitchen tools and ingredients should have a designated spot in your pantry, making it easy to grab what you need
- Utilize vertical space: Your pantry walls are like the pages of a book waiting to be filled – use shelves, baskets, or hooks to maximize storage and keep your floor clear, creating a sense of openness and freedom
- Make it personal: Add a few decorative touches that reflect your personality and style, like a vintage sign or a favorite cookbook, to make your pantry feel like a warm and inviting part of your kitchen’s narrative
Bringing Your Pantry to Life: 3 Key Takeaways
Your pantry is a reflection of you, so don’t be afraid to add personal touches that tell your story – whether it’s a vintage sign, a favorite cookbook, or a handmade ceramic jar
Maximizing space doesn’t have to mean sacrificing style; consider custom shelving, baskets, or containers that not only keep your pantry organized but also add a touch of warmth and character
Remember, organizing your kitchen pantry is not a one-size-fits-all solution – it’s about creating a functional and beautiful space that makes cooking a joy, so feel free to experiment and make it your own
Pantry Wisdom
The kitchen pantry is more than just a storage space – it’s a canvas for your culinary story, where every jar, spice, and ingredient is a brushstroke of flavor and memory waiting to be arranged into a masterpiece of delicious moments.
Maya Rivera
Bringing Your Pantry Story to Life
As we’ve explored the world of kitchen pantry organization, we’ve covered the basics of maximizing space and creating a storage solution that reflects your personal style. From custom shelving to thoughtful design, it’s all about turning a cluttered area into a beautifully functional space. We’ve broken down the process into manageable steps, focusing on how to make your pantry a true reflection of your cooking style and the story you want to tell through your kitchen. By applying these principles, you’ll not only gain a more efficient cooking space but also a area that inspires creativity and joy.
As you finish your pantry project, remember that it’s not just about the end result – it’s about the journey of creation. Don’t be afraid to experiment, try new things, and make your space truly yours. Your kitchen pantry is a chapter in the story of your home, and with a little imagination and elbow grease, it can become a vibrant reflection of your personality and style. So go ahead, fill those shelves with love, and watch your kitchen transform into a warm and inviting space that welcomes you and your loved ones to create, share, and savor life’s delicious moments.
Frequently Asked Questions
What are some creative ways to use the space on the back of a pantry door?
The back of the pantry door is like a secret canvas waiting for your creativity. I love using over-the-door storage racks for spices, baskets, or even a chalkboard for grocery lists. You can also add a pegboard for hanging frequently used utensils or a magnetic strip for spices. It’s amazing how much functionality you can squeeze into this often-wasted space!
How can I categorize and group similar items in my pantry to make the most of my custom shelving?
Now that we have our custom shelving in place, let’s talk about categorizing and grouping similar items. I like to think of it as creating “neighborhoods” in my pantry – grouping baking supplies, snacks, and cooking essentials together in a way that makes sense for my cooking style and the story I want my kitchen to tell.
What are some tips for maintaining my newly organized pantry and keeping it clutter-free over time?
Now that your pantry is organized, let’s keep the magic alive! Set a monthly reminder to tidy up, and make it a habit to put things back in their designated spots after each use. I also like to schedule a seasonal “pantry purge” to get rid of expired items and make room for new favorites.