I still remember the day I realized that a cluttered workshop was not just a matter of aesthetics, but a productivity killer. I was searching for a specific wrench to finish a project, and after what felt like an eternity, I found it buried under a pile of tools. That’s when I decided to create a guide to organizing your tools on a pegboard. It wasn’t just about neatness; it was about efficiency and making the most of my time. I started by assessing my tools and categorizing them based on frequency of use and type. It was a game-changer, and I’m excited to share my process with you.
In this article, I’ll walk you through the steps to create your own organized pegboard, from planning to execution. You’ll learn how to maximize your space, choose the right tools, and maintain your setup over time. My goal is to provide you with practical, no-nonsense advice that you can apply to your own workshop. By the end of this guide, you’ll be well on your way to creating a functional and efficient workspace that will help you complete projects faster and with less stress. So, let’s get started and turn your pegboard into a productivity powerhouse!
Table of Contents
Guide Overview: What You'll Need
Total Time: 1 hour 30 minutes
Estimated Cost: $20 – $40
Difficulty Level: Easy
Tools Required
- Drill (with screwdriver and drill bits)
- Level
- Pencil
- Measuring Tape
Supplies & Materials
- Pegboard (available in various sizes)
- Pegboard Hooks (assorted types and sizes)
- 2-in x 4-in Lumber (for shelf support)
- Wood Screws (1 inch or 2 inches long)
- Wall Anchors (for securing pegboard to wall)
Step-by-Step Instructions
- 1. First, let’s get your pegboard ready for some serious tool organization – I’m talking a blank slate, buddy! Take everything off your pegboard and give it a good wipe down with some soap and water. This is a fresh start, and we’re going to make the most of it. I like to put on some music at this point, something upbeat to get those creative juices flowing.
- 2. Next, gather all your tools and sort them into categories – think drill bits, screwdrivers, wrenches, and so on. This is where the magic happens, and you start to see your tool collection in a whole new light. Don’t worry too much about the specifics at this stage; we’re just getting everything organized and visible.
- 3. Now it’s time to plan your pegboard layout. I like to use a piece of graph paper to sketch out my design, taking into account the size and shape of each tool. Remember, this is your workshop, and you should make it your own. Consider the tools you use most frequently and think about placing them in easy-to-reach locations.
- 4. With your plan in hand, it’s time to start installing your pegs. Make sure they’re spaced out evenly and securely fastened to the pegboard. I’ve found that using a level can be a real lifesaver at this stage, ensuring everything is straight and true. Don’t be afraid to get a little creative with your peg placement – after all, this is a custom tool storage system.
- 5. Once your pegs are in place, you can start hanging your tools. I like to start with the largest items first, working my way down to the smallest. This helps maintain a sense of balance and harmony on your pegboard. Take your time, and don’t be afraid to make adjustments as you go – it’s all part of the process.
- 6. To add an extra layer of visual organization, consider using different colored pegs or bins to categorize your tools. For example, you could use red pegs for all your measuring tools and blue pegs for your electrical tools. This might seem like a small touch, but it can make a big difference in the long run.
- 7. Finally, take a step back and admire your handiwork – you’ve just created a fully functional tool storage system that’s tailored to your unique needs. Take some time to fine-tune your setup, making any necessary adjustments to ensure everything is accessible and easy to use. And remember, this is a dynamic system – don’t be afraid to make changes as your tool collection evolves over time.
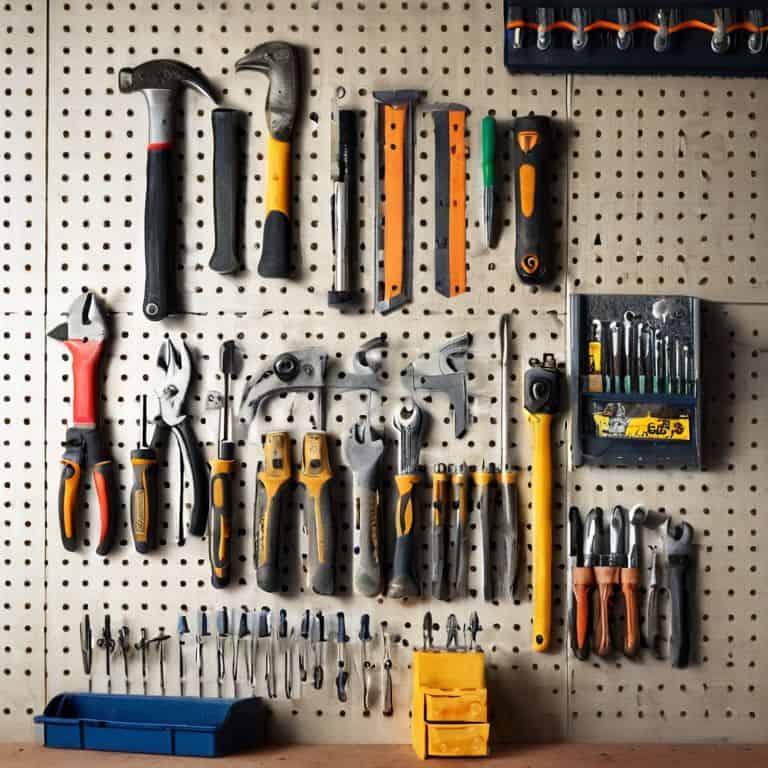
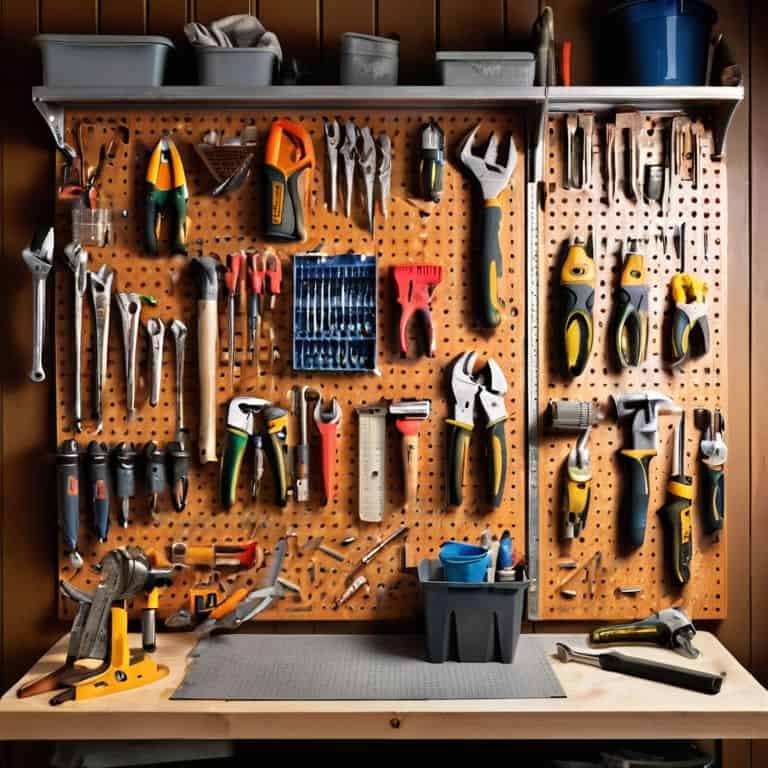
Pegboard Power
Now that we’ve got our tools in order, let’s talk about custom pegboard designs that can take your workshop to the next level. I’m a big fan of mixing and matching different pegboard hook styles to create a layout that’s tailored to my specific needs. For example, I like to use a combination of short and long hooks to hang everything from small wrenches to large power tools.
When it comes to optimizing garage storage space, it’s all about finding a balance between form and function. I’ve found that a well-designed pegboard can be a game-changer for small workshops, as it allows you to make the most of your available wall space. By choosing the right pegboard hook selection guide, you can ensure that your tools are not only organized, but also easily accessible.
As you’re installing your pegboard, keep in mind a few workshop layout ideas for small spaces to maximize your efficiency. Consider the flow of your workspace and try to position your pegboard in a way that minimizes clutter and reduces wasted time searching for tools. With a little creativity and some tool organization systems for professionals, you can turn even the smallest workshop into a productive powerhouse.
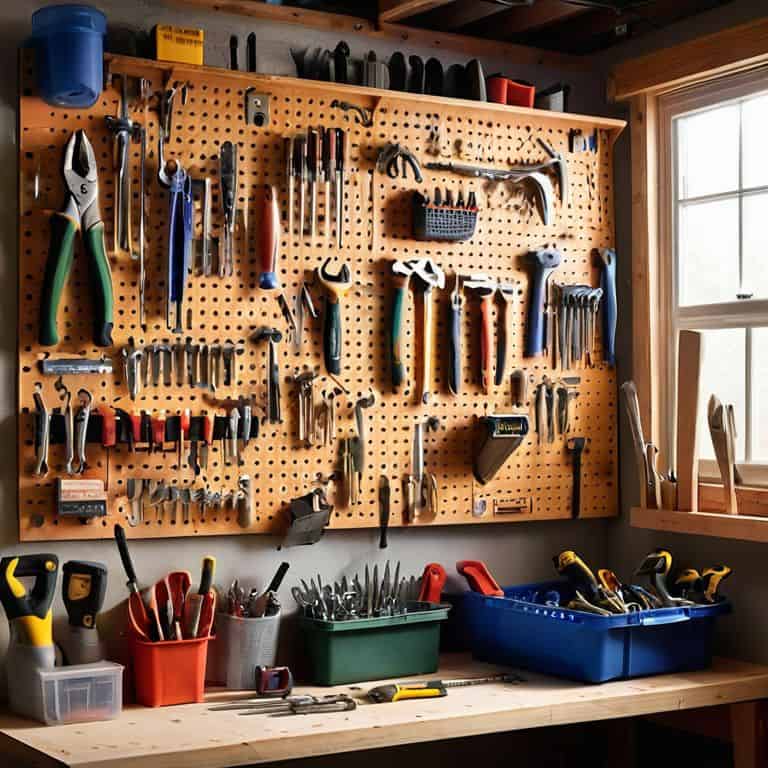
Custom Designs for Tool Titans
Now that we’ve unleashed the “Pegboard Power”, let’s take it to the next level with some custom designs. I love seeing makers push the limits of what’s possible with their pegboards. From adding a sliding rail for frequently used tools to incorporating a mini work surface, the possibilities are endless. I’ve even seen some tool titans add a magnetic strip for their smaller metal bits – genius, right?
For me, customizing my pegboard is all about creating a workflow that’s tailored to my projects. I’ve added a few 3D printed hooks for my favorite hand tools and some wooden dowels for my cable management. It’s amazing how a little creativity can turn a pegboard into a command center for your workshop. What unique feature will you add to your pegboard to make it truly one-of-a-kind?
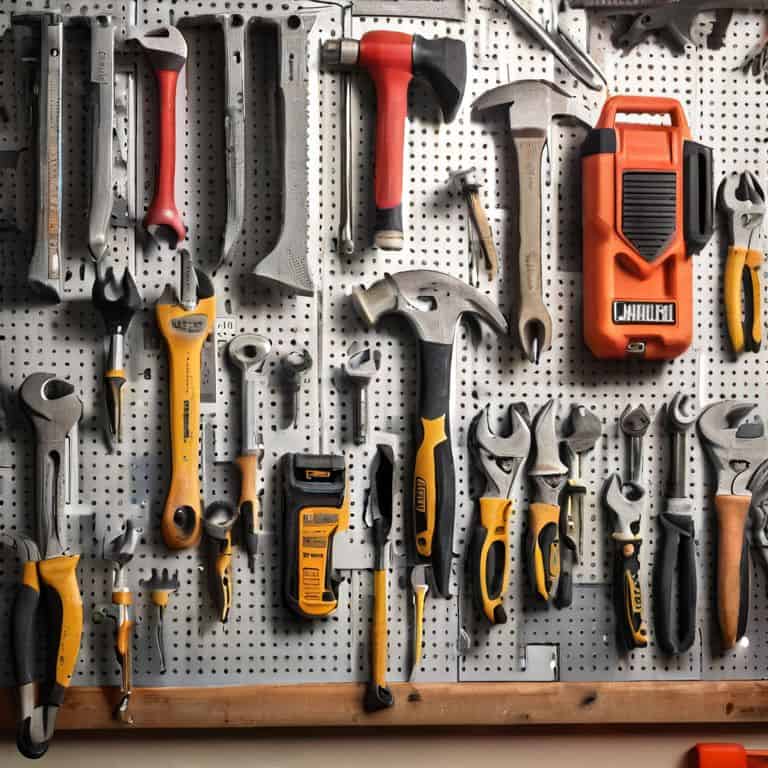
Hook Selection Guide for Pros
Now that we’ve talked about custom designs, let’s dive into the fun part – hooks! You can’t have a killer pegboard without the right hooks for the job. I’m talking about everything from screw hooks for your trusty tape measures to robust bin hooks for storing all your screws and nails. When it comes to choosing the right hooks, think about the tools you use most often and how you want to access them.
For me, it’s all about a mix of functionality and flexibility. I like to use a combination of short and long hooks to keep my most-used tools front and center, while keeping less frequently used items towards the back. And don’t even get me started on the importance of spring-loaded hooks – they’re a total game-changer for hanging cords and keeping your workspace clutter-free!
Pegboard Perfection: 5 Tips to Turbocharge Your Tool Organization
- Plan Your Pegboard Layout Like a Pro: Take a step back, and think about the tools you use most often – group them together for maximum efficiency
- Tool Tango: Mix and Match Your Pegboard Hooks for a Custom Fit – experiment with different hook sizes and styles to create the perfect spot for each tool
- Label It Like You Mean It: Add some personality to your pegboard with labels, stickers, or even a marker – make it easy to find what you need in a flash
- Keep It Clean, Keep It Lean: Schedule regular pegboard cleanups to keep your tools in top shape and your workspace clutter-free – it’s a game-changer, trust me
- Add Some Flair with Accessories: Think beyond just hooks – add some bins, baskets, or even a magnetic strip to store small parts and keep your pegboard looking fresh
Pegboard Perfection: 3 Key Takeaways
By organizing your tools on a pegboard, you’ll not only save time but also reduce stress and increase productivity in your workshop, making it a breeze to tackle any project that comes your way
Customizing your pegboard with the right hooks and accessories can make all the difference – it’s all about creating a system that works for you and your unique workflow, so don’t be afraid to get creative and experiment
Remember, the goal of pegboard organization isn’t just about aesthetics; it’s about creating a functional and efficient workspace that inspires you to build, create, and make awesome things – so have fun with it and make it your own
Pegboard Wisdom
A well-organized pegboard is like a great song – every tool is an instrument, and when they’re all in harmony, you can create something truly amazing!
Franklyn "Frank" Bishop
Wrapping Up Your Pegboard Party
We’ve covered a lot of ground in this guide, from the basics of getting your tools in line to custom designs for tool titans and a hook selection guide for pros. The key takeaway is that organizing your tools on a pegboard is all about finding a system that works for you. Whether you’re a seasoned pro or just starting out, having a well-organized workspace can make all the difference in your productivity and overall enjoyment of your projects. So, don’t be afraid to experiment and try out different layouts until you find the one that feels just right.
As you put the final touches on your pegboard, remember that the journey is just as important as the destination. Don’t stress if things don’t turn out perfectly – it’s all part of the process, and you can always tweak and adjust as you go. The most important thing is that you’re taking the time to create a space that inspires you to build, create, and make. So, go ahead, fire up those power tools, and let the sound of creation fill the air – you got this, and I’m rooting for you every step of the way!
Frequently Asked Questions
What are some common mistakes to avoid when designing a custom pegboard layout?
Don’t be afraid to experiment, but some common pitfalls to avoid are overcrowding, neglecting tool frequency, and poor weight distribution – trust me, I’ve been there! Leave some breathing room and group your most-used tools front and center for a layout that’s both functional and rad.
How can I maximize the storage space on my pegboard without making it look cluttered?
Dude, maximizing storage without the clutter is all about balance! Group similar tools together, use a mix of short and long hooks, and don’t be afraid to leave some breathing room. Think of it as a functional art piece – you want it to look cool, not crazy!
Are there any specific pegboard hook types that are best suited for hanging heavy tools like drill presses or impact wrenches?
Dude, for heavy hitters like drill presses or impact wrenches, you’ll want to grab some heavy-duty hooks, like the ones with a thick gauge or a reinforced spring. I’m talking about the kind that can handle 20-30 pounds or more of weight. Trust me, you don’t want your prized tools crashing to the floor!