I still remember the first time I tried to replace a light fixture in my dad’s garage – I was a teenager, and it was a disaster. I ended up stripping the screws and had to call in a pro to fix my mistakes. But that’s the thing, right? We’ve all been there, and it’s exactly why I’m excited to share my take on how to replace a light fixture. It’s not rocket science, but somehow, it’s still intimidating for a lot of us. I’ve lost count of how many times I’ve heard someone say, “I’m not handy, I could never do that.” But trust me, with the right guidance, you can tackle this project and come out feeling like a total rockstar.
So, what can you expect from this article? I’ll walk you through the entire process, from turning off the power to installing your shiny new fixture. I’ll share some of my favorite tricks of the trade, like using a voltage tester to ensure your safety, and some common mistakes to avoid. By the end of this, you’ll be equipped with the knowledge and confidence to tackle your own lighting project, and who knows, you might just discover a new passion for DIY. My goal is to make this process fun and accessible, so let’s get started and turn that ugly old light into a stunning new centerpiece for your room!
Table of Contents
Guide Overview: What You'll Need

Total Time: 1 hour 30 minutes
Estimated Cost: $20 – $100
Difficulty Level: Intermediate
Tools Required
- Voltage Tester (for safety)
- Needle-Nose Pliers (for wiring)
- Screwdriver (flathead and Phillips)
- Ladder (sturdy, 6 feet tall)
- Wire Strippers (for 12 inches of wire)
- Drill (with 1/8 inch drill bit)
Supplies & Materials
- New Light Fixture (compatible with existing wiring)
- Wire Nuts (assorted sizes)
- Mounting Screws (1 inch or 2 inches long)
- Electrical Tape (for insulation)
- Fuses or Circuit Breaker (as required by local code)
Step-by-Step Instructions
- 1. First, let’s get prepared for the task at hand – replacing that old light fixture. Make sure you’ve got a replacement fixture that matches the voltage and wattage of your old one, and that you’ve got all the necessary tools, like a voltage tester, a screwdriver, and a ladder. I like to have my tools organized in my workshop, but let’s be real, it’s not always the tidiest space, so double-check that you’ve got everything before we start.
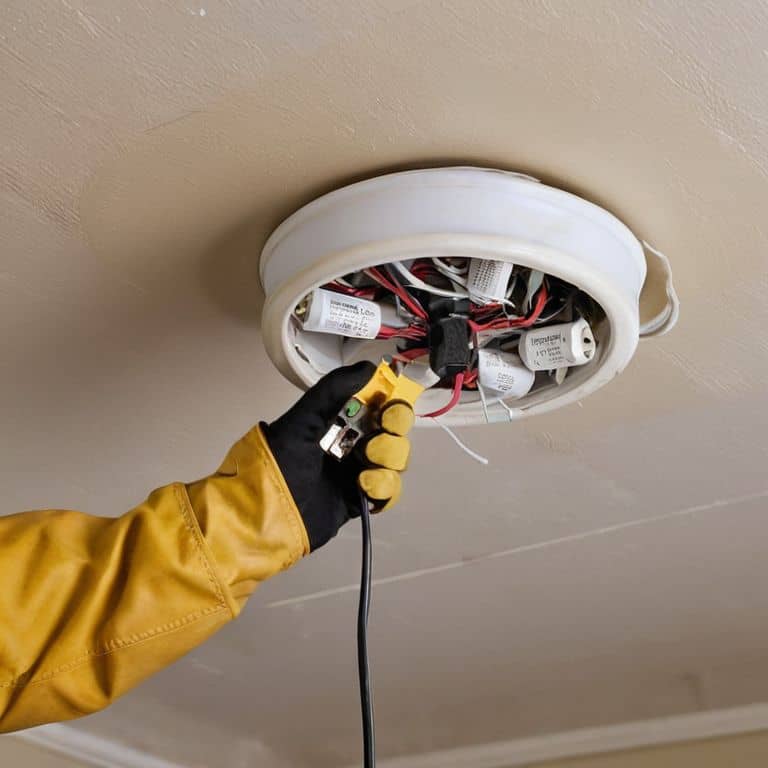
- 2. Next, safety first, turn off the power to the light fixture at the electrical panel. Verify that the light is completely dark before you start working on it – we don’t want any accidents or electrical shocks. Use your voltage tester to ensure there’s no power flowing to the fixture. This is a crucial step, so don’t rush it.
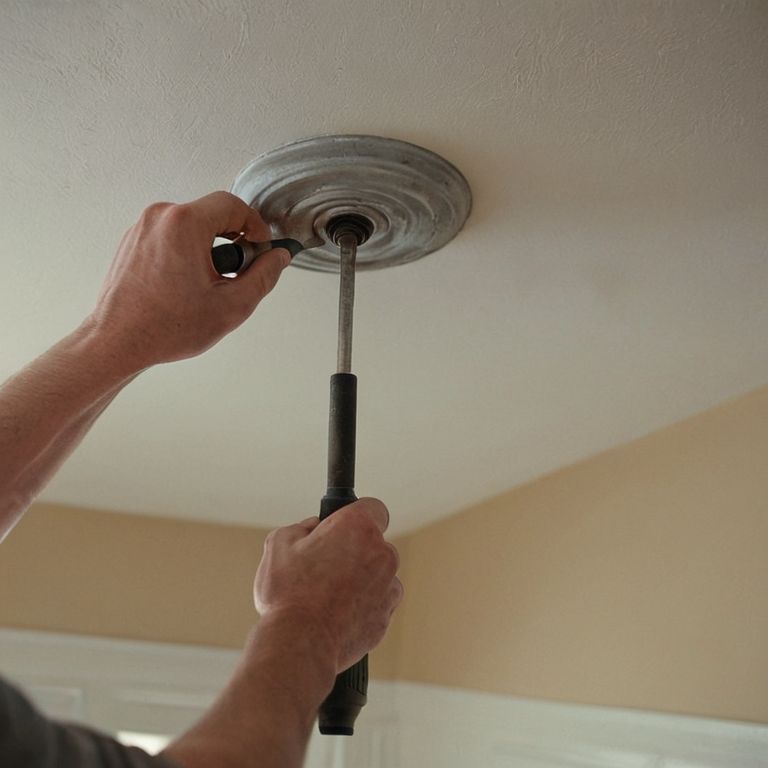
- 3. Now, let’s remove the old fixture. This usually involves removing some screws or clips that hold it in place. Gently pull the fixture away from the ceiling, and you should see the wires attached to it. Take note of which wires are connected to which screws on the old fixture – it’ll make it easier to connect the new one. I always find this part a bit like solving a puzzle.
- 4. The next step is to disconnect the wires from the old fixture. This can be a bit fiddly, so be patient. Use your needle-nose pliers if you need to, and gently pull the wires off the screws. You might need to use a wire stripper to remove any caps or connectors. Don’t worry if it takes a bit of time – we’re making progress.
- 5. With the old fixture completely removed, it’s time to prepare the new one. Take your new light fixture and remove any packaging or protective covering. Check the instructions that came with it to see if there are any specific mounting requirements or if there are any parts that need to be assembled before installation. I love this part – it’s like unwrapping a present.
- 6. Now, let’s mount the new fixture to the ceiling. Follow the manufacturer’s instructions for this part, as different fixtures might have slightly different requirements. Typically, you’ll need to screw the mounting bracket into the ceiling, then hang the fixture from it. Make sure it’s securely fastened – you don’t want it falling down anytime soon.
- 7. Next, we need to connect the wires to the new fixture. Refer back to the notes you made when you disconnected the old fixture, and match the wires to the corresponding screws on the new one. Make sure all connections are secure and not loose. If you’re unsure, it’s always a good idea to double-check the wiring diagram that came with your new fixture. This is where patience really pays off.
- 8. Finally, turn the power back on at the electrical panel and test your new light. Make sure it’s working correctly and that there are no issues with the installation. If everything looks good, congratulations – you’ve successfully replaced your old light fixture with a brand new one. Now, go ahead and admire your handiwork – you’ve earned it.
How to Replace a Light Fixture
When it comes to replacing a ceiling light fixture, safety should always be your top priority. Make sure to turn off the power to the circuit at the main electrical panel, and verify that the light is completely dark before you start working on it. I like to think of this step as the “prep work” – you know, like clearing out the old to make way for the new. It’s also a good idea to double-check your wiring to ensure you’re not missing any crucial connections.
As you’re hanging your new fixture, remember to choose the right size for your space. You don’t want it to be too big or too small – that’d be like trying to fit a square peg into a round hole. Take a moment to measure your area and select a fixture that complements it. And, if you’re feeling fancy, you could even consider installing an LED light fixture, which can be a great energy-efficient option.
Now, I know some of you might be thinking, “But what if I encounter some issues along the way?” Don’t worry, my friends – troubleshooting common lighting issues is all part of the process. Just take a deep breath, and remember that it’s all about understanding electrical wiring colors. With a little patience and practice, you’ll be a pro at replacing light fixtures in no time.
Choosing the Right Light Fixture Size
Now that we’ve got the old fixture out, it’s time to think about the new one. Choosing the right size is crucial – you don’t want it to be too big or too small for the space. I like to think of it as finding the perfect fit for a Leatherworking project, where every stitch counts. For a light fixture, measure the area where it’ll be installed and consider the style you’re going for. Do you want something sleek and modern or a bit more rustic?
Think about the room’s purpose and the type of lighting you need. For example, a kitchen might require more focused lighting, while a living room might benefit from a warmer glow. I always say, “Measure twice, install once” – it’s better to take your time and get it right than to end up with a fixture that’s just not quite right. Trust me, I’ve been there, and it’s not fun. So, take a deep breath, grab your tape measure, and let’s find the perfect fit for your new light fixture!
Understanding Electrical Wiring Colors
Now that we’ve got our new fixture, let’s talk about the wires. I know, I know – electrical wiring can seem like a whole different language, but trust me, it’s easier than you think. The key is understanding those colorful wires. You’ve got your black (hot) wires, white (neutral) wires, and copper (ground) wires. Think of them like a team working together to make your light shine bright. The black wires carry the electrical current, the white wires complete the circuit, and the copper wires keep everything safe.
When connecting your new fixture, make sure to match the wire colors. It’s like solving a puzzle, and once you get the hang of it, you’ll be a pro. Just remember, black to black, white to white, and copper to copper. Keep in mind, some fixtures might have additional wires, like a red or blue wire for dimming or special features. But don’t worry, your new fixture’s instructions will guide you through it. With a little patience and practice, you’ll be wiring like a rockstar in no time.
Shine On: 5 Essential Tips for a Smoother Light Fixture Swap
- Measure Twice, Install Once: Double-check your new light fixture’s dimensions to ensure it fits perfectly in the space, and don’t forget to consider any obstructions like ceiling beams or vents
- Get a Grip on the Wiring: Familiarize yourself with the electrical wiring colors and codes to avoid any shocking surprises – remember, black is usually hot, white is neutral, and copper is ground, but always double-check with your local electrical codes
- Turn Off the Power, Not Your Brain: Make sure to switch off the power to the light fixture at the electrical panel before starting work, and use a voltage tester to verify the wires are dead – safety first, my friends!
- Fixture Frenzy: Don’t be afraid to get creative with your light fixture choices – consider factors like brightness, color temperature, and style to find the perfect fit for your space, and have fun with it!
- Lighten Up and Have Fun: Remember, replacing a light fixture is a DIY adventure, not a chore – put on your favorite playlist, grab a snack, and enjoy the process of transforming your space with your own two hands, and don’t worry if things get a little messy, it’s all part of the fun!
Key Takeaways for a Successful Light Fixture Replacement
Always turn off the power to the circuit at the main electrical panel before starting work on the light fixture to avoid any electrical shocks or injuries
Choose a light fixture that matches the voltage and wattage requirements of your existing electrical setup, and consider factors like size, style, and energy efficiency to ensure a proper fit and optimal performance
Double-check your wiring connections and make sure all wires are securely attached to their corresponding terminals on the new fixture to prevent any potential electrical hazards or fires
Shining Wisdom
Replacing a light fixture isn’t just about swapping out some wires and slapping in a new shade – it’s about illuminating your space with personality, and that’s where the real magic happens, one DIY project at a time!
Franklyn "Frank" Bishop
You Did It!

Alright, buddy, we’ve made it through the nuts and bolts of replacing a light fixture! You’ve learned how to choose the right size, understand those colorful wires, and even got a step-by-step guide on how to make the switch. It’s been a wild ride, and I’m incredibly proud of you for taking the first step towards becoming a DIY master. Remember, it’s all about having fun and learning from those happy accidents – they’re an essential part of the process, and I’m living proof that they can lead to some amazing creations.
Now that you’ve got this newfound confidence, don’t be afraid to think outside the box and try new things. Maybe you’ll discover a hidden talent for restoring vintage tools or even start your own urban gardening project. Whatever it is, just remember that making something with your own hands is an incredible feeling, and I’m honored to have been a part of your journey. Keep on building, and don’t forget to turn up the music – it’s time to get creative and make some more beautiful mistakes!
Frequently Asked Questions
What if I don't turn off the power to the light fixture before starting the replacement process?
Whoa, hold up, buddy! If you don’t switch off the power, you’re lookin’ at a serious shock hazard or even a fire. Don’t risk it! Always, always turn off the power at the electrical panel before startin’ the replacement process. Verify it’s off using a voltage tester, just to be sure. Safety first, my friend!
How do I know which type of light fixture to choose for my specific room or decor?
Dude, choosing the right light fixture is all about vibe! Consider the room’s style, size, and purpose. Think about the type of lighting you need – ambient, task, or accent. And don’t forget to match it with your decor. I like to think of it as finding the perfect soundtrack for my space – it’s all about setting the mood!
Can I replace a light fixture with a smart light or one that has special features like dimming or color changing?
Absolutely, buddy! You can definitely swap out that old fixture for a smart light or one with fancy features like dimming or color changing. Just make sure to check the specs and wiring requirements beforehand, ’cause some of those smart lights need a little extra love to get ’em working right.