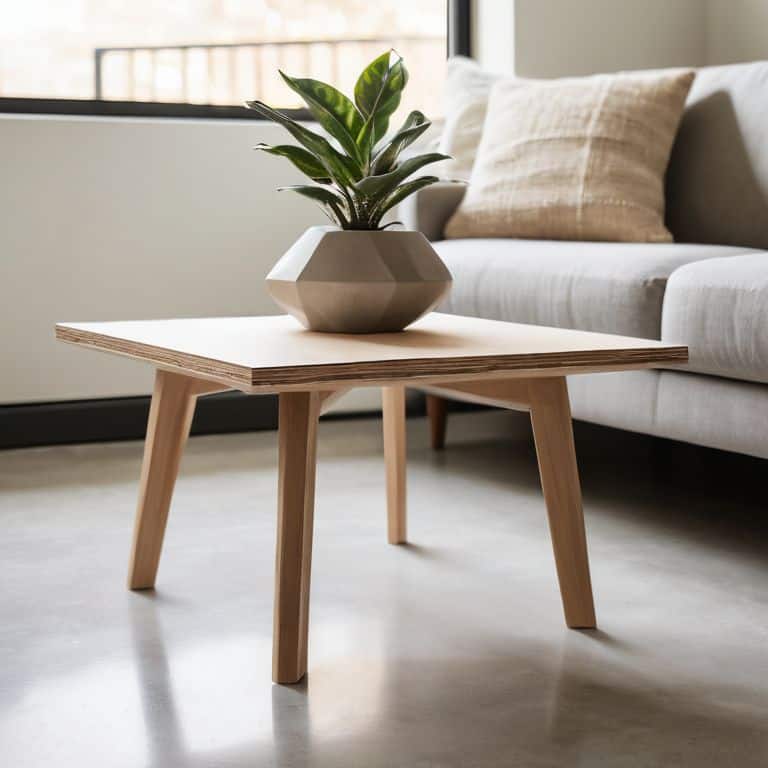
I still remember the first time I tried to make a modern plywood coffee table – it was a disaster. I mean, who needs instructions, right? Wrong. I ended up with a wobbly, uneven mess that looked more like a kindergartener’s art project than a piece of furniture. But that’s the thing: building something with your own hands is all about embracing the mistakes and learning from them. So, if you’re ready to ditch the intimidating DIY guides and join me in a fun, hands-on project, let’s get started on how to make a modern plywood coffee table that’ll be the envy of all your friends.
In this article, I’ll share my no-nonsense knowledge and personal experience to guide you through the process of creating a stunning, modern plywood coffee table. You’ll get practical advice on everything from choosing the right materials to assembling the final product. I’ll show you that with a few simple tools and some creativity, you can turn a pile of plywood into a beautiful piece of furniture that reflects your personal style. So, let’s fire up those power tools and get ready to build something amazing together!
Table of Contents
Guide Overview: What You'll Need
Total Time: 4 hours 30 minutes
Estimated Cost: $100 – $200
Difficulty Level: Intermediate
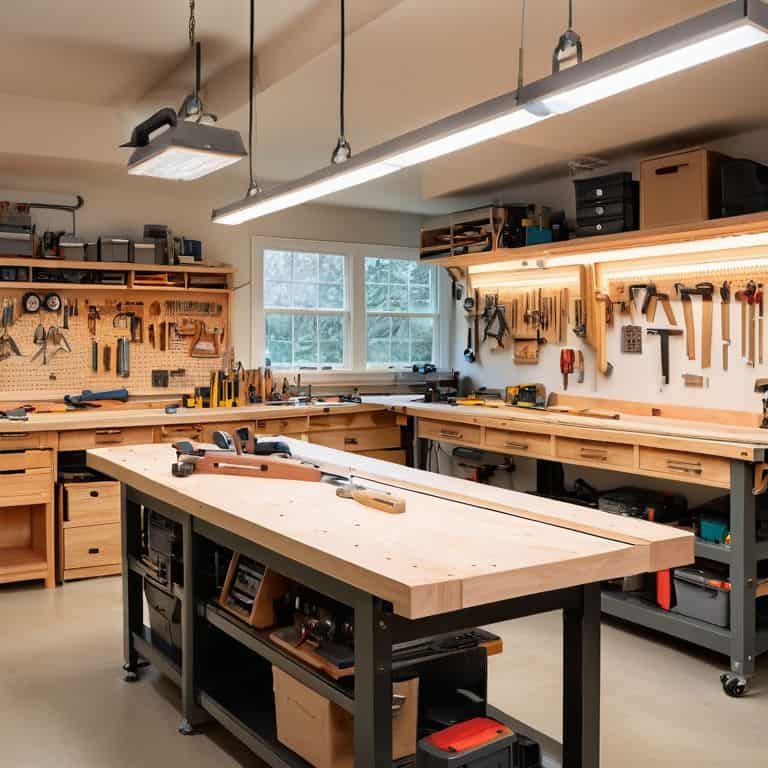
Tools Required
- Circular Saw (for cutting plywood)
- Drill Press (for precise drilling)
- Hand Saw (for cutting 2-in x 4-in lumber)
- Sander (for smoothing out wood surfaces)
- Drill (for assembling the table)
- Tape Measure (for accurate measurements)
- Square (for ensuring corners are square)
- Clamps (for holding pieces together during assembly)
Supplies & Materials
- 3/4-inch Plywood (for the table top and shelves)
- 2-in x 4-in Lumber (for the table legs and frame)
- Wood Glue (for bonding wood pieces together)
- 2 1/4-in Wood Screws (for assembling the table frame)
- 1 1/4-in Wood Screws (for attaching the table top and shelves)
- Wood Filler (for filling any gaps or holes)
- Sandpaper (for smoothing out wood surfaces)
- Polyurethane (for protecting the wood finish)
- Decorative Trim (optional, for adding a decorative edge)
Step-by-Step Instructions
- 1. First, let’s get our materials ready. We’ll need a fresh plywood sheet, some sturdy legs, a drill press, a jigsaw, and a sander. I like to lay everything out in my workshop to get a feel for the project, and I always make sure to have a good soundtrack playing in the background to get those creative juices flowing.
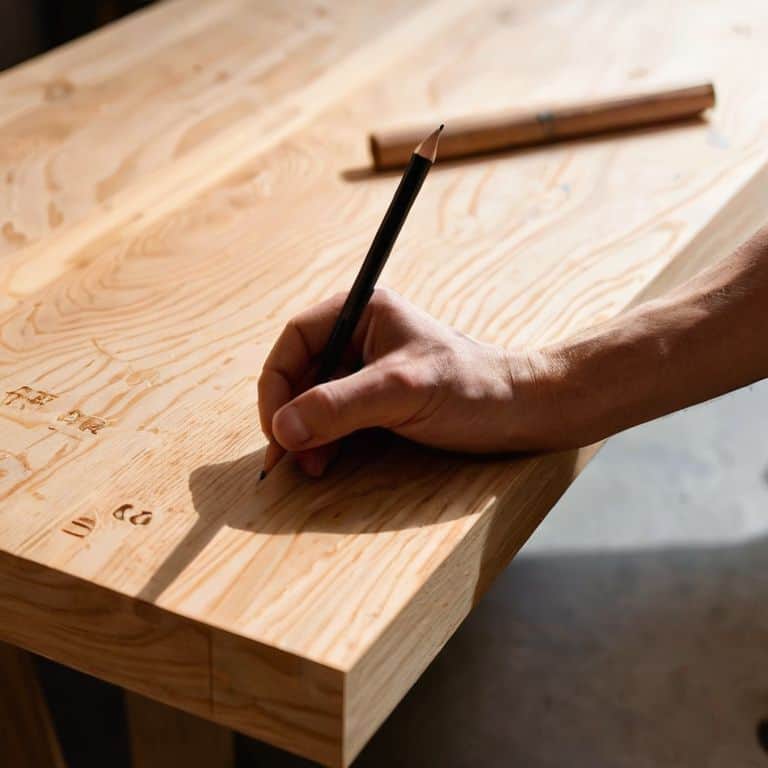
- 2. Next, we need to cut out the top and shelves from our plywood sheet. I use a jigsaw for this, and I always make sure to wear my safety glasses and a dust mask. It’s also important to double-check your measurements before cutting, as this will affect the overall look and stability of your coffee table. I like to think of this step as the foundation of our project, where we start to see our design come to life.
- 3. Now it’s time to assemble the frame. This is where things can get a bit tricky, but don’t worry, with some patience and the right tools, you’ll be just fine. I use a drill press to screw the legs into place, and I make sure everything is square and level. It’s also a good idea to use clamps to hold everything in place while you screw it together.
- 4. With our frame built, it’s time to add the shelves and top. I use a combination of wood glue and screws to attach the shelves, and I make sure they’re evenly spaced and securely attached. The top is where we can get a bit creative, adding a unique edge or design element to make our coffee table really stand out.
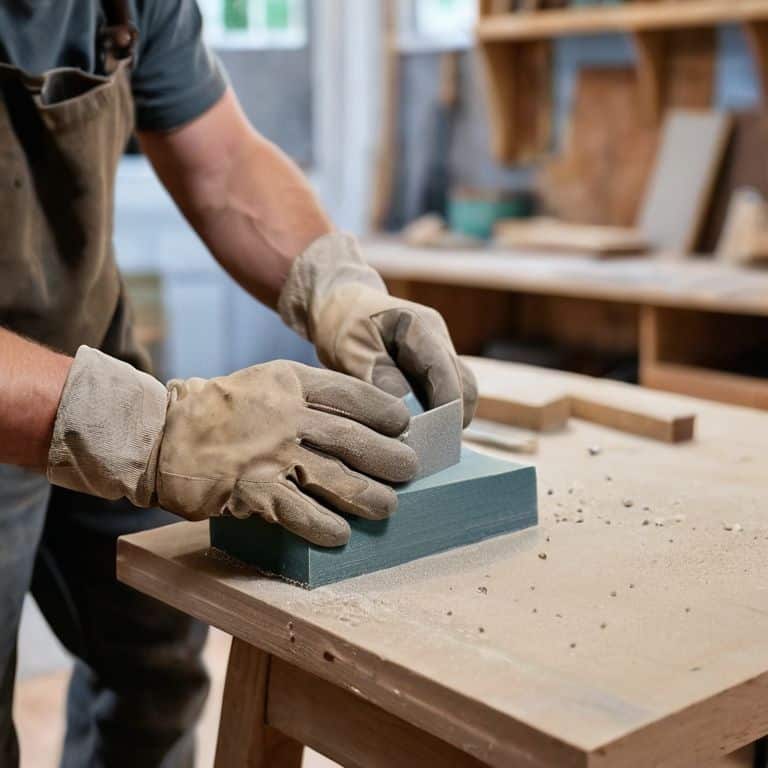
- 5. Next up, we need to sand everything down to a smooth finish. I use a belt sander for the big surfaces and a smaller orbital sander for the edges and corners. This is where our coffee table starts to feel like a real piece of furniture, and it’s amazing how a good sanding can bring out the beauty of the wood.
- 6. Now it’s time to add a finish. I like to use a water-based polyurethane, as it’s easy to apply and dries quickly. I apply a few coats, letting each one dry before adding the next. This will give our coffee table a nice, durable finish that will withstand all the cups of coffee and late-night conversations it will host.
- 7. Finally, it’s time to add the final touches. I like to add some felt pads to the bottom of the legs to protect our floors, and I might add some decorative trim or molding to give our coffee table a bit of extra flair. And that’s it, our modern plywood coffee table is complete, and it’s ready to be the centerpiece of our living room.
Build Your Dream
As we dive into the world of plywood coffee table designs, it’s essential to remember that the fun lies in experimentation. Don’t be afraid to try out new ideas and see what works best for your space. I always say, happy accidents are the best part of the creative process. When it comes to adding the final touches, consider minimalist coffee table decor to keep the focus on the beautiful plywood grain.
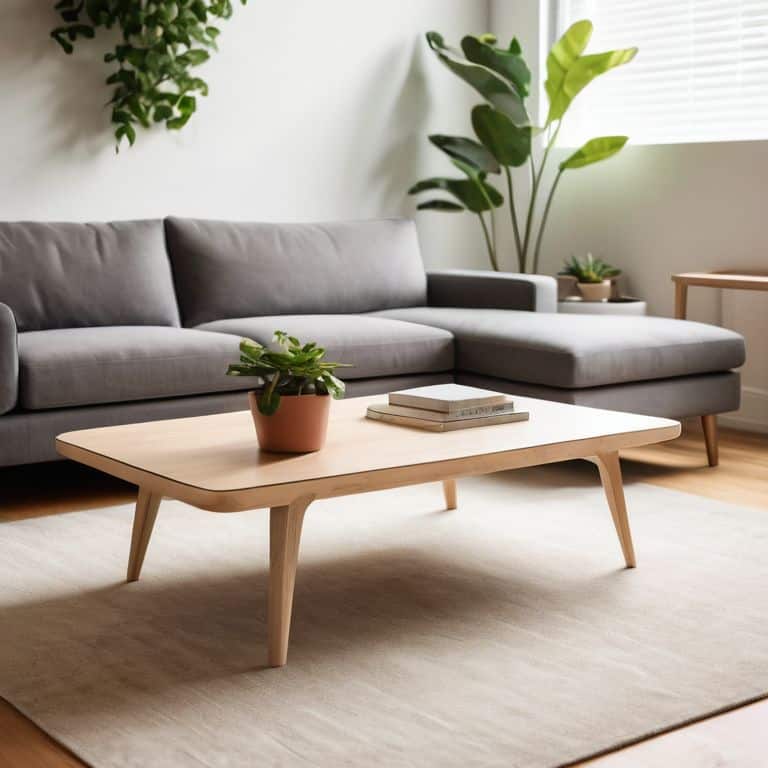
Now, let’s talk about hairpin leg installation tips. This is where things can get a bit tricky, but trust me, it’s worth the extra effort. Make sure to align the legs perfectly and use the right screws to secure them. You don’t want your beautiful coffee table to wobble or, worse, collapse. With a little patience and practice, you’ll be a pro at installing hairpin legs in no time.
As you’re putting the finishing touches on your project, think about plywood finishing techniques that will bring out the natural beauty of the wood. A simple stain or sealant can make all the difference in the world. Remember, the goal is to create a unique piece that reflects your personal style, so don’t be afraid to get creative and try out new things. With these tips and a bit of imagination, you’ll be well on your way to building a one-of-a-kind coffee table that’ll be the envy of all your friends.
Hairpin Leg Installation Tips Inside
Now that we’ve unleashed our creativity with plywood coffee table designs, it’s time to talk about one of my favorite details: hairpin legs. I just love how they add a touch of industrial chic to our project. When it comes to installing them, make sure to measure twice and drill once – you want those legs to be evenly spaced and securely attached. I like to use a template to get the holes perfectly aligned, it saves me from any potential mistakes.
By taking your time with this step, you’ll be rewarded with a sturdy and stylish base that complements your plywood top beautifully. And trust me, it’s all about the little details like this that make our DIY project truly special. So, go ahead and get creative with those hairpin legs – your coffee table will thank you!
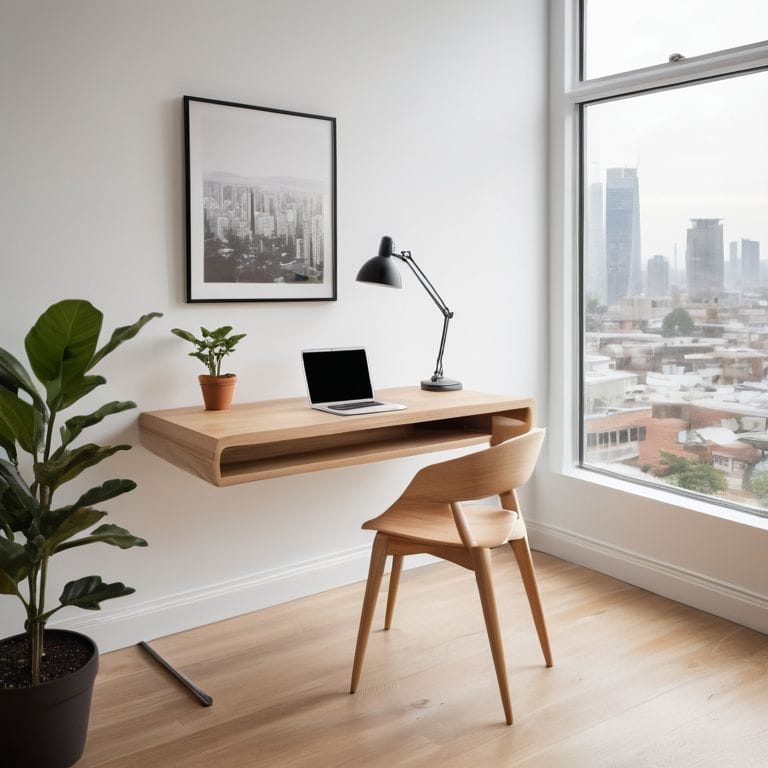
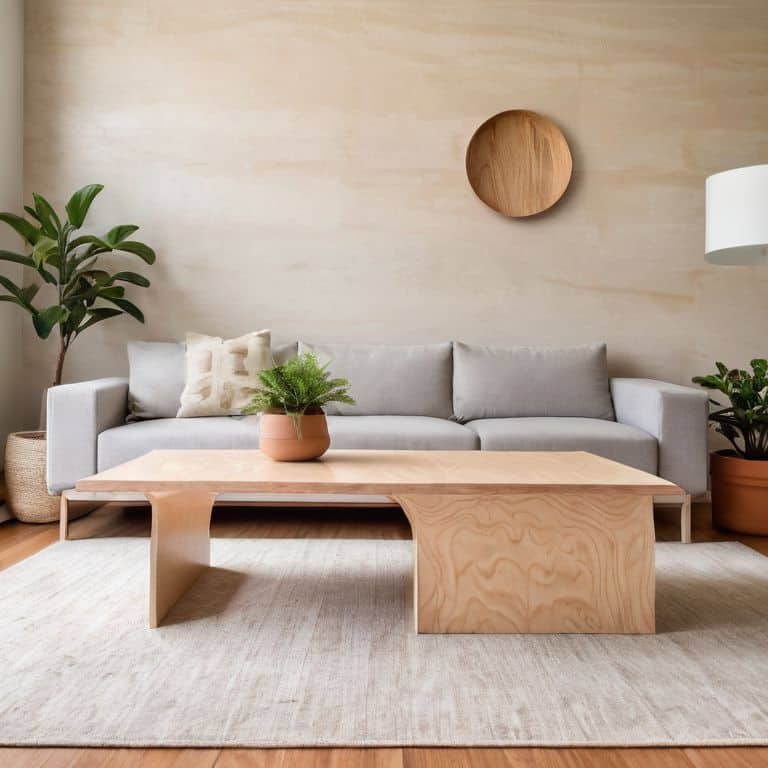
Plywood Coffee Table Designs Unleashed
Now that we’ve got the basics covered, it’s time to unleash your inner designer. Think about the style you want to achieve – modern, rustic, or a fusion of both. Consider the space where your coffee table will live and how you can make it a statement piece. Do you want a sleek, low-profile design or something with more texture and visual interest? Maybe you’re feeling adventurous and want to add some LED lights or a glass top. The possibilities are endless, and I love that about DIY projects – they’re a reflection of your personality. So, don’t be afraid to experiment and try out new ideas. Remember, it’s all about having fun and making something that’s truly yours.
5 Essential Tips to Elevate Your Modern Plywood Coffee Table Game
- Choose the Right Plywood: Don’t be afraid to get creative with the type of plywood you use – from birch to walnut, the right wood can make your table stand out
- Sand, Sand, Baby: Sanding is key to a smooth finish, so don’t skip this step – trust me, your table (and your guests) will thank you
- Measure Twice, Cut Once: Double-check your measurements before cutting your plywood – it’s better to take a little extra time now than to have to restart later
- Add Some Flair with Finishing: A good finish can make or break the look of your table – experiment with different stains, oils, or paints to give your table some personality
- Get Creative with Legs and Hardware: Don’t settle for boring legs or hardware – consider using hairpin legs, metal brackets, or other unique elements to give your table some serious style
Key Takeaways for Your Modern Plywood Coffee Table
Embracing the process and having fun is just as important as the final product – don’t be afraid to make mistakes and learn from them
With the right materials and a bit of creativity, you can turn a simple plywood sheet into a stunning coffee table that reflects your personal style
Remember, the beauty of DIY projects lies in customization, so feel free to experiment with different designs, leg installations, and finishes to make your coffee table truly one-of-a-kind
Building Wisdom
The beauty of making a modern plywood coffee table lies not in the perfection of its edges, but in the imperfections that tell the story of its creation – every scratch, every dent, is a testament to the hands that built it, and the love that went into making it a part of your home.
Franklyn "Frank" Bishop
Conclusion: You're Now a Plywood Master
We’ve covered a lot of ground in this project, from the initial cuts of plywood to the final installation of those sleek hairpin legs. You’ve learned how to bring a design to life with your own hands, and that’s something to be incredibly proud of. Whether you opted for a simple, minimalist look or decided to get creative with your plywood coffee table’s design, the fact remains that you’ve created something truly unique. Don’t forget to celebrate those happy accidents along the way – they often lead to the most interesting and personalized touches.
As you put the finishing touches on your modern plywood coffee table, remember that the real beauty of DIY projects lies not just in the end result, but in the journey itself. It’s about embracing the process, learning from your mistakes, and having fun along the way. So, go ahead and fill that new coffee table with your favorite books, decorations, or snacks, and bask in the satisfaction of knowing you built it with your own two hands. Happy building, and I’ll catch you in the next project!
Frequently Asked Questions
What type of plywood is best suited for a modern coffee table?
Dude, for a modern coffee table, I swear by 3/4-inch thick Baltic Birch plywood! It’s got a sleek, modern look and is super durable. The birch veneer gives it a nice, light finish that’ll make your table pop. Trust me, it’s the perfect choice for a stylish and sturdy coffee table that’ll be the centerpiece of your living room!
How do I achieve a smooth finish on my plywood coffee table?
To get that silky smooth finish, I swear by a combo of sanding and a quality wood finish. Start with a coarse grit, then work your way up to fine. I like to use a water-based polyurethane – it’s easy to apply and dries fast. Plus, it brings out the natural beauty of the plywood!
Can I use alternative leg designs, such as metal or wooden dowels, instead of hairpin legs?
Absolutely, get creative with those legs! Metal or wooden dowels can add a totally different vibe to your coffee table. Just ensure they’re sturdy enough to support the weight. I’ve seen some amazing tables with reclaimed wood dowels or industrial-style metal pipes – the possibilities are endless, and I’m stoked to see what you come up with!