I still remember the first time I built a PC – it was a frustrating experience, to say the least. I had read all the manuals, watched countless YouTube tutorials, but still managed to make some of the most common pc building mistakes to avoid. The “Quick Start Guide” that came with the components was vague, and I ended up spending hours troubleshooting issues that could have been easily prevented. Looking back, I wish someone had told me that building a PC is not just about throwing components together, but about doing it with precision and patience.
In this article, I’ll share my personal experience and expertise to help you steer clear of the most common pitfalls. You’ll learn how to identify and avoid the mistakes that can turn your dream PC into a nightmare. I’ll provide you with practical tips and step-by-step guidance on how to build a PC that meets your needs and exceeds your expectations. By the end of this guide, you’ll be equipped with the knowledge to build a PC like a pro, and you’ll be able to troubleshoot any issues that may arise with confidence. So, let’s get started and explore the common pc building mistakes to avoid, and how to build a PC that you’ll love.
Table of Contents
- Guide Overview: What You'll Need
- Step-by-Step Instructions
- Avoid Common Pc Building Mistakes
- Steering Clear of Trouble: 5 Key Tips for a Smooth PC Building Experience
- Key Takeaways for a Successful PC Build
- Words of Wisdom
- Conclusion: Building Your Dream PC with Confidence
- Frequently Asked Questions
Guide Overview: What You'll Need
Total Time: 1 hour 30 minutes
Estimated Cost: $0 – $100
Difficulty Level: Intermediate
Tools Required
- Torx Driver (for removing CPU cooler screws)
- Thermal Paste (for applying to CPU die)
- Cable Ties (for managing cables)
- Screwdriver (for securing motherboard stand-offs)
- Anti-Static Wrist Strap (for grounding yourself)
Supplies & Materials
- Motherboard Manual (for referencing specifications)
- CPU Cooler (ensure compatibility with CPU socket)
- Memory Modules (check compatibility with motherboard)
- Storage Drive (choose between hard drive or solid state drive)
- Power Supply (calculate wattage requirements for system)
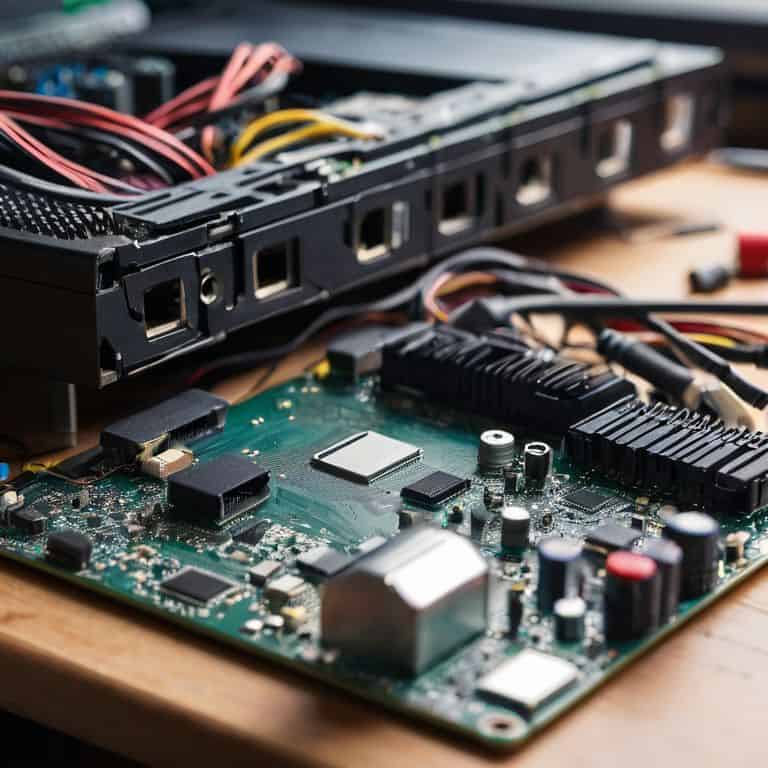
Step-by-Step Instructions
- 1. First, do this: before you even start building your PC, make sure you have all the necessary components. I’ve seen many beginners jump into building their PC without checking if they have all the parts, only to realize halfway through that something is missing. Take a few minutes to double-check your list and ensure you have everything you need, including the CPU, motherboard, RAM, storage, power supply, and graphics card.
- 2. Next, ground yourself to prevent static electricity from damaging your components. Static electricity can be a real problem when building a PC, and it’s essential to take precautions to avoid it. You can ground yourself by touching a metal object or wearing an anti-static wrist strap. This simple step can save you a lot of trouble down the line.
- 3. Now, let’s move on to the CPU installation. This is one of the most critical steps in building a PC, and it’s essential to get it right. Start by carefully removing the CPU from its packaging and aligning it with the socket on the motherboard. Make sure the pins are aligned correctly, and then gently push the CPU into place. Secure it with the socket’s locking mechanism, but be careful not to overtighten.
- 4. After installing the CPU, it’s time to add the memory (RAM). This is a relatively simple step, but it’s still important to get it right. Start by locating the RAM slots on the motherboard and removing any protective covering from the RAM modules. Align the RAM modules with the slots, and then gently push them into place until they click. Make sure they are securely seated and the tabs are fully engaged.
- 5. With the CPU and RAM installed, it’s time to move on to the storage. You have a few options here, including hard drives, solid-state drives (SSDs), and newer technologies like NVMe drives. Regardless of which type you choose, make sure it’s properly connected to the motherboard and secured in the case. If you’re using a hard drive, you’ll also need to connect the power and data cables.
- 6. Next up is the power supply, which is responsible for providing power to all the components in your PC. When choosing a power supply, consider the wattage you need to support all your components. A good rule of thumb is to add up the power requirements of all your components and then choose a power supply that can handle at least that much power. Also, make sure the power supply is compatible with your motherboard and has the necessary connectors for all your components.
- 7. Finally, let’s talk about cable management, which is often overlooked but is essential for keeping your PC running smoothly and quietly. Start by planning out your cable route and using cable ties or zip ties to keep everything organized. This will not only make your PC look cleaner, but it will also improve airflow and reduce the risk of overheating. Take your time and be patient, as good cable management can take some time to get right.
Avoid Common Pc Building Mistakes
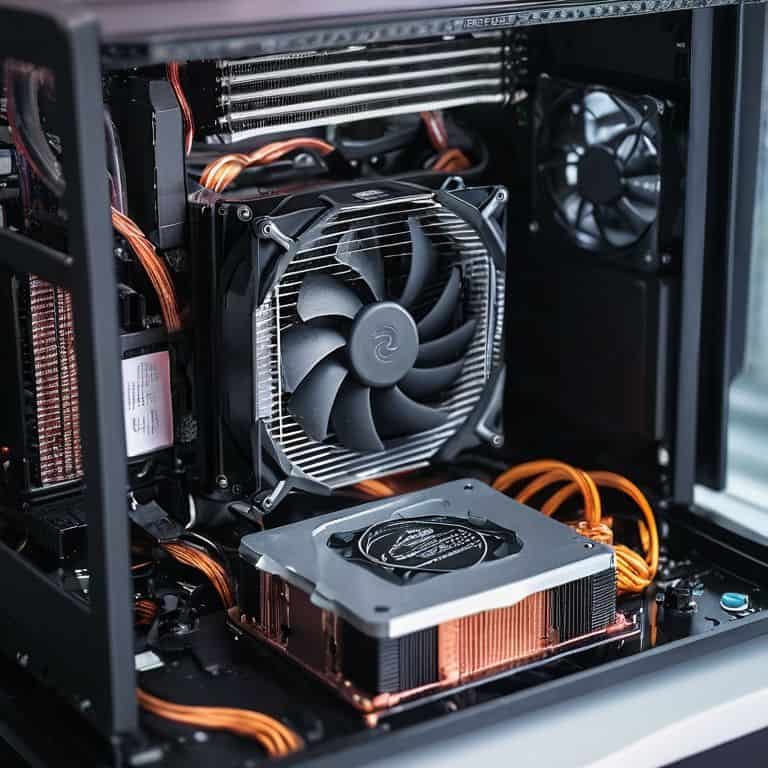
As you work on your PC build, it’s essential to keep overheating prevention tips in mind. A well-ventilated case and a quality cooling system can make all the difference in ensuring your components run smoothly. I always recommend checking the thermal paste on your CPU and making sure all fans are properly connected.
Proper installation is also crucial, especially when it comes to the CPU. Essential pc building tools, such as a torque wrench, can help you avoid damaging the socket or the CPU itself. Take your time, and make sure you’re following the manufacturer’s instructions for proper cpu installation.
For a first-time PC builder, it’s easy to get overwhelmed by all the cables and components. That’s why pc cable organization ideas are so important. Not only do they make your build look cleaner, but they also help improve airflow and reduce the risk of damage from stray cables. By keeping your build organized, you’ll be able to troubleshoot issues more easily and enjoy a more seamless overall experience.
Overheating Prevention Tips Inside
To prevent overheating, it’s crucial to ensure proper airflow within your case. I always recommend installing case fans to circulate air and keep your components at a safe temperature. Additionally, applying a sufficient amount of thermal paste to your CPU and GPU can make a significant difference. Don’t forget to clean dust from your fans and heat sinks regularly, as dust buildup can significantly reduce their effectiveness.
By following these simple tips, you can prevent overheating and prolong the lifespan of your PC’s components. Remember, a well-maintained cooling system is key to a stable and efficient PC. I’ll cover more advanced cooling solutions in future posts, but for now, these basics will get you started on the right foot.
Proper Cpu Installation Made Easy
To ensure a smooth PC building process, proper CPU installation is crucial. I’ve seen many beginners struggle with this step, but it’s actually quite straightforward. First, make sure to handle the CPU by the edges, avoiding any contact with the pins. Next, align the CPU with the socket, taking care to match the notches on the CPU with the tabs on the socket. Gently push the CPU into place, ensuring it’s fully seated.
By following these simple steps, you’ll be able to install your CPU with confidence. Remember to apply a thin, even layer of thermal paste to the CPU die (the top surface) before securing the CPU cooler. This will help maintain optimal temperatures and prevent overheating. With the CPU installed, you’ll be one step closer to bringing your dream PC to life.
Steering Clear of Trouble: 5 Key Tips for a Smooth PC Building Experience
- Insufficiently grounding yourself before handling components can lead to static electricity damage, so make it a habit to touch a grounded metal object or wear an anti-static strap
- Failing to secure cables properly can cause overheating, noise, and even damage to components, so take the time to cable manage your build
- Not updating your motherboard BIOS to the latest version can lead to compatibility issues and poor performance, so be sure to check for updates before installing your operating system
- Using the wrong thermal paste or applying it incorrectly can significantly impact your CPU’s cooling performance, so follow the manufacturer’s instructions carefully
- Rushing through the installation process without double-checking connections and settings can lead to frustrating errors and downtime, so take your time and verify each step before moving on to the next
Key Takeaways for a Successful PC Build
Always prioritize proper component installation, such as the CPU and motherboard, to avoid damage and ensure optimal performance
Implement effective cooling solutions to prevent overheating, including the selection of the right CPU cooler and case fans
Double-check all connections and configurations before powering on your PC for the first time, and don’t hesitate to turn it off and on again if you encounter any issues during the boot process
Words of Wisdom
The biggest mistake most beginners make when building a PC isn’t the mistake itself, but rather not learning from it – every misstep is an opportunity to gain valuable experience and become a better builder.
Leo Maxwell
Conclusion: Building Your Dream PC with Confidence
As we conclude our journey through the common PC building mistakes to avoid, let’s take a moment to reflect on the key takeaways. We’ve covered the importance of proper CPU installation, the need for adequate cooling systems, and the value of creating a detailed checklist to ensure every component is correctly in place. By avoiding these common pitfalls, you’ll not only save time and frustration but also ensure your custom PC runs smoothly and efficiently. Whether you’re a seasoned builder or a novice, remembering to start with the basics and taking your time will make all the difference in the outcome of your project.
Now, as you embark on your PC building adventure, remember that it’s okay to make mistakes – they’re an inevitable part of the learning process. The key is to learn from them and not be discouraged. With patience, persistence, and the right guidance, you can create a custom PC that not only meets but exceeds your expectations. So, don’t be afraid to get creative and try new things – the world of PC building is full of endless possibilities, and with the right mindset, you can achieve anything you set your mind to. Happy building, and I look forward to seeing the amazing creations you’ll come up with!
Frequently Asked Questions
What are some common signs that my PC is overheating and how can I troubleshoot the issue?
Have you tried checking your system temps? Common signs of overheating include random shutdowns, slow performance, and loud fan noise. Try monitoring your CPU and GPU temps with software like HWMonitor or SpeedFan. If they’re excessively high, ensure good airflow, clean dust from your case, and consider reapplying thermal paste to your CPU.
Can I still recover my PC if I've already made a mistake during the building process, such as incorrectly installing the CPU?
Don’t worry, mistakes happen. If you’ve incorrectly installed the CPU, try not to panic. Have you tried turning it off and on again? Seriously, sometimes a simple reboot can resolve issues. If not, we can troubleshoot together. Check your CPU installation against the manual, and let’s go from there. I’ve got a step-by-step guide on my blog to help you recover from common mistakes like this.
How do I know if I've properly grounded myself to prevent static electricity damage to my PC components?
To ensure you’re properly grounded, touch a grounded metal object, like a tap, or wear an anti-static strap. You can also use a grounding mat or clip to keep yourself grounded. A simple trick is to touch the metal part of your PC case before handling components. Remember, static electricity can be silent, so it’s always better to be safe than sorry.