I still remember the first time I tried to build a simple diy rustic coffee table plan – I was a total newbie, and my dad’s old garage was my playground. I had visions of a beautiful, rustic coffee table, but what I ended up with was a wobbly, uneven mess. It was a happy accident, though, because it taught me that making mistakes is all part of the process. Fast forward to today, and I’m excited to share my own simple diy rustic coffee table plan with you, so you can avoid some of the pitfalls I faced.
In this article, I’ll give you the lowdown on building a rustic coffee table that’s both functional and stylish. You’ll get my honest, no-hype advice on how to choose the right materials, prepare your workspace, and bring your vision to life. I’ll walk you through every step of the process, from cutting and assembling the wood to adding the perfect finish. My goal is to make this project fun and accessible, so you can enjoy the process of creating something with your own hands. By the end of this guide, you’ll be equipped with the knowledge and confidence to build a simple diy rustic coffee table plan that you’ll love for years to come.
Table of Contents
- Guide Overview: What You'll Need
- Step-by-Step Instructions
- Simple Rustic Coffee Table Plan
- 5 Killer Tips to Elevate Your Simple DIY Rustic Coffee Table Plan
- Key Takeaways for Your DIY Rustic Coffee Table
- Building Something Real
- Wrapping Up Your Rustic Coffee Table Masterpiece
- Frequently Asked Questions
Guide Overview: What You'll Need
Total Time: 4 hours 30 minutes
Estimated Cost: $100 – $200
Difficulty Level: Intermediate
Tools Required
- Circular Saw (for cutting lumber)
- Drill (with screwdriver and drill bits)
- Sander (for smoothing out wood surfaces)
- Tape Measure (for accurate measurements)
- Clamp (for holding pieces together)
- Level (for ensuring even surfaces)
- Hammer (for tapping pieces into place)
Supplies & Materials
- 2-in x 6-in lumber (for table top and shelf)
- 4-in x 4-in lumber (for legs)
- Wood Screws (2 1/4 inches long)
- Wood Glue
- Wood Filler (for filling gaps and holes)
- Rustic Wood Stain (optional)
- Polyurethane (for protecting the wood surface)
Step-by-Step Instructions
- 1. First, let’s gather our materials and get ready to build this epic rustic coffee table. We’ll need a few basic power tools like a circular saw, a drill press, and a sander, as well as some hand tools like a tape measure, a square, and a pencil. Don’t worry if you don’t have all of these tools – we can always improvise and get creative.
- 2. Next, we need to cut our lumber to the right size. For this project, we’ll be using reclaimed wood for the top and shelves, and regular lumber for the frame. Make sure to wear your safety glasses and a dust mask when cutting, and try to get your cuts as straight as possible. If you’re new to cutting lumber, don’t worry if it’s not perfect – it’s all part of the process.
- 3. Now it’s time to assemble the frame of our coffee table. We’ll be using a simple mortise and tenon joint to attach the legs to the frame, so make sure you have a good understanding of how this joint works. If you’re not comfortable with this type of joint, you can always use a simpler method like screws or nails. The key is to make sure your frame is stable and level.
- 4. With our frame assembled, it’s time to attach the shelves. We’ll be using a combination of wood glue and nails to secure the shelves to the frame, so make sure you have a good supply of both on hand. Don’t worry if your shelves aren’t perfect – a little imperfection can add character to your coffee table.
- 5. Next, we need to add the top to our coffee table. This is where things can get a little tricky, as we need to make sure our top is securely attached to the frame. We’ll be using a combination of wood screws and wood glue to attach the top, so make sure you have a good drill and a lot of patience.
- 6. Now it’s time to sand and finish our coffee table. This is where we can really make our project shine, so don’t be afraid to get a little creative with your finish. We’ll be using a simple polyurethane finish for this project, but you can use anything from stain to paint to make your coffee table truly unique.
- 7. Finally, it’s time to add the final touches to our coffee table. This can include anything from adding decorative trim to attaching metal hardware, so don’t be afraid to think outside the box and come up with something truly unique. With a little patience and practice, you’ll be enjoying your new rustic coffee table in no time.
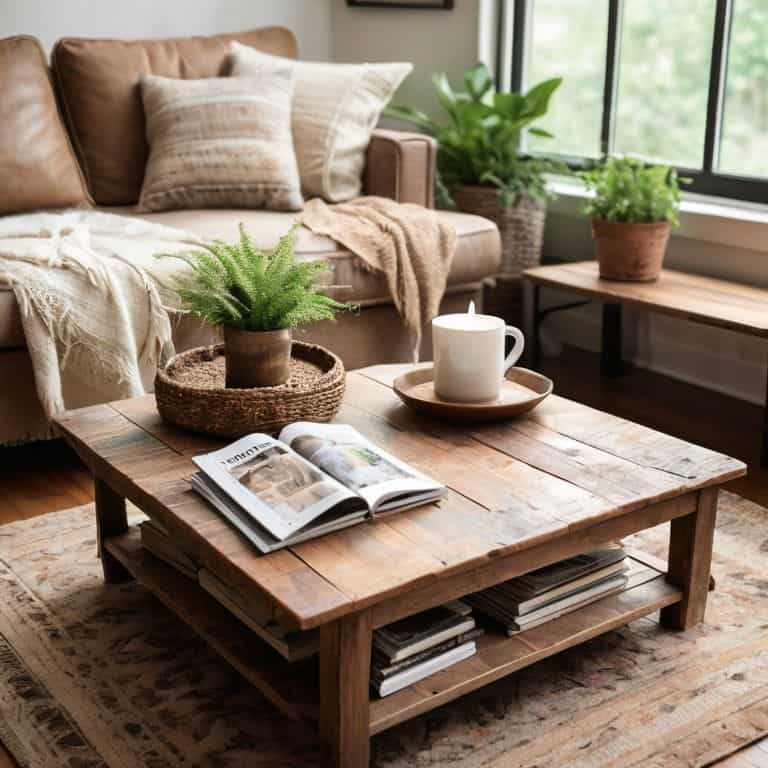
Simple Rustic Coffee Table Plan

As we dive into the world of rustic wood finishing techniques, it’s essential to remember that the beauty of a handmade coffee table lies in its imperfections. When working with reclaimed wood, you’ll often encounter unique characteristics that can add charm to your piece. To enhance the natural beauty of the wood, consider using a combination of sanding and staining techniques. This will help bring out the rich textures and colors of the wood, creating a truly one-of-a-kind piece.
When it comes to adding storage to your coffee table, a diy coffee table with storage can be a game-changer. By incorporating a simple shelf or drawer, you can keep your living room clutter-free while still maintaining a stylish aesthetic. For a more industrial look, consider using coffee table plans with metal legs to add a touch of modernity to your design. This contrast between rustic wood and metal can create a stunning visual effect that’s sure to be a conversation starter.
To take your coffee table to the next level, draw inspiration from farmhouse style decor inspiration. Consider adding decorative metal straps or ornate hardware to give your piece a touch of elegance. By combining these elements with easy woodworking projects for beginners, you can create a beautiful and functional coffee table that reflects your personal style. Remember, the key to a successful DIY project is to have fun and be willing to experiment – happy building!
Diy Coffee Table With Storage Ideas
Now that we’ve got our rustic coffee table foundation laid out, let’s talk about adding some killer storage ideas to take it to the next level. I mean, who doesn’t love a good spot to stash their favorite coffee table books, remotes, or coasters? We can add some rustic crates or baskets underneath for a cozy, homespun vibe. Alternatively, we could incorporate a lift-top storage compartment for a sleeker look. The possibilities are endless, and I’m excited to see how you’ll choose to customize your DIY coffee table with storage!
Rustic Wood Finishing Made Easy
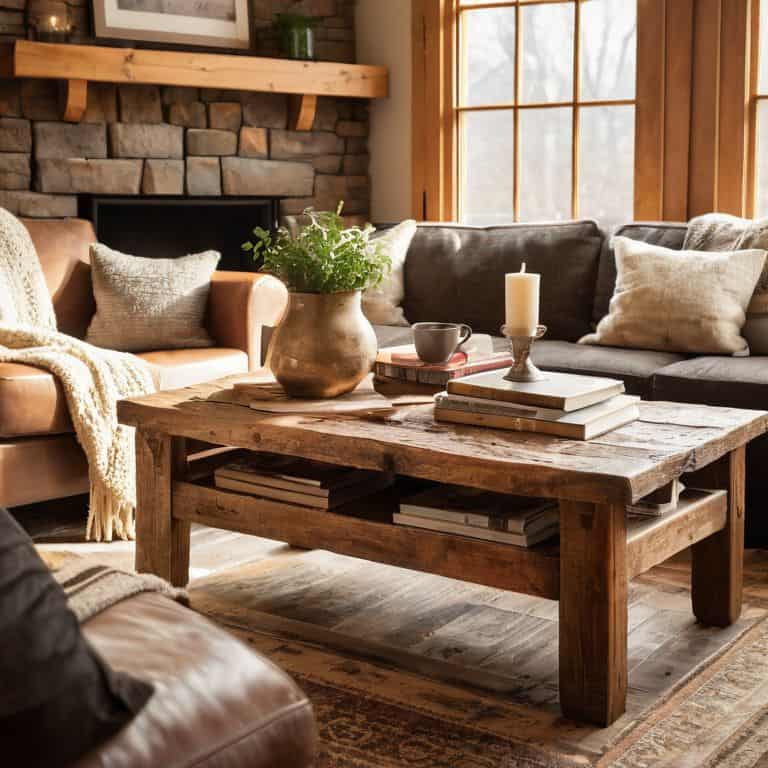
Now that we’ve got our table built, it’s time to give it that perfect rustic finish. I’m a big believer in embracing the imperfections, so don’t worry if it’s not perfect – that’s what makes it charming, right? For my rustic coffee table, I used a mix of sanding and staining to bring out the natural beauty of the wood. I applied a warm, honey-brown stain and let it dry completely before sealing it with a clear coat. The result is a gorgeous, distressed finish that adds tons of character to the table.
To make the finish even more unique, I added some subtle scratches and scuffs – just like it’s been around for years. You can use a variety of techniques to achieve this look, from using steel wool to create a worn effect, to adding a few strategically-placed “distressed” marks with a hammer and chisel. Remember, the key to a great rustic finish is to keep it simple and have fun with it!
5 Killer Tips to Elevate Your Simple DIY Rustic Coffee Table Plan
- Choose the Right Wood: Selecting the perfect type of wood is crucial for a rustic coffee table – consider using reclaimed or distressed wood for a unique, one-of-a-kind look
- Add Some Serious Storage: Incorporate creative storage solutions, like hidden compartments or lift-top shelves, to keep your living room clutter-free and functional
- Don’t Be Afraid to Get Creative with Finishes: Experiment with different stains, paints, or wax finishes to give your coffee table a personalized touch that reflects your style
- Bring in the Metal: Add some industrial chic to your rustic coffee table with metal accents, like hairpin legs or metal straps, for a striking contrast of textures and styles
- Light it Up: Add some warm and cozy ambiance to your living room with built-in LED lights or string lights under your coffee table – it’s a game-changer for movie nights and cozy gatherings
Key Takeaways for Your DIY Rustic Coffee Table
Remember, the beauty of a rustic coffee table lies in its imperfections, so don’t be too hard on yourself if things don’t turn out perfectly – it’s all part of the charm!
With a little creativity, you can turn your DIY coffee table into a functional storage unit, perfect for hiding away coffee table books, remotes, and other living room essentials
Most importantly, have fun with the process and don’t be afraid to experiment with different materials, finishes, and designs until you create a piece that truly reflects your unique style and personality
Building Something Real
A simple DIY rustic coffee table plan isn’t just about following instructions, it’s about unleashing your creativity and turning raw materials into a piece of your story.
Franklyn "Frank" Bishop
Wrapping Up Your Rustic Coffee Table Masterpiece
We’ve covered a lot of ground with our simple DIY rustic coffee table plan, from the initial steps of gathering materials to the final touches of adding a rustic wood finish. The DIY coffee table with storage ideas we explored can really make your project stand out, providing both functionality and a unique aesthetic. Remember, the key to a successful DIY project is not just about following the instructions, but also about embracing the process and having fun with it. Don’t be afraid to experiment and try out new things – it’s often the happy accidents that lead to the most interesting and personalized results.
As you put the finishing touches on your rustic coffee table, take a step back and admire your handiwork. You’ve not only created a beautiful piece of furniture, but you’ve also unleashed your creativity and proven to yourself that you’re capable of bringing your ideas to life. So, go ahead and pour yourself a cup of coffee, sit back, and enjoy the fruits of your labor. And don’t forget to share your project with others – who knows, you might just inspire someone else to start their own DIY journey and discover the joy of creating something with their own hands.
Frequently Asked Questions
What type of wood is best suited for a rustic coffee table?
For a rustic coffee table, I’m all about character-rich woods like reclaimed oak, pine, or cedar. These woods have a natural, worn look that adds to the rustic vibe. You can also consider using pallet wood or barn wood for a more distressed feel. The key is to choose a wood that tells a story!
How do I achieve a distressed finish on my coffee table?
To get that sweet distressed finish, I like to use a combo of sanding, staining, and a little bit of elbow grease. Try using a wire brush to rough up the wood, then apply a stain and wipe it off with a rag to create a unique, worn look. Don’t be afraid to experiment and make some ‘happy accidents’ – it’s all part of the charm!
Can I add a lower shelf or cabinet to my rustic coffee table for extra storage?
Absolutely, let’s add some extra storage to that beauty! A lower shelf or cabinet is a great idea – just think about the size and style you want, and we can make it happen. You can use the same rustic wood and add some decorative brackets for a cool, industrial vibe. I’ll show you some ideas in my next video, so stay tuned!