I still remember the first time I attempted to build my own PC – the frustration, the confusion, and the overwhelming sense of dread when I stared at the step-by-step pc assembly guide that came with the parts. It was like trying to decipher a secret code, and I’m pretty sure I’m not the only one who’s felt that way. The truth is, assembling a PC isn’t rocket science, but it does require a clear, no-nonsense approach that’s often lacking in the guides that come with the hardware.
In this article, I’ll walk you through a step-by-step pc assembly guide that’s designed to be easy to follow, even if you’re a complete beginner. I’ll share my own experiences, tips, and tricks to help you avoid common pitfalls and get your PC up and running in no time. You can expect practical advice and clear explanations, without any technical jargon or confusing terminology. By the end of this guide, you’ll be confident in your ability to build and customize your own PC, and you’ll have a better understanding of how all the components work together to create a powerful and efficient machine.
Table of Contents
- Guide Overview: What You'll Need
- Step-by-Step Instructions
- Your Step by Step Pc Assembly Guide
- Beginner Friendly Motherboard Installation Tips and Tricks
- Choosing the Right Cpu Cooler for Optimal Performance
- 5 Essential Tips for a Smooth PC Assembly Experience
- Key Takeaways for a Successful PC Assembly
- Building Confidence, One Screw at a Time
- Bringing Your Dream PC to Life
- Frequently Asked Questions
Guide Overview: What You'll Need
Total Time: 2 hours 30 minutes
Estimated Cost: $500 – $1000
Difficulty Level: Intermediate
Tools Required
- Screwdrivers (both flathead and Phillips)
- Torx driver (for CPU cooler and motherboard)
- Pliers (for gripping small components)
- Wire cutters and strippers (for cable management)
- Thermal paste applicator (for CPU cooler installation)
Supplies & Materials
- CPU (chosen based on performance needs)
- Motherboard (compatible with chosen CPU)
- RAM (at least 16 GB for most users)
- Storage drive (HDD or SSD, depending on budget and needs)
- Power supply (wattage dependent on system requirements)
- Graphics card (optional, for gaming or graphics-intensive tasks)
- Case (with sufficient space for components and cooling)
- Cooling system (CPU cooler and case fans)
- Operating system (to be installed after assembly)
Step-by-Step Instructions
- 1. First, let’s start with the unboxing and preparation of all the components. This is a crucial step that many people overlook, but trust me, it’s essential to have everything ready before you begin. Take out all the components from their boxes, including the CPU, motherboard, RAM, graphics card, storage drives, and the casing. Make sure you have all the necessary screws, cables, and manuals within reach.
- 2. Next, we need to prepare the casing for the assembly. This involves removing the side panels and any other obstructive elements that might get in the way of our build. Take a moment to familiarize yourself with the casing’s layout and identify where each component will be installed. It’s also a good idea to ground yourself by touching a metal object or wearing an anti-static wrist strap to prevent any damage to the components.
- 3. Now it’s time to install the motherboard stand-offs, which are small metal spacers that elevate the motherboard off the casing. This is a critical step, as it prevents the motherboard from coming into contact with the casing and potentially causing a short circuit. Make sure to screw them in firmly, but avoid overtightening, which can damage the threads.
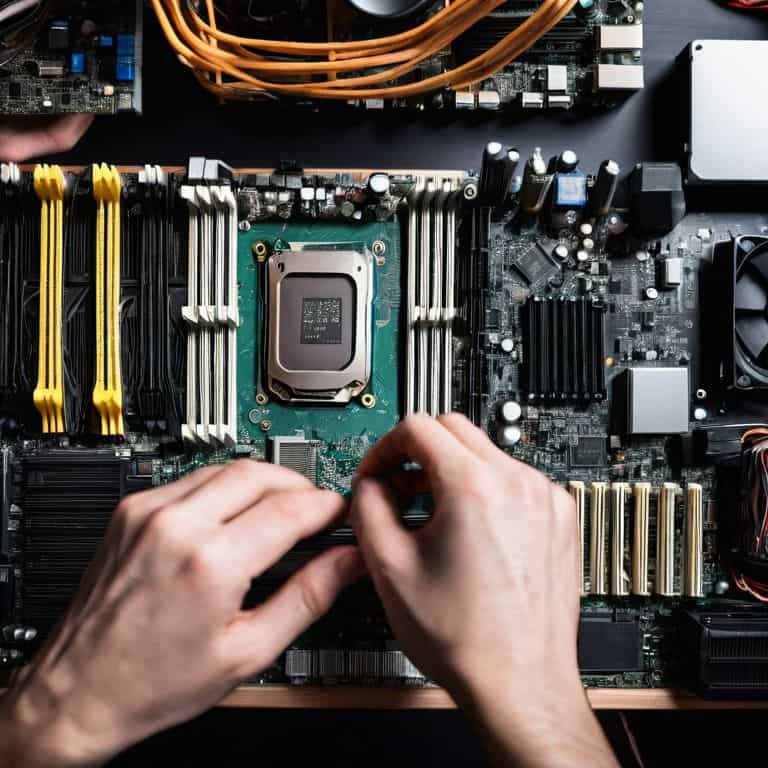
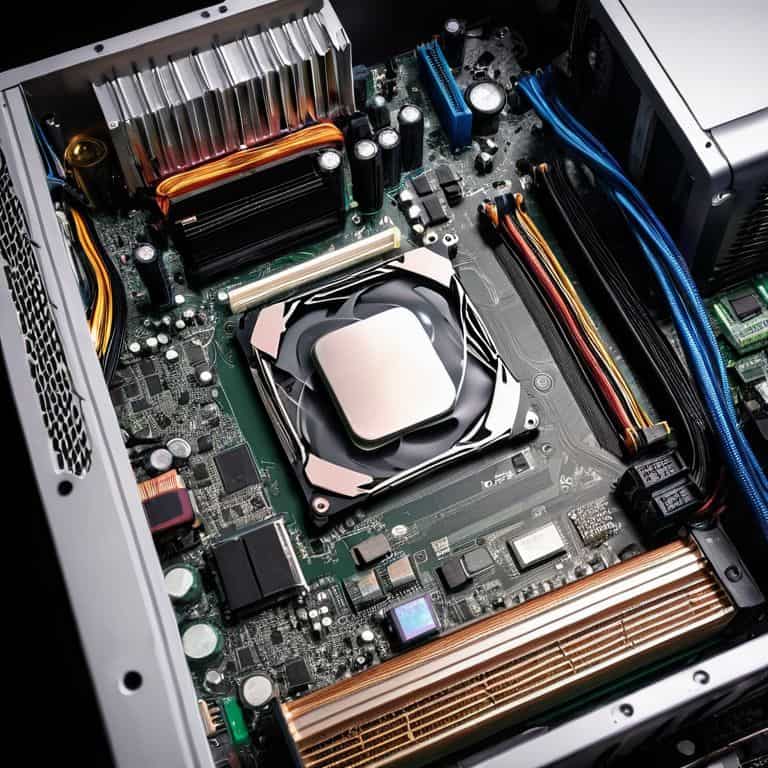
- 4. With the stand-offs in place, we can now install the motherboard. Align it carefully with the stand-offs and gently lower it into position. Ensure that all the screws are securely fastened, but don’t overtighten them at this stage. We’ll come back to this later. Take a moment to connect the power cables to the motherboard, making sure they’re securely attached and won’t come loose during the build.
- 5. The next step is to install the CPU and CPU cooler. This requires a bit of care, as the CPU is a sensitive component. Remove it from its packaging and align it with the socket on the motherboard. Gently push it into place, making sure it’s securely seated. Then, apply a small amount of thermal paste to the CPU die (the top surface) and install the CPU cooler. Tighten the cooler’s screws in a star pattern to ensure even pressure.
- 6. Moving on to the memory installation, we need to identify the RAM slots on the motherboard. These are usually color-coded, so make sure to match the RAM sticks to the correct slots. Gently push the RAM into place, making sure it’s securely seated and the clips are engaged. You should hear a clicking sound when it’s properly installed.
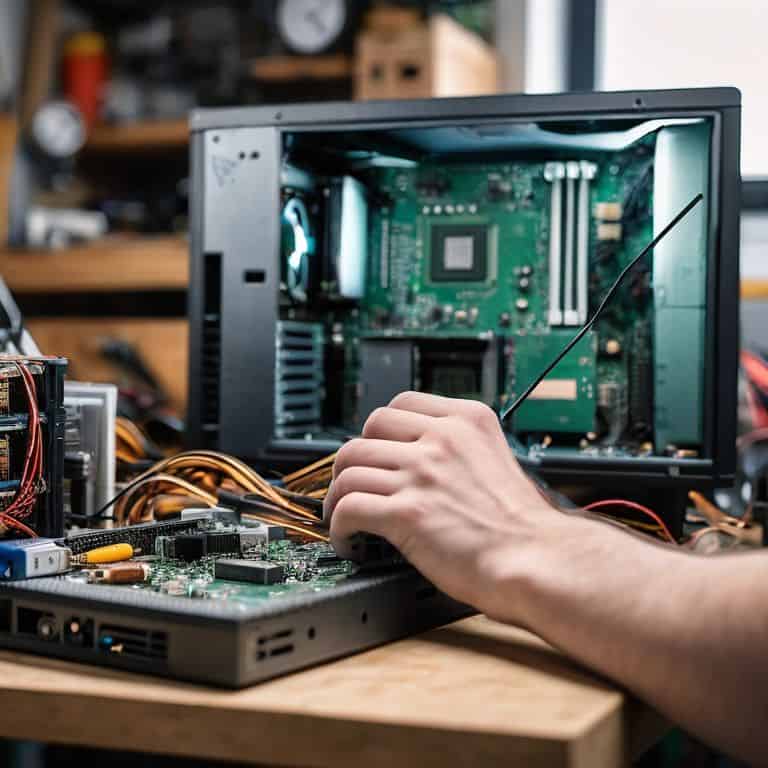
- 7. Now it’s time to install the storage drives, which can be either hard drives or solid-state drives (SSDs). Identify the storage bay in the casing and remove any screws or clips that hold it in place. Install the drive into the bay, making sure it’s securely fastened with screws. Then, connect the SATA cables to the motherboard and the drive. Make sure they’re securely attached and won’t come loose during the build.
- 8. The final step is to connect all the front panel headers to the motherboard. These include the power button, reset button, and LED indicators. Consult your motherboard manual to identify the correct headers and connect them accordingly. It’s also a good idea to connect any case fans to the motherboard or a fan controller. With all the components installed and connected, we can now power on the system and test it to ensure everything is working as expected.
Your Step by Step Pc Assembly Guide
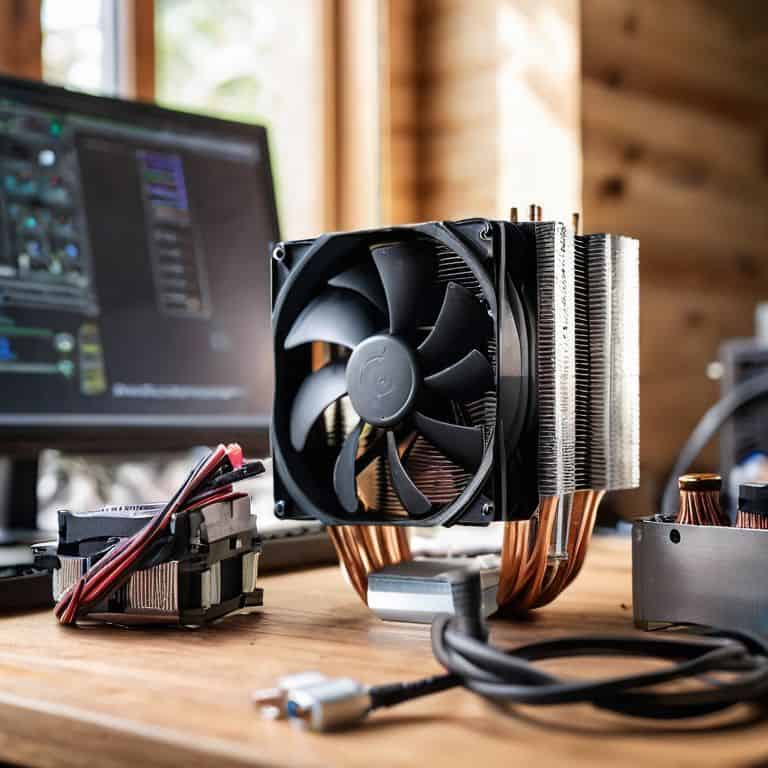
As you work through the assembly process, it’s essential to consider choosing the right cpu cooler for your system. This component plays a critical role in maintaining optimal temperatures and ensuring your PC runs smoothly. When selecting a CPU cooler, think about the size of your case and the type of cooling system you prefer – air or liquid.
Another crucial aspect of PC assembly is optimizing pc airflow. Proper airflow helps to keep your components at a safe temperature, which can improve performance and extend the lifespan of your system. To achieve this, ensure that your case has adequate ventilation and that you’ve installed fans in a way that creates a smooth flow of air through the system.
When it comes to tips for proper cable routing, it’s all about keeping your build organized and tidy. Not only does this make your PC look more professional, but it also helps to improve airflow and reduce the risk of damage to your components. Take your time when routing cables, and consider using cable ties or zip ties to keep everything in place.
Beginner Friendly Motherboard Installation Tips and Tricks
When it comes to installing your motherboard, I’ve got some beginner-friendly tips to make the process a breeze. First, ensure the mounting holes on the motherboard align with the stand-offs on the case. Gently lower the motherboard into place, making sure not to touch any of the components. I like to use a grounding strap to prevent static electricity from damaging my gear.
Take your time and carefully secure the motherboard with screws, tightening them in a star pattern to avoid warping the board. Don’t overtighten, as this can damage the motherboard or the case. With these simple steps, you’ll be well on your way to a successful installation.
Choosing the Right Cpu Cooler for Optimal Performance
When it comes to choosing the right CPU cooler, it’s essential to consider a few key factors. First, think about the type of cooling you need – air or liquid. Air coolers are generally easier to install and maintain, while liquid coolers offer superior performance. I always recommend checking the compatibility of the cooler with your CPU socket and motherboard.
For optimal performance, look for a cooler with a high thermal dissipation rate and a low noise level. Have you considered the size of your case and the space available for the cooler? These are crucial factors to ensure a smooth and efficient cooling system.
5 Essential Tips for a Smooth PC Assembly Experience
- Ground yourself to prevent static electricity damage to your components by touching a grounded metal object or wearing an anti-static strap
- Handle components by the edges to avoid touching sensitive parts and causing damage
- Use a torx screwdriver for removing the CPU cooler and motherboard stand-offs to avoid stripping the screws
- Apply a thin, even layer of thermal paste to the CPU die (the top surface) for optimal heat transfer to the cooler
- Double-check your cable management to ensure all cables are securely connected and tied back to improve airflow and reduce dust accumulation
Key Takeaways for a Successful PC Assembly
Always start by preparing a well-ventilated, static-free workspace and gather all the necessary components and tools before beginning the assembly process
Selecting the right CPU cooler and installing the motherboard correctly are crucial steps that require patience and attention to detail to ensure optimal performance and prevent damage to the components
Remember to handle each component with care, follow the step-by-step guide, and don’t hesitate to consult online resources or seek help if you’re unsure about any part of the process to guarantee a successful and enjoyable PC assembly experience
Building Confidence, One Screw at a Time
The journey to your dream PC isn’t about the specs; it’s about the sense of accomplishment you feel when you turn it on for the first time, knowing you built it with your own hands, one careful step at a time.
Leo Maxwell
Bringing Your Dream PC to Life
You’ve made it through the step-by-step pc assembly guide, and by now, you should have a good grasp of how to bring your dream PC to life. From choosing the right CPU cooler for optimal performance to mastering the art of motherboard installation, we’ve covered it all. The key to a successful assembly is not just about following instructions, but also about understanding the why behind each step. By taking the time to learn about each component and how they work together, you’ll be better equipped to troubleshoot any issues that may arise and make informed decisions about future upgrades.
As you plug in your new PC and watch it roar to life, remember that the sense of accomplishment you feel is not just about the end result, but about the journey itself. Building a PC is a rewarding experience that can help you develop a deeper understanding of technology and give you the confidence to tackle even more complex projects. So, don’t be afraid to experiment, try new things, and push the limits of what your PC can do. With the right mindset and a bit of patience, you’ll be unleashing your creativity and achieving great things in no time.
Frequently Asked Questions
What are the essential tools I need to have before starting the PC assembly process?
Before we dive in, let’s make sure you’ve got the essentials covered. For PC assembly, you’ll need a trusty screwdriver set, torx drivers, pliers, and a can of compressed air. I also recommend a grounding strap to prevent static damage. Don’t worry, I’ve got a detailed checklist on my blog if you need it!
How do I handle static electricity when installing sensitive components like the CPU and RAM?
Static electricity can be a real concern when handling sensitive components. To minimize the risk, touch a grounded metal object or wear an anti-static strap to discharge any static electricity from your body. I also recommend working on a static-dissipative surface, like an anti-static mat, to keep your components safe.
What are some common mistakes to avoid during the motherboard installation step to prevent damage to the components?
When installing the motherboard, beware of static electricity, improper alignment, and overtightening screws. Ground yourself, match the mounting holes carefully, and snug the screws in a star pattern to avoid damage. Have you tried checking the manual for specific torque specs? I always make a detailed checklist to ensure a smooth installation.