I still remember the first time I attempted to make a pie crust from scratch – it was a disaster. I had heard that to make a perfect flaky pie crust, you need to keep your ingredients cold and handle the dough as little as possible. But no matter how hard I tried, my crust always ended up tough and dense. It wasn’t until I started working as a recipe tester that I discovered the secret to a truly flaky crust. The key is not just about keeping things cold, but about understanding the science behind the layering process that occurs when you combine ingredients like butter and flour. If you’re struggling to achieve that perfect, tender crust, you’re not alone – and that’s why I’m excited to share my expertise on how to make a perfect flaky pie crust.
In this article, I’ll take you through a step-by-step guide on how to make a perfect flaky pie crust, from the initial preparation of your ingredients to the final rolling out of the dough. You’ll learn the importance of mise en place, how to create the perfect balance of fat and flour, and the simple tricks that will make your crust unfailingly flaky. My goal is to empower you with the knowledge and confidence to create a beautiful, delicious pie crust that will impress your friends and family. By the end of this guide, you’ll be equipped with the skills to make a perfect, flaky pie crust every time – and that’s a promise.
Table of Contents
Guide Overview: What You'll Need
Total Time: 2 hours 30 minutes
Estimated Cost: $10 – $20
Difficulty Level: Intermediate
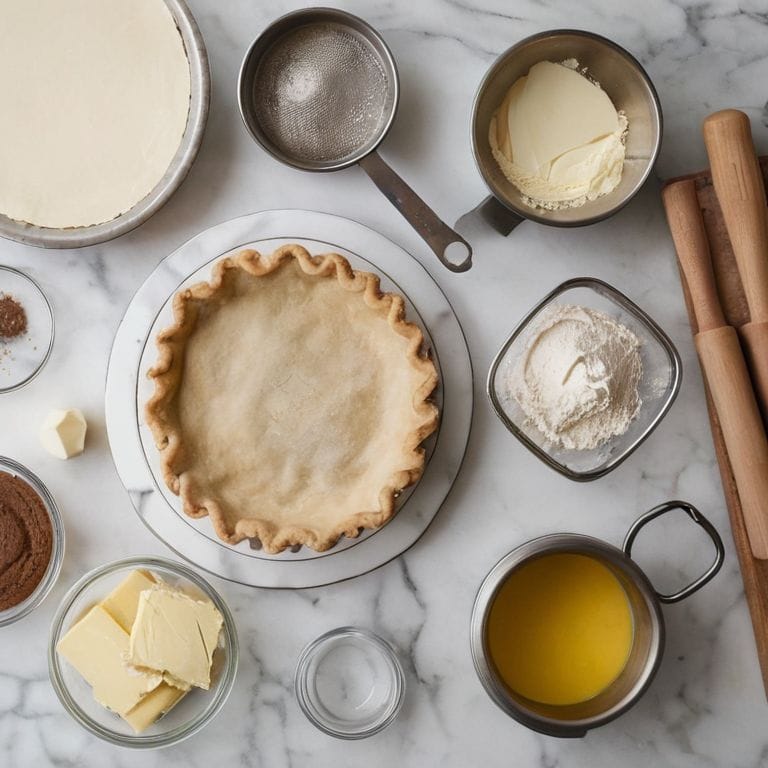
Tools Required
- Pastry Blender (or food processor)
- Rolling Pin (at least 10 inches long)
- Measuring Cups (dry and liquid)
- Measuring Spoons
- Lightly Floured Surface (for rolling out dough, approximately 2 feet by 2 feet)
Supplies & Materials
- All-Purpose Flour (2 1/4 cups)
- Cold Unsalted Butter (1 cup, cut into small pieces)
- Ice Water (1/2 cup, or as needed)
- Salt (1 teaspoon)
- Egg (beaten, for egg wash, optional)
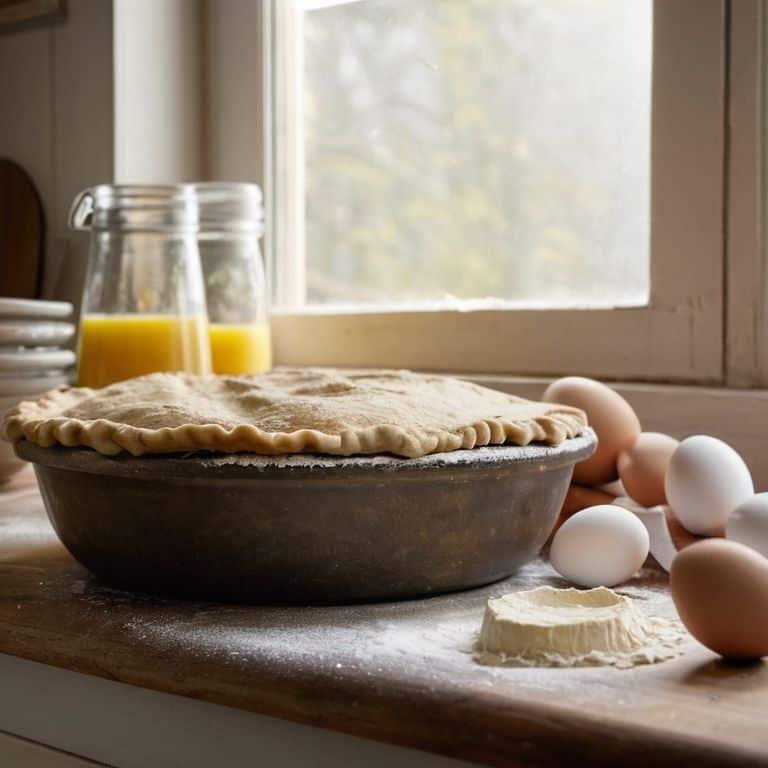
Step-by-Step Instructions
- 1. First, let’s start with the foundation of a perfect flaky pie crust: cold ingredients. Make sure your butter is chilled in the refrigerator overnight, and your water is ice-cold. This will help you achieve the desired flakiness in your crust. To begin, preheat your kitchen by taking out all the necessary ingredients and equipment, including a large mixing bowl, a pastry blender, and a rolling pin.
- 2. Next, in a large mixing bowl, combine 2 1/4 cups of all-purpose flour, 1 teaspoon of salt, and 1/2 cup of cold unsalted butter. Use a pastry blender or your fingertips to work the butter into the flour until the mixture resembles coarse crumbs with some larger pea-sized pieces of butter remaining. This step is crucial, as it will help create the layers in your pie crust.
- 3. Now, it’s time to add the liquid ingredients to the mixture. Gradually pour in 1/4 cup of ice-cold water while gently stirring the mixture with a fork. Be careful not to overmix, as this can lead to a tough crust. Stop adding water when the dough starts to come together in a shaggy mass. You may not need to use all of the water, so add it slowly and be prepared to stop at any moment.
- 4. Turn the dough out onto a lightly floured surface and gently knead it a few times until it becomes smooth and pliable. Be careful not to overwork the dough, as this can cause the gluten to develop, leading to a tough crust. You can also use a stand mixer with a dough hook attachment to knead the dough, but be sure to stop the mixer as soon as the dough comes together.
- 5. Divide the dough in half and shape each half into a disc. Wrap each disc in plastic wrap and refrigerate for at least 30 minutes to allow the gluten to relax. This step is essential, as it will make the dough easier to roll out and help you achieve a more even texture in your crust.
- 6. On a lightly floured surface, roll out one of the chilled dough discs to a thickness of about 1/8 inch. Use a rolling pin to achieve an even thickness and to help you distribute the butter evenly throughout the dough. As you roll, rotate the dough 90 degrees every few rolls to ensure it doesn’t become misshapen.
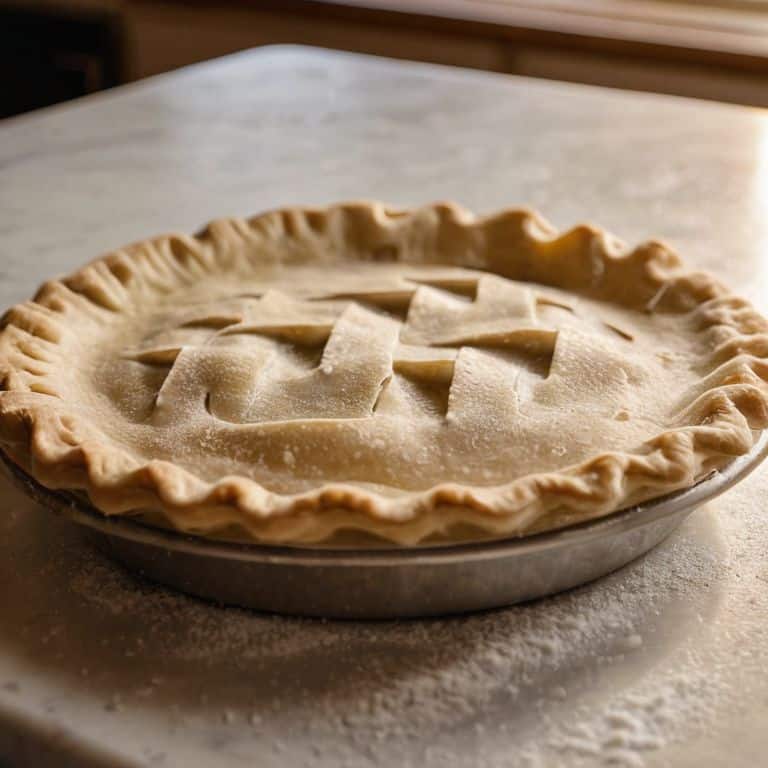
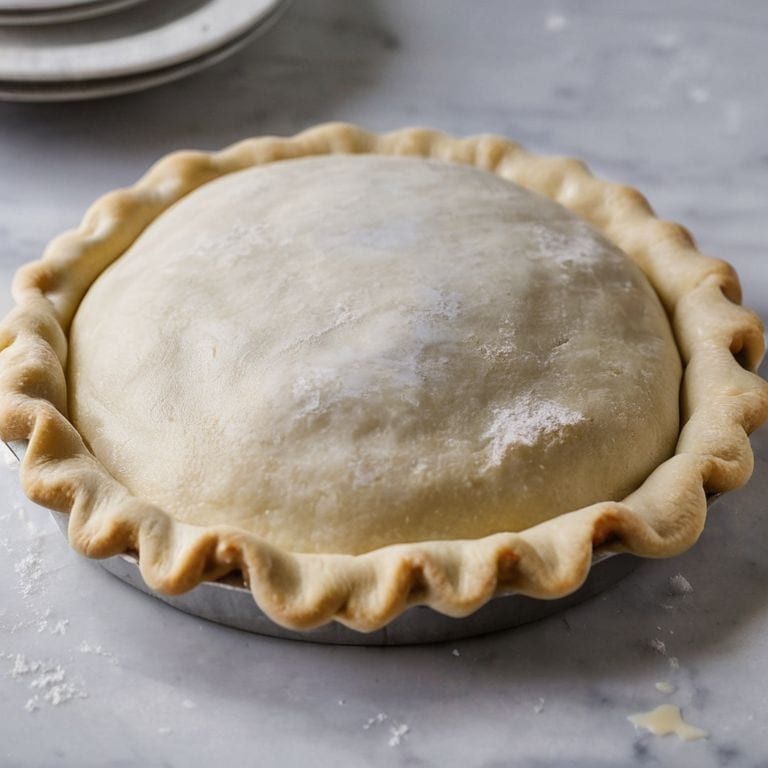
- 7. Once you’ve achieved the desired thickness, use a pastry brush to remove any excess flour from the surface of the dough. Then, carefully transfer the dough to a 9-inch pie dish, gently pressing it into the bottom and up the sides of the dish. Use a knife or a pair of kitchen shears to trim the edges of the crust, leaving about 1/2 inch of overhang. Fold the overhang under itself to create a fluted edge, and crimp the edge to seal the crust.
- 8. Use a fork to prick the bottom of the crust, which will help prevent it from bubbling up during baking. Then, line the crust with parchment paper and fill it with pie weights or dried beans. This will help the crust hold its shape while it bakes.
- 9. Bake the crust in a preheated oven at 375°F (190°C) for 15 minutes, then remove the parchment paper and pie weights or beans. Return the crust to the oven and bake for an additional 5-10 minutes, or until it’s golden brown. Remove the crust from the oven and let it cool completely on a wire rack before filling and serving.
Cracking the Flaky Code
As I delved deeper into the world of flaky pie crusts, I discovered that chilling pie dough techniques play a crucial role in achieving the perfect layers. It’s essential to allow the dough to rest and relax, enabling the gluten to unwind and the butter to firm up. This step is often overlooked, but trust me, it’s a game-changer. By giving your dough the time it needs to chill, you’ll be rewarded with a crust that’s both tender and flaky.
When it comes to choosing the right fat for your pie crust, the debate between lard vs butter can be overwhelming. As a firm believer in the power of an all butter pie crust recipe, I can attest that the richness and flavor it provides are unparalleled. However, it’s crucial to keep in mind that using only butter can make the crust more prone to shrinking. To combat this, make sure to roll out the pie crust evenly and gently, using long, smooth strokes to coax it into shape.
To ensure your crust turns out perfectly, it’s also important to consider blind baking pie crust methods. This technique involves pre-baking the crust without filling, allowing it to set and become crispy before adding your desired filling. By mastering this step, you’ll be able to achieve a crust that’s both flaky and sturdy, providing a beautiful foundation for your favorite pies.
Butter vs Lard the Crust Conundrum
When it comes to creating a flaky pie crust, the type of fat used can make all the difference. I’ve experimented with both butter and lard, and I’m excited to share my findings with you. Butter, with its higher water content, can lead to a more tender crust, but it can also make the dough more prone to shrinking.
On the other hand, lard produces a flakier, more tender crust, with a more delicate texture. After meticulous testing, I’ve found that a combination of both – using butter for flavor and lard for flakiness – yields the perfect crust. This harmonious blend allows for a delicate balance of flavor and texture, making your pie crust truly unforgettable.
Chilling Secrets for Perfect Dough
Now that we’ve cracked the code to achieving flaky layers, let’s dive into the chilling secrets that’ll take your pie crust to the next level. I’m a firm believer that a well-chilled dough is the key to a tender, flaky crust. When you chill your dough, the gluten in the flour relaxes, making it easier to roll out and reducing the likelihood of it shrinking in the oven.
By keeping your dough chilled, you’ll also help the butter to stay solid, which is essential for creating those beautiful, flaky layers. I like to chill my dough for at least 30 minutes, but the longer, the better – overnight is even more ideal. This simple step will make all the difference in the world, trust me, it’s worth the wait!
Flaky Pie Crusade: 5 Essential Tips to Unleash the Perfect Crust
- Keep Your Ingredients Ice-Cold: Chill your butter, lard, and even flour in the fridge before starting to ensure the dough comes together smoothly and evenly
- Mind the Mixing: Don’t overwork the dough – mix wet and dry ingredients separately and gently fold them together to preserve the delicate layers of butter and dough
- Choose the Right Fat: Decide between butter and lard based on the flavor profile you’re aiming for, and make sure to use high-quality, European-style butter for the best results
- Resting is Key: Let your dough rest for at least 30 minutes to allow the gluten to relax, making it easier to roll out and reducing the likelihood of shrinkage
- Roll with the Right Touch: Use long, gentle strokes to roll out your dough, applying even pressure to ensure uniform thickness and a beautiful, flaky texture
Key Takeaways for a Perfect Flaky Pie Crust
Chill your ingredients and equipment to ensure the butter remains solid, creating a flakier crust
Choose the right fat: while both butter and lard produce excellent results, butter offers a richer flavor and lard a flakier texture
Master the art of layering: gentle folding and strategic rolling will help you achieve the tender, buttery layers that define a truly exceptional pie crust
The Flaky Pie Crust Philosophy
A perfect flaky pie crust is not just about the ingredients or the technique, but about the patience and love you bring to the process – it’s the tender touch, the gentle folds, and the willingness to let it rest, just like a good story unfolding, one layer at a time.
Julia Ashwood
The Perfect Crust Awaits
As we conclude our journey to creating the perfect flaky pie crust, let’s recap the essential elements that make it all come together. From the initial step-by-step instructions to understanding the science behind chilling secrets and the butter vs lard debate, each component plays a crucial role in achieving that tender, flaky texture we all adore. Remember, the key to success lies in meticulous preparation, or as I like to call it, mise en place, ensuring that every ingredient is measured and ready to go before you begin.
Now, as you embark on your own pie-making adventures, I want to leave you with a final thought: the pursuit of the perfect flaky pie crust is not just about following a recipe, but about embracing the process. It’s about the joy of creation, the satisfaction of watching your loved ones savor each bite, and the pride in knowing you’ve mastered a skill that will be passed down for generations. So, don’t be afraid to experiment, to try new things, and to make this journey your own. Happy baking!
Frequently Asked Questions
What's the ideal temperature for chilling the dough to achieve the perfect flaky layers?
For that perfect chill, I swear by the fridge at 39°F (4°C). It’s the sweet spot where the butter firms up, and the dough relaxes, making it a breeze to roll out. Trust me, this temperature is key to achieving those tender, flaky layers we all adore!
Can I use a combination of butter and lard for an extra-flaky crust, and if so, what's the best ratio?
For an ultra-flaky crust, I swear by a combination of butter and lard. My go-to ratio is 75% butter to 25% lard – this blend yields a tender, layered crust with a rich flavor. Feel free to experiment, but start with this ratio for a show-stopping pie!
How do I know if I've overworked the dough, and what are the consequences for my pie crust's texture?
Overworking the dough is a common pitfall – it leads to a tough, dense crust. To avoid it, watch for signs like a smooth, shiny surface or a dough that’s starting to feel stiff and rigid. If you’ve overworked it, your crust may end up more like a cracker than a flaky masterpiece.