I still remember the day I found that gorgeous vintage brass chandelier at a flea market – it was love at first sight, but it was also a hot mess. As I delved into the world of a guide to cleaning and restoring brass decor, I realized that most people believe it’s a daunting task that requires a lot of expensive cleaning solutions and professional help. But the truth is, with a little patience and the right techniques, you can bring those stunning brass pieces back to life without breaking the bank. My partner and I have been working on restoring our old, quirky house, and I’ve learned that it’s all about embracing the imperfections and telling a story with each room.
In this article, I’ll share my personal experience and no-nonsense advice on how to clean and restore brass decor, from removing tarnish to polishing it to perfection. You’ll learn how to identify different types of brass, choose the right cleaning materials, and avoid common mistakes that can damage your precious pieces. Whether you’re a seasoned DIY enthusiast or a beginner, this guide is designed to be your go-to resource for transforming your space with beautiful, restored brass decor. So, let’s get started on this creative adventure together and make your home tell a unique story that reflects your personality!
Table of Contents
- Guide Overview: What You'll Need
- Step-by-Step Instructions
- A Guide to Cleaning and Restoring Brass Decor
- Brass Brilliance: 5 Tips to Unlock Your Decor's Hidden Glow
- Brass Restoration Essentials to Remember
- Bringing Brass to Life
- Bringing Brass Back to Life: A Journey of Restoration
- Frequently Asked Questions
Guide Overview: What You'll Need
Total Time: 1 hour 30 minutes
Estimated Cost: $10 – $30
Difficulty Level: Easy
Tools Required
- Soft-bristled toothbrush (for intricate designs)
- Soft cloth (microfiber or cotton)
- Gloves (optional, for protection)
- Mask (optional, for protection)
Supplies & Materials
- Brass cleaner or polish (choose a suitable type for your decor)
- Baking soda (for homemade cleaning paste)
- White vinegar (for homemade cleaning solution)
- Water (warm, for rinsing)
- Metal polish (for high-shine finish, optional)
Step-by-Step Instructions
- 1. First, let’s gather our supplies, shall we? We’ll need some warm water, a mild dish soap, a soft-bristled toothbrush, a microfiber cloth, and some white vinegar. I like to think of this step as the pre-game show for our brass restoration adventure.
- 2. Next, we’ll want to give our brass pieces a good initial cleaning. Dip your microfiber cloth into the soapy water, wring it out thoroughly, and gently wipe down each piece to remove any loose dirt or debris. This is where the magic starts to happen, and we begin to uncover the beauty beneath.
- 3. Now it’s time to get a little more aggressive with our cleaning. Mix equal parts water and white vinegar in a bowl, and soak your brass pieces for about 30 minutes. This will help loosen any tough grime or tarnish. While we wait, let’s take a moment to appreciate the history behind these pieces – the stories they could tell, the hands they’ve passed through.
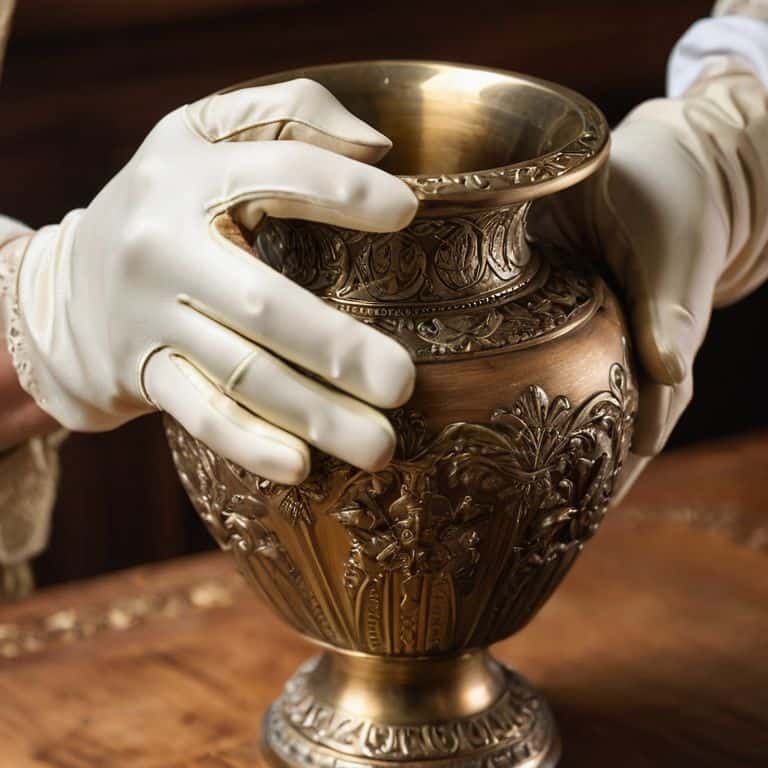
- 4. After our pieces have soaked, it’s time to bring out the big guns: barkeepers friend. This gentle yet effective cleanser is a game-changer for removing tarnish and grime. Apply a small amount to your soft-bristled toothbrush, and gently scrub away any remaining tough spots.
- 5. With our brass pieces now free from grime, it’s time to polish them to perfection. Using a clean, dry microfiber cloth, apply a small amount of brass polish and rub it in using circular motions. Be sure to follow the instructions on the polish for any specific application guidelines. As we work, I like to imagine the before-and-after photos we’ll take to showcase our handiwork.
- 6. For any particularly delicate or intricate pieces, we may need to use a Q-tip or small brush to apply the polish and get into tight spaces. This is where patience and attention to detail really pay off – taking our time to ensure every nook and cranny is polished to perfection.
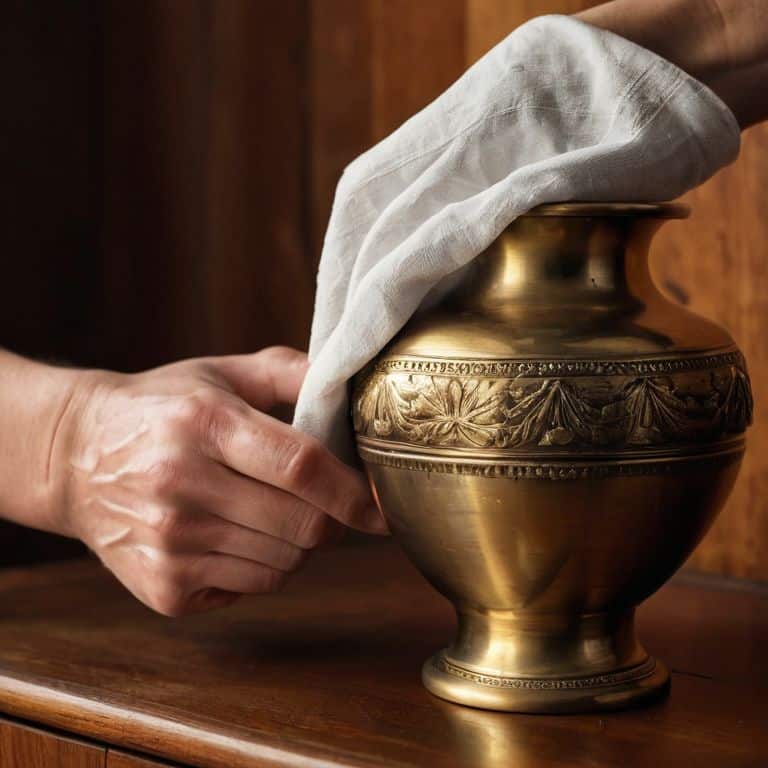
- 7. Finally, let’s seal the deal with a clear wax or lacquer to protect our newly restored brass pieces from future tarnishing. Apply a small amount to a clean cloth, and gently rub it into the metal using circular motions. As we step back to admire our handiwork, I hope you’ll feel the same sense of pride and accomplishment that I do – knowing we’ve brought these beautiful pieces back to life, and given them a new story to tell.
A Guide to Cleaning and Restoring Brass Decor
As I delve into the world of brass restoration, I’ve discovered that restoring brass hardware is an art that requires patience and attention to detail. It’s amazing how a simple cleaning and polishing process can transform a vintage piece into a stunning work of art. I’ve had my fair share of thrift store finds, and I can attest that refurbishing thrift store brass finds can be a fun and rewarding experience.
When it comes to cleaning vintage brass fixtures, it’s essential to use the right techniques to avoid damaging the material. I’ve learned that brass polishing techniques can vary depending on the type of brass and the level of tarnish. For instance, using a gentle polish can help remove tarnish from brass without scratching the surface. It’s also crucial to protecting brass from corrosion by applying a clear coat or wax after polishing.
To take your brass restoration project to the next level, consider experimenting with different polishing methods and materials. You can find plenty of tutorials and tips online, or you can join a community of DIY enthusiasts who share their experiences and advice on removing tarnish from brass. Remember, the key to achieving a beautiful finish is to work slowly and carefully, allowing each layer to dry before applying the next. With practice and patience, you’ll be able to restore your brass pieces to their former glory.
Mastering Brass Polishing Techniques for Shine
Now that we’ve covered the basics of restoring brass hardware, let’s dive into the fun part – polishing! I just love the transformative power of a good polish. With the right techniques, you can bring out the warm, sun-kissed glow of your brass pieces. For me, it’s all about experimentation and finding the perfect balance. I’ve tried everything from DIY concoctions to store-bought polishes, and I’m excited to share my favorite methods with you.
My go-to technique involves a gentle circular motion with a soft cloth and a touch of elbow grease. It’s amazing how a little patience and TLC can make your brass decor shine like new. Remember, the key is to work slowly and carefully, building up a beautiful patina over time. And don’t worry if it takes a few tries to get it just right – the process is all part of the fun!
Restoring Brass Hardware to Former Glory
Restoring Brass Hardware to Former Glory
Now that we’ve covered the basics of cleaning and restoring brass decor, let’s dive into the fun part – bringing old hardware back to life. I just love scouring flea markets for unique brass pieces, like vintage doorknobs or hinges, and giving them a new lease on life. With a little elbow grease and the right techniques, you can transform tired, tarnished hardware into stunning pieces that add character to your space.
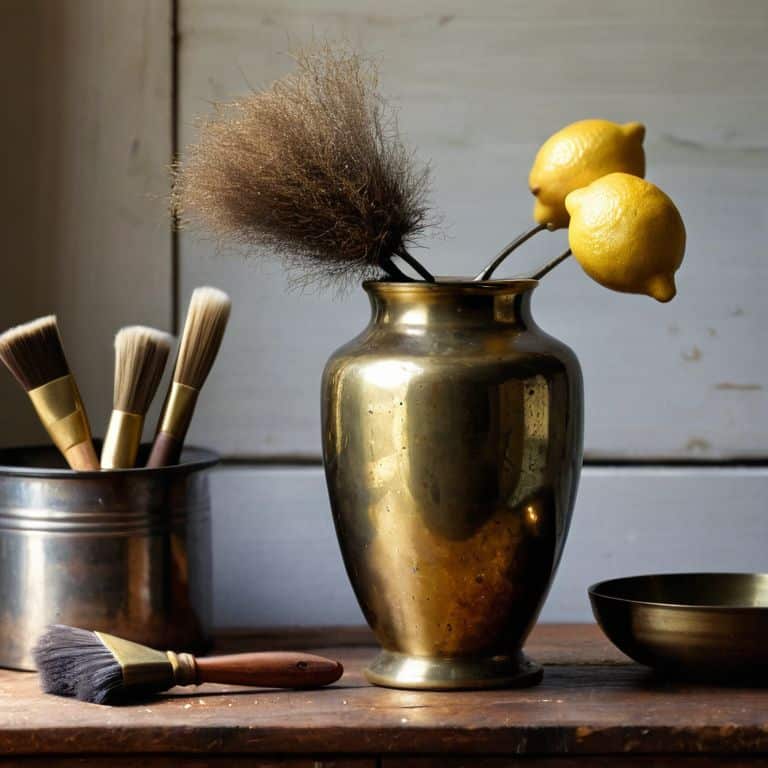
I’ve named my trusty brass cleaner “Brassie” – she’s a reliable sidekick in my restoration adventures. By using Brassie and some gentle polishing techniques, you can remove grime and reveal the warm, golden glow of the brass beneath. It’s amazing how a little restoration can make a piece feel truly one-of-a-kind, telling a story of its own within your larger home narrative.
Brass Brilliance: 5 Tips to Unlock Your Decor's Hidden Glow
- Start with a gentle touch: Before breaking out the heavy-duty cleaning solutions, try simply dusting your brass decor with a soft cloth to remove any surface dirt and debris
- Choose the right cleaner for the job: From lemon juice to commercial brass cleaners, select a solution that suits the level of tarnish and the type of brass you’re working with
- Don’t forget the power of elbow grease: Sometimes, all it takes is a little bit of scrubbing with a soft-bristled brush or a non-abrasive sponge to bring out the shine in your brass decor
- Protect your pieces from future tarnish: Apply a clear wax or sealant to your cleaned and restored brass decor to create a barrier against the elements and keep it looking its best
- Practice makes perfect: Don’t be discouraged if your first attempts at cleaning and restoring brass decor don’t yield the desired results – with a little patience and practice, you’ll be a pro at bringing out the beauty in these gorgeous pieces
Brass Restoration Essentials to Remember
Embracing the process of restoring brass decor is not just about cleaning, but about uncovering the story and history behind each piece, making your space truly unique and personal
Mastering the art of polishing brass requires patience, the right techniques, and a bit of creativity, but the end result is well worth the effort, bringing a touch of elegance and sophistication to any room
By adopting a mindset that views restoration as an adventure rather than a chore, you can transform your home into a reflection of your personality, where every piece of brass decor tells a chapter in the story of you and your space
Bringing Brass to Life
Restoring brass decor isn’t just about polishing metal, it’s about uncovering the stories and character that make a house a home.
Maya Rivera
Bringing Brass Back to Life: A Journey of Restoration
As we’ve explored in this guide to cleaning and restoring brass decor, the process of revitalizing these beautiful pieces is not just about following steps, but about uncovering the hidden stories behind each item. From the initial cleaning to the final polishing, every stage is an opportunity to connect with the past and imbue our spaces with character. By mastering the techniques of brass polishing and applying them to our unique finds, we transform not just metal, but the ambiance of our homes.
So, the next time you stumble upon an old, tarnished brass piece, remember that it’s not just a relic of the past, but a potential showstopper in your home’s story. With a little patience, some elbow grease, and the right techniques, you can bring any brass decor back to its former glory, making your space a vibrant tapestry of personal style and history. Happy restoring, and let’s keep telling our stories, one beautifully restored piece at a time!
Frequently Asked Questions
What are some common mistakes to avoid when cleaning and restoring brass decor to prevent damage?
Don’t strip away the patina with harsh chemicals, my friend! Avoid using abrasive materials that can scratch the surface, and never over-polish – it’s a delicate dance between shine and damage.
How can I maintain the shine and luster of my restored brass pieces over time?
To keep your restored brass pieces shining, I swear by regular dusting and an occasional buff with a soft cloth. For tougher cases, a gentle polish every few months does the trick. I like to think of it as giving my brass friends a little spa day – it keeps them looking their best and tells a story of love and care over time.
Are there any eco-friendly or non-toxic alternatives to traditional brass polishing methods?
I’m so glad you asked. For a greener glow, I swear by lemon juice and baking soda or white vinegar and flour – they’re like a match made in heaven for polishing brass without harsh chemicals. Plus, they’re super easy to find in your pantry, making it a fun DIY experiment!