I still remember the first time I had to how to replace a toilet flapper in my own home – it was a nightmare. The internet was flooded with confusing tutorials and overly complicated instructions that made me feel like I needed a PhD in plumbing to get the job done. But here’s the thing: it’s actually _incredibly simple_. You don’t need to be a master plumber or have a ton of experience to swap out a flapper. With the right guidance, you can have a brand new flapper in place in no time, and I’m here to walk you through it.
In this article, I’ll give you the lowdown on how to replace a toilet flapper without any of the nonsense. I’ll share my own experiences, tips, and tricks to make the process as smooth as possible. You’ll learn how to diagnose the problem, choose the right replacement flapper, and install it with ease. My goal is to make you feel confident and empowered to take on this project, even if you’re a complete beginner. So, let’s get started and turn that frustrating toilet into a well-functioning one – it’s time to get your hands dirty and learn how to replace a toilet flapper like a pro!
Table of Contents
Guide Overview: What You'll Need
Total Time: 30 minutes to 1 hour
Estimated Cost: $10 – $30
Difficulty Level: Easy
Tools Required
- Adjustable Wrench for loosening nuts
- Channel-Type Pliers for gripping and bending
- Needle-Nose Pliers for reaching small areas
Supplies & Materials
- Toilet Flapper Replacement choose the correct size for your toilet
- Chain and Hook if the old chain is damaged
- Silicone-Based Lubricant for lubricating moving parts
Step-by-Step Instructions
- 1. First, let’s get started by turning off the water supply to the toilet – you don’t want any unexpected surprises while you’re working on it. Locate the shut-off valve behind the toilet and turn it clockwise until it stops. Then, flush the toilet to drain the tank.
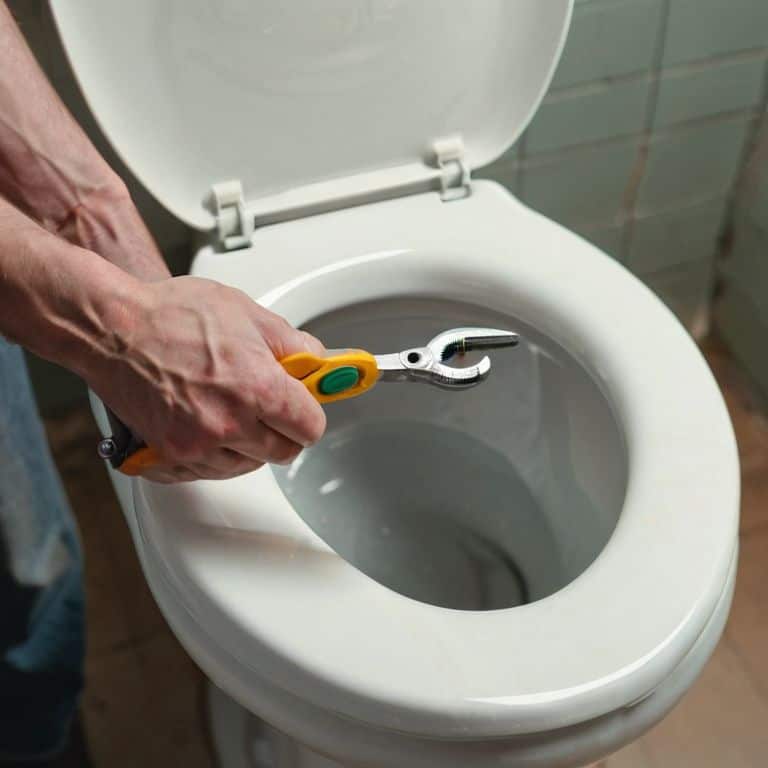
- 2. Next, you’ll need to disconnect the chain that links the flapper to the flush handle. This is usually a simple process, but be careful not to pull too hard, or you might end up with a bigger problem on your hands. Use a pair of needle-nose pliers to gently grasp the chain and slide it off the hook.
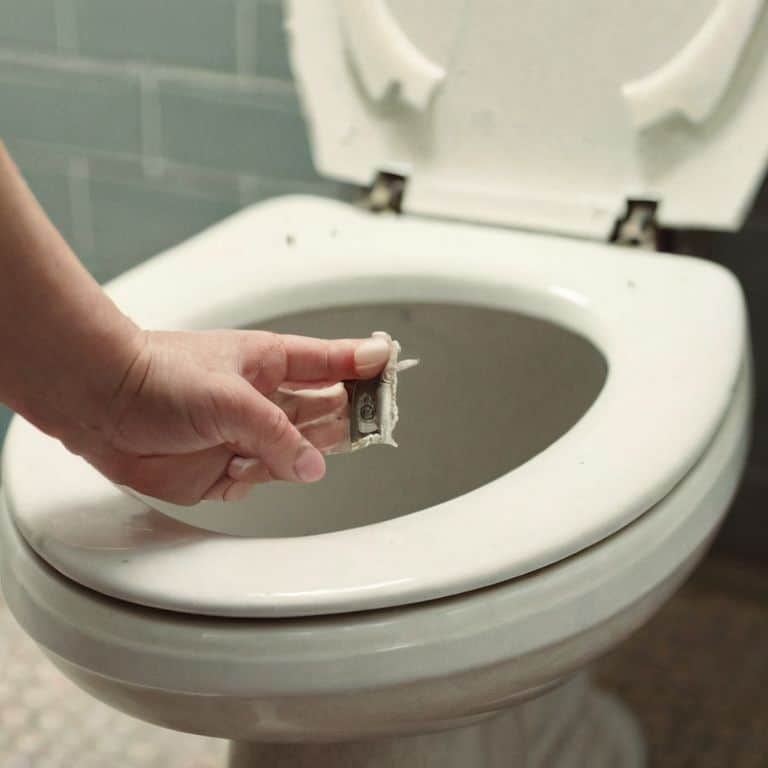
- 3. Now it’s time to remove the old flapper. This is often the easiest part of the process, as it usually just lifts right off. However, if it’s been in place for a while, you might need to wiggle it back and forth a bit to loosen any mineral deposits that have built up. Once it’s off, take a moment to inspect the area and make sure there aren’t any other issues that need to be addressed.
- 4. With the old flapper out of the way, you can now prepare the tank for the new one. Take a soft brush or cloth and gently scrub away any debris or mineral buildup that might be present. This will help ensure a clean, secure fit for the new flapper.
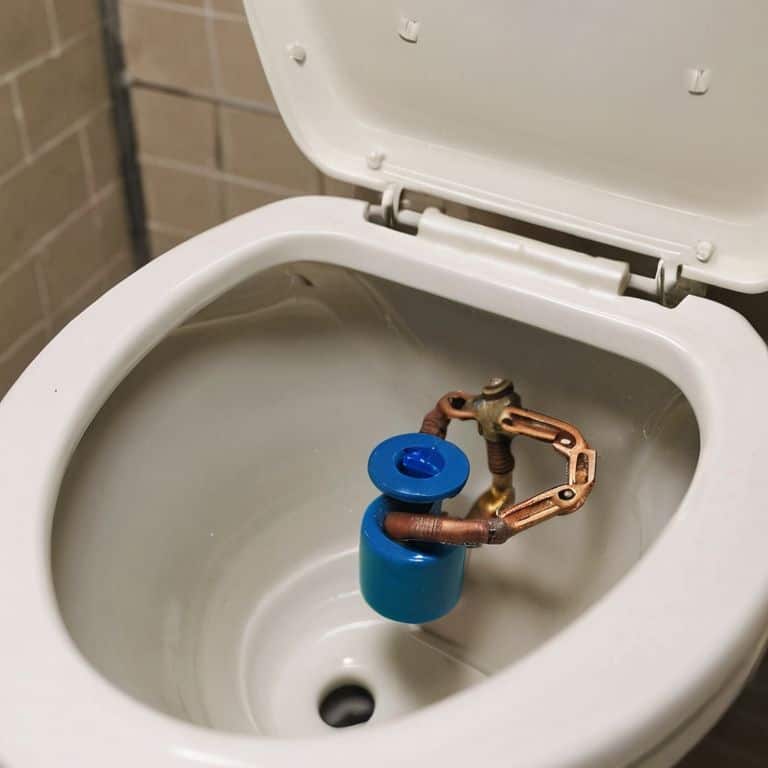
- 5. Next, take your new flapper and align it with the flush valve. Make sure it’s properly seated and the edges are even. You might need to adjust the chain slightly to get everything to fit together just right.
- 6. Once the new flapper is in place, it’s time to reconnect the chain. Hook the chain back onto the flush handle, making sure it’s securely attached. Then, adjust the length of the chain to ensure it’s not too loose or too tight.
- 7. Finally, turn the water supply back on and test the toilet to make sure everything is working as it should. Flush the toilet several times to ensure the new flapper is sealing properly and the chain is adjusted correctly. If you notice any issues, you might need to fine-tune the chain a bit to get everything just right.
Swap Out That Flapper

Now that we’ve got the basics covered, let’s dive into some extra tips to make this toilet flapper replacement a breeze. One thing to keep in mind is that diy toilet repair for beginners can be a bit intimidating, but trust me, it’s easier than you think. When it comes to the cost, toilet flapper replacement cost is relatively low, especially considering the water you’ll save in the long run.
As we swap out that old flapper, make sure to take a closer look at the fill valve. Sometimes, issues with the flapper can be related to problems with the fill valve, so it’s worth checking out. If you’re experiencing any common toilet problems, like constant running or leaking, now’s the time to address them. By taking care of these issues, you can avoid more costly repairs down the line and even explore some water saving toilet upgrades.
When troubleshooting a leaking toilet, it’s essential to consider the flapper as a potential culprit. If you’ve replaced the flapper and still notice leaks, you may need to do some further troubleshooting. Don’t worry, it’s all part of the process, and with a little patience and practice, you’ll be a diy toilet repair pro in no time. Remember, the goal is to have a functional and efficient toilet, and with these tips, you’ll be well on your way to achieving that.
Diy Toilet Flapper Replacement
Now that we’ve got our new flapper ready to go, it’s time to get it installed. This is the fun part – taking that old, worn-out piece out and putting the new one in its place. Make sure you’ve got your bucket or container ready to catch any water that might spill out when you disconnect the old flapper. Don’t worry if it gets a bit messy; that’s all part of the DIY adventure, right? Take a deep breath, and let’s dive in.
As you pull out the old flapper, take a moment to appreciate how far you’ve come. You’re not just replacing a part; you’re giving your toilet a brand new lease on life. And with your new flapper securely in place, you’ll be enjoying a more efficient, leak-free toilet in no time.
Troubleshoot Leaks Like a Pro
Now that we’ve got our new flapper in place, let’s talk about what to do if you’re still noticing some leaks. First, double-check that the chain is the right length – if it’s too short, it can keep the flapper from sealing properly. Also, make sure there aren’t any mineral buildup or debris on the flapper or the flush valve seat. A quick cleaning can work wonders! If the leak persists, it might be worth checking the flapper’s alignment or even trying a different type of flapper altogether. Remember, troubleshooting is all about trial and error – and I’m all about embracing those ‘happy accidents’ as learning opportunities.
Flapper Frenzy: 5 Tips to Make Your Replacement a Success
- Shut off the water supply before you start: don’t get caught with your pants down and water spraying everywhere!
- Choose the right flapper for your toilet: it’s like picking the perfect power tool for the job – it’s all about the fit
- Clean out the tank before installing the new flapper: think of it like clearing your workbench, you want a clean slate to work with
- Don’t overtighten the flapper chain: you don’t want to restrict the flow, just like you don’t want to over-tighten a screw and strip the head
- Test the flapper after installation: it’s like turning on your freshly built planter and watching the water flow – satisfying, right?
Key Takeaways for a Successful Toilet Flapper Replacement
Always turn off the water supply to the toilet before starting the replacement process to avoid any messy accidents
Make sure to inspect and clean the flapper seat and surrounding area to ensure a proper seal and prevent future leaks
Remember, replacing a toilet flapper is a relatively simple DIY task, and with the right mindset and a bit of patience, you can save money and feel a sense of accomplishment by doing it yourself
Wrapping Up Your DIY Toilet Flapper Replacement
You’ve made it through the step-by-step guide and have successfully swapped out that old flapper for a brand new one. Remember, the key to a successful DIY project is not being afraid to get your hands dirty and learn from your mistakes. Don’t be too hard on yourself if things don’t go exactly as planned – it’s all part of the process. By following the instructions and taking your time, you’ve not only fixed your toilet but also gained some valuable experience and confidence in your DIY skills.
As you put the finishing touches on your project, take a step back and admire your handiwork. You’ve just saved yourself some money and proved that with a little bit of patience and elbow grease, you can tackle even the most daunting tasks. So, go ahead and celebrate your victory – you’ve earned it! And who knows, you might just find yourself itching for the next DIY challenge. Whatever it is, I’ll be here, cheering you on and sharing my own projects, so be sure to stay tuned for more DIY adventures from Frank’s Workshop.
Frequently Asked Questions
What if my toilet has a different type of flapper, will these steps still work?
Don’t worry, buddy! If your toilet’s got a different type of flapper, these steps will still give you a solid foundation. You might just need to tweak things a bit. Check your toilet’s manual or look up the specific model online to see if there are any unique requirements. And hey, if you’re still unsure, drop me a comment and we’ll figure it out together!
How often should I replace my toilet flapper to avoid leaks and other issues?
Dude, that’s a great question! Generally, you should replace your toilet flapper every 4-7 years, or sooner if you notice any signs of wear. But let’s be real, if you’re experiencing leaks or issues, it’s probably time for a swap – don’t wait for it to become a bigger problem!
Can I use a universal toilet flapper replacement kit or do I need to buy one specifically designed for my toilet model?
Hey, great question! While universal kits can work, I always recommend checking your toilet’s specs to ensure a perfect fit. Some models have quirky requirements, so it’s better to be safe than sorry. If you’re not sure, consult your toilet’s manual or manufacturer’s website for guidance – trust me, it’s worth the extra minute to get it right!